
Welcome to Modern Agriculture!


Tilapia is often known for its mild-tasting and tender flesh. However, it is also one of the most popular edible fish raised in aquaculture due to its fast growth rate and versatile uses across a range of different applications, including using them in aquaponics systems or selling commercially. For those looking to get into the business of selling these highly in-demand fish, starting a tilapia hatchery may just be a novel idea worth looking into.
Some of the things that one should know about before starting a tilapia hatchery are how to select and manage broodstock, the three tilapia hatchery methods, the requirements for egg and fry development, feeding, and fertilization, and the routine management of the hatching system.
In this article, we took the liberty of compiling the above information to help guide interested hatchers in growing and harvesting tilapia.
A hatchery is a combination of a farm and a laboratory where fish is spawned and hatched. The fingerlings stay in the hatchery where they are cared for until they reach the size suggested for transfer into farms. Hatcheries are necessary because they provide a steady supply of fingerlings and juveniles to commercial fisheries and recirculating system practitioners.
Since tilapia is often tagged as the “aquatic chicken” for its ability to grow in captivity and its fast growth rate, many are interested in establishing tilapia hatcheries to supply seed stock for the tilapia farming industry. According to FAO, hatcheries require excellent water quality, incubation systems, and tanks needed for nurturing the seeds.
Broodstock is a group of mature fish that is used for breeding. They can be sourced from other hatcheries, or they can be grown to ensure their quality. Using good broodstock is key to establishing a successful tilapia hatchery, so understanding how to manage them is also essential. Below are some of the basis of selecting tilapia broodstock:
In maintaining good quality broodstock in the hatching system, here are some notes to remember according to BFAR:
The choice of the method used in tilapia hatching dramatically depends on the hatcher’s budget and technical knowledge. There are three most common hatching methods followed by tilapia growers: the open pond method, the hapa method, and the tank method. A thorough understanding of these methods is needed to start a productive hatchery.
In this method, breeders are stocked in ponds after an intensive preparation. The ponds are used for spawning and rearing following a controlled time interval. It is important to note that you can either harvest fingerling or fry using the open pond method.
For those who own commercial hatcheries or backyard ponds, harvesting fingerlings are possible. The fingerlings are usually collected on the 30th day, and the pond undergoes total collection or draining on the 45th day. For raising fry, ponds with shallower dimensions are preferred. Specifically, there should be 200 to 1200 square meters of water with a depth of 40 to 60 cm. The fry is collected ten days after stocking until the 21st day when pond draining happens.
The hapa method uses net enclosures in breeding and hatching. Fine mesh netting is preferred to secure the fry and fingerlings. It is usually installed in ponds and river banks with slow current, and its suggested measurement is 3m x 3m x 1.5.
For the stocking density, hapas can accommodate 4 to 5 breeders weighing 50 to 250 grams for every square meter. Meanwhile, the ideal sex ratio is 3:1 up to 7:1. The fry can be harvested two weeks after breeder stocking.
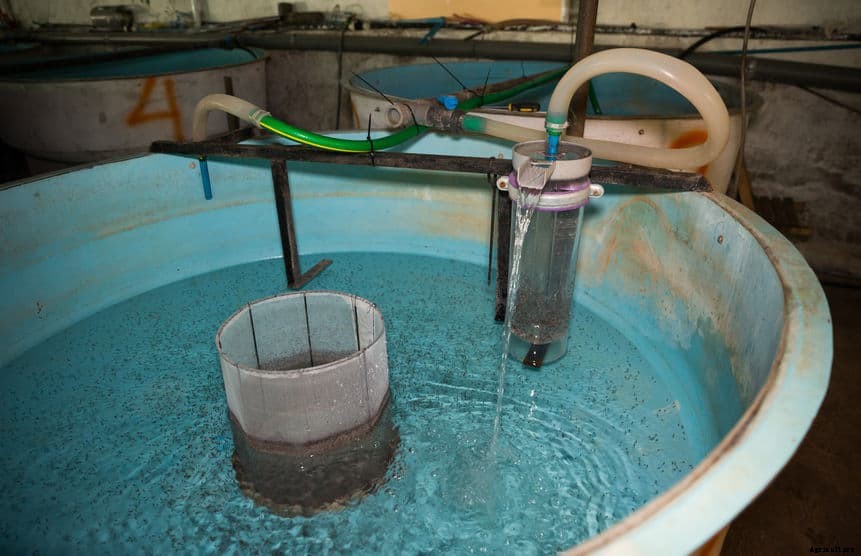
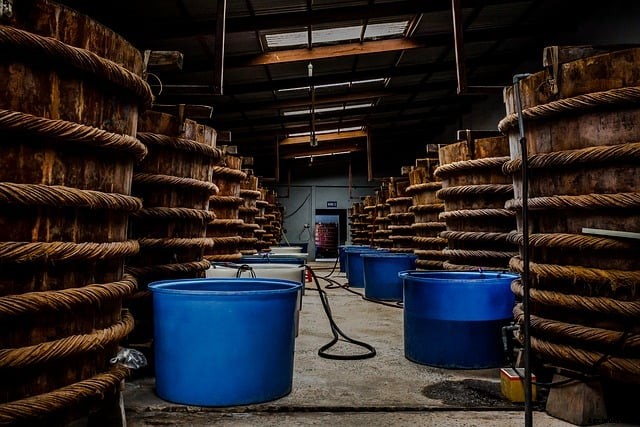
The tank method is quite expensive, but it is the common choice of many hatchers. The hatching tank needs good water quality, and it requires oxygen provisions, unlike in ponds and hapas. Hatchers would need to install blowers and compressors to ensure that the fish won’t die.
The suggested stocking density for every square meter is 7 to 14 breeders with a weight of 50 grams to 1 kilogram. Also, the sex ratio should be 3:1 to 7:1, and the water depth should be maintained at 50 to 70 cm.
Aside from figuring out which method of hatching suits your budget and skills, it also important to learn how to take care of the tilapia eggs and fry. For their healthy development in an incubator, it is vital to note the following suggestions of FAO:
Feeding the broodstock with 3 to 5 percent of their body weight is required primarily for hapa and tank methods since they will not be able to get food from planktons. Feeds loaded in protein, which is either bought commercially or formulated, can be a good source of nutrients. For the open pond method, breeders are also fed if fertilization is not successful.
The need for fertilization is most common in open pond methods to stimulate plankton growth. It is recommended if the hatcher has assessed that the water has low nitrate and phosphate levels. Different types of feed can be sourced from Amazon and other aquaponics stores, so the hatcher would not have to worry about where to buy them. However, if the soil in the pond is already full of nutrients, it can already support the plankton growth, so there is no need to fertilize.
Taking care of a hatchery does not end in finding out the method to be used or knowing the development requirements of the eggs, fry, and fingerlings. Aside from these things, managing the hatchery through routine work is needed. Here is a list of what you should know about hatchery management:
There is a ton of information that you have to learn in starting a tilapia hatchery. The first item on our list is the different hatching methods, including the pond, hapa, and tank. Some other details that you need to know are the tilapia eggs and fry development requirements, feeding, fertilization, and routine management of hatcheries.
It would be better if you will ask an expert to guide you on starting your hatchery. If it is not possible, you may refer to more detailed instructions from reliable sources such as the Food and Agriculture Organization of the United Nations.


