
Welcome to Modern Agriculture!

Tricks and tips for hatching chicks with incubators and moving them to brooders. You can read about incubators at Taking the Guesswork Out of Incubators
-Advertisement-–
The hatching process is one of the niftiest little miracles in the animal world. During the last days of incubation, the chick grows to fill up the entire egg, except for the air cell, the pocket of air at the large end of the egg. At this time, the chick begins to orient itself in the shell and prepare for hatching. Their head and beak are tucked under one wing, with their beak facing the air cell. At about day 19 of a 21-day incubation period, the chick’s head will thrust forward, breaking the membrane between them and the air cell, a process called the ‘internal pip’. The chick begins to take its first real breaths.
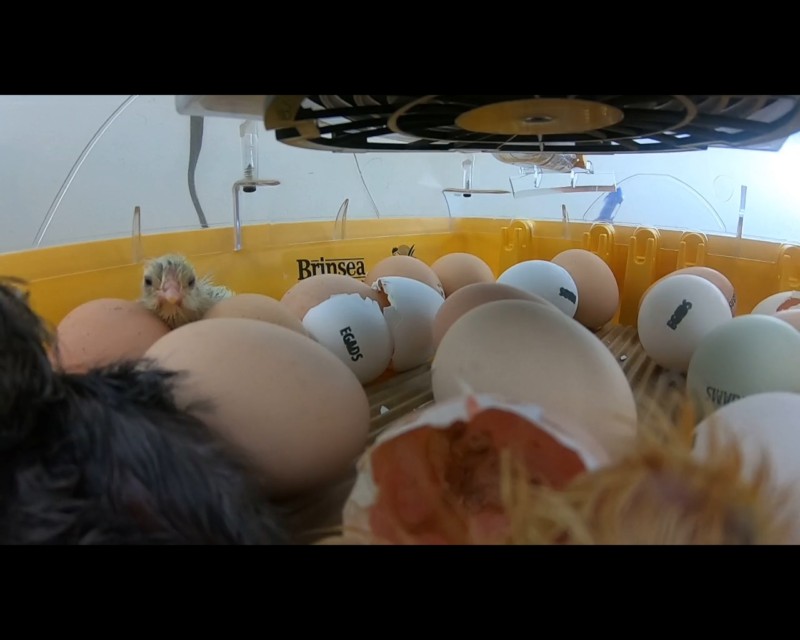
Chicks hatching in the incubator, from the Mother Earth News October, 2019 Chick Week.
By day 20, their lungs are functioning and the chick will begin the serious part of the hatching process. Using the egg tooth, a tiny projection on the end of their beaks, they will begin to peck at the shell thousands of times. The shell has become thinner by this stage, as the chick absorbs some of the calcium from the shell in making its skeleton, and this ‘external pipping’ happens fairly quickly.
Once the chick has pecked through the shell, they will rest for several hours, as their lungs adjust to breathing outside air. Proper humidity in the hatcher is critical at this point; if the membranes dry out and adhere to the chick’s body, it will be more difficult for the tiny bird to leave their shell. During the second stage of pipping, the chick will move inside the egg, turning clockwise in a circle, pecking away at the shell until a circumferential break in the shell is created, known as “zipping”. After this, the chick will push out of the shell, to lay squirming and exhausted on the floor of the hatcher.
-Advertisement-You will see the newly born chicks fall deeply asleep for several minutes, then move a bit, then sleep more as they gain strength and flexibility. But it doesn’t take long for them to begin moving around more as their muscles gain strength and coordination. In a successful hatch, 95% of the eggs will hatch within 24 hours. Wait to move the chicks to the brooder until they are dried and fluffy, otherwise they can get chilled during the move.
If you have several chicks that do not hatch, the culprit is likely a humidity issue, either during incubation or hatching. Humidity should be around 50% during incubation and closer to 65-75% during the hatch process. Keep in mind that too much humidity isn’t good either. Pay attention to the manufacturer’s recommendations for their unit, and realize that you may have to do a couple of hatches to get a real feel for your incubator.
Watch chicks slowly hatch.
While it’s tempting to try to help out a chick that seems to be struggling during the hatching process, you can often do much more harm than good. The entire process can take up to 24 hours. Trying to speed things up by removing the shell and tearing the membranes can speed up the drying of the membranes, making it more difficult for the chick or damage the chick’s delicate feathers and skin. Depending on the stage of hatching, the membranes might still be filled with blood that has not been drawn into the chick with the yolk. Tearing the membrane and rupturing the blood vessels will almost always result in a dead, or seriously weakened chick.
The floor of your hatcher is also important. Many of the new incubators have bases that are hard plastic. These are wonderful for being able to clean and disinfect thoroughly between hatches, but they are often too slippery for the chicks to be able to get good footing. If chicks have to struggle too much to be able to get to their feet, there is a good chance they can become spraddle-legged. This means that their legs spread out beneath them, and if left like this too long it can permanently damage their legs. Cut a piece of inexpensive rubber shelf liner to fit the floor of your hatcher. This material is readily available and it can be washed and reused for many hatches. Some Styrofoam incubators have fine wire mesh floors, which will also work for giving new chicks much needed traction.
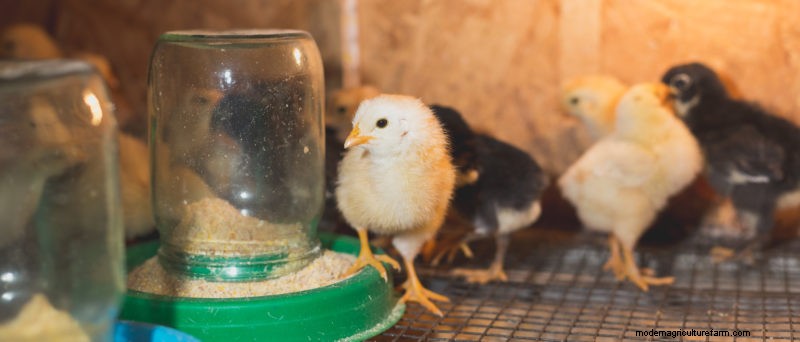
Once the chicks are dried and fluffed out, it’s time to move them into a brooder. A good brooder should provide protection from drafts and be small enough that the chicks do not wander too far from a heat source and become chilled, but not so small to prevent them from getting away from the heat source if they choose.
Non-slip flooring is also important in the brooder. Many people use shavings with good results, but depending on the size of the brooder, a rubber liner can work well too. Whatever you choose, make sure it’s easy to clean. After the first three or four days, once the chicks start eating well, it’s amazing how much poop they can produce.
The brooder temperature should be near 95 degrees Fahrenheit for the first week, and can be reduced about five degrees every week after that, until the chicks are accustomed to room temperature, or are fully feathered enough to handle the outdoors.
Traditionally, the heat source for a brooder was limited to a heat lamp. These do well as a heat source, and can be raised or lowered to adjust the temperature in the brooder, but take care to keep it from getting too hot for the chicks. It may take some trial and error to get the temperature just right. And, the longer the heat lamp shines on the floor of the brooder, the more heat can build up. And, an important downside to heat lamp bulbs is the risk of fire. If the holder breaks and the bulb falls into the brooder, it won’t take long for things to melt or catch fire.
A great alternative to heat lamps are chick brooder heating plates. These radiate heat down to the chicks and can be height adjusted to tweak the temperature. Chicks will huddle underneath much like they would if brooded by a hen. They can cost a bit more than a heat lamp, but properly cared for can last for years, and will be unlikely to overheat or set something on fire. These small brooders are available from many poultry supply companies, and come in a variety of sizes.
Watching your newly hatched chicks grow and join your flock is one of the delights of raising poultry. These tips can help get you off to a great start successfully hatching your own chickens.
This article has been sponsored by Brinsea.
-Advertisement-
