
Welcome to Modern Agriculture!

Bearded irises (so called because of the row of hair-like growths on their ‘fall’ petals) are one of the most spectacular early summer plants. The elaborate flowers come in a range of colours, from maroon and purple to pink, yellow, orange and white. They’re often intricately veined or bordered by a contrasting shade, and are carried among a forest of handsome, sword-like leaves.
Discover 10 bearded irises to grow.
Bearded irises like a sunny spot and well-drained soil – find out all you need to know about growing bearded irises in our Bearded Iris Grow Guide.
By digging up and dividing old, overcrowded clumps that are starting to fizzle out in the centre, you can reinvigorate them, as well as make more plants. The best time to do this is immediately after flowering, as the plants will then have a year to establish themselves before the next flowering season.
Here’s how to divide bearded irises.
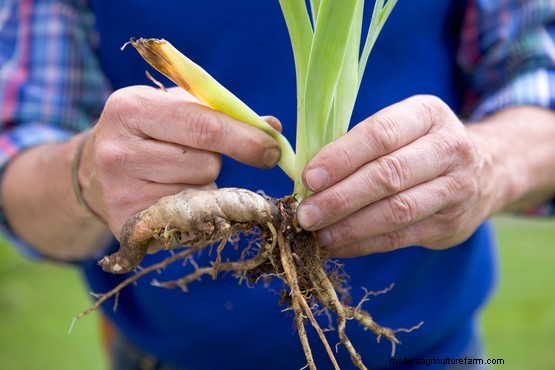
Discard the spent rhizomes (the flat stems lying on the surface of the soil) at the centre of the plant that have no shoots. Select healthy, vigorous rhizomes from the outside, each with a fan of leaves.
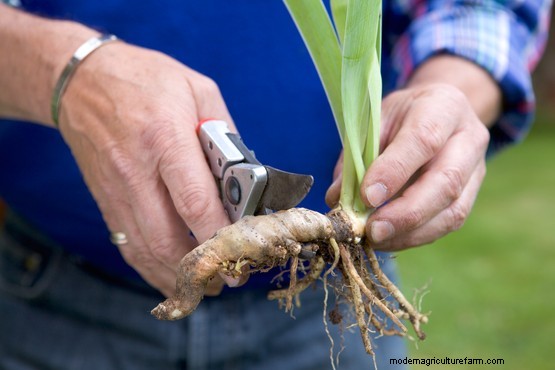
Shorten any long roots to 3cm or so – longer roots will only die back, and shortening encourages the development of new roots. Cut back the fan of leaves to 15cm to prevent excessive moisture loss.
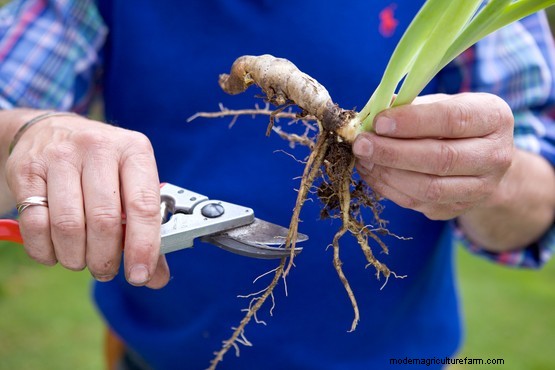
Cut off the end of each rhizome with sharp secateurs so that the healthy chunk remaining is 8-10cm long. The trimming of rhizomes makes it easier to replant and grow on the healthiest part.
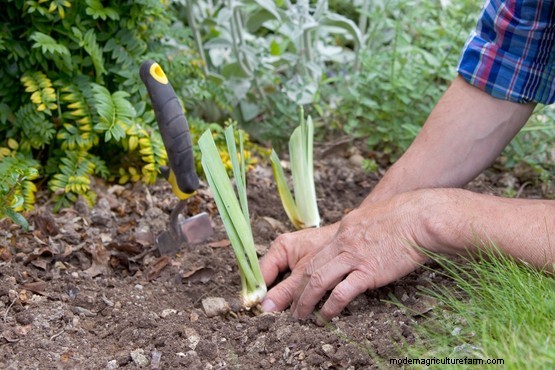
Plant the new, prepared rhizomes in a sunny spot in free-draining soil enriched with rotted manure or compost and a dusting of fertiliser. The top should be just visible. Water in and keep moist until established.


