
Welcome to Modern Agriculture!

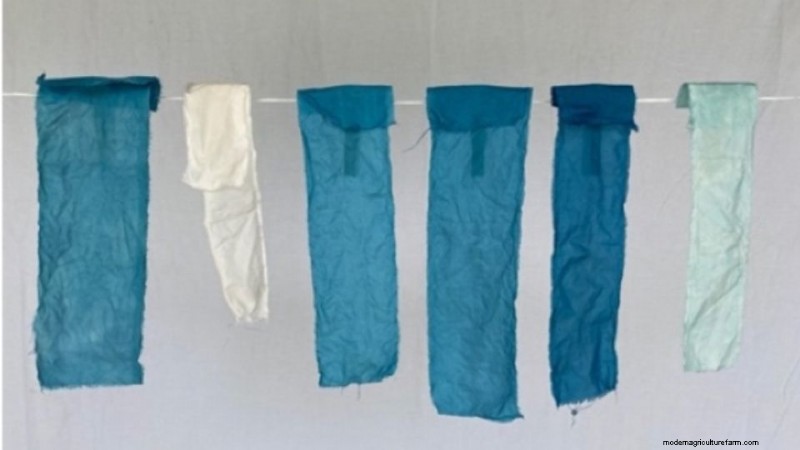
Dyeing with Japanese indigo grown in the home garden can be an exciting and satisfying way to incorporate gardening into more aspects of your life and create unique products for yourself and others. Of course, you do not have to grow Japanese indigo yourself to enjoy dyeing with the indigo pigment. This resource provides information to those who would like to experience the process from growing the plant until the final dyed project and those who would like to purchase the pigment and use it for dyeing. After preparing the fabric, there are many ways to dye with indigo. Two well-established methods, accessible and achievable for the beginning dyer, follow.
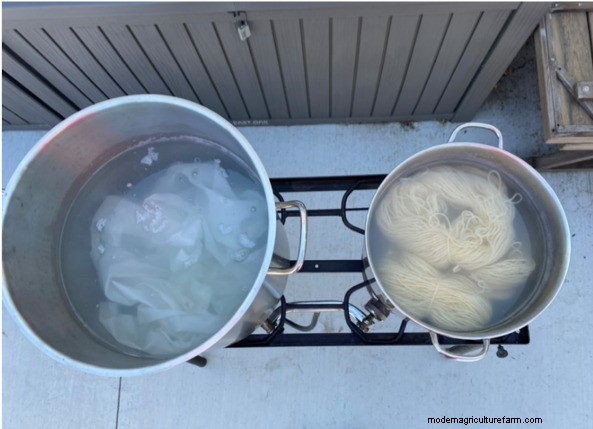 Figure 1. Scouring (left) Cotton and (right) Wool Before Dyeing
“Scouring” your fabric will ensure the fibers are clean and ready to accept the dye. Soak your fabric in water for 30 minutes or more (some, like Maiwa, recommend up to 1 hour) with 2 teaspoons of a pH-neutral detergent, 4 teaspoons of soda ash (washing soda) per pound of fabric, and gently agitate (Figure 1). Use warm water for silk or wool and hot/simmering water for cotton. A specific detergent for silks and wool, like Orvus Paste, may also be used at a rate of 5 teaspoons per pound of fabric. Allow the fabric to cool and rinse with water. Remove excess water by squeezing, but do not wring out delicate fibers like silk. Failure to properly scour your fabric can result in blotchy dye uptake.
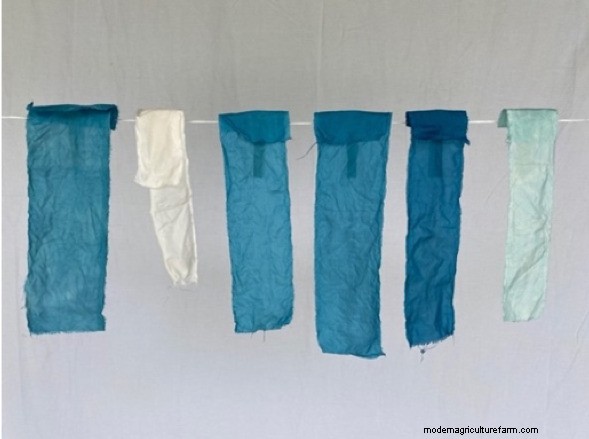 Figure 2. Silks Dyed Using Fresh Japanese Indigo Leaves
Fresh-leaf dyeing is the most basic form of dyeing with indigo. Colors from fresh-leaf dyeing include more green and aqua hues than what is traditionally associated with the “blue jean indigo” color (see Figure 2). Protein fibers (silk, wool) are best for fresh-leaf dyeing. While fresh-leaf dyeing can be used to dye cellulose fibers (cotton, linen, etc.), treating the fabric before dyeing with soymilk is necessary unless performing a more complex dyeing process (Marshall, 2018). Examples here focus on silk.
To determine how much fresh leaf material is needed, weigh the dry fibers you intend to dye (Figure 3). You will need 2–5 times or more of that weight in leaf material (the more leaves, the richer and darker the color). Harvest indigo early in the day, preferably before sunrise, to ensure the plant is not stressed, as this can decrease dye yields. To harvest, cut the stems, leaving several nodes if another harvest is expected. Keeping the harvested material as cool as possible will slow down pigment degradation. Submerging the harvested stems in cold water is an efficient way to accomplish this. After harvesting the stems, strip the leaves and weigh out the desired amount. These processes are illustrated in Figure 3. One of the two following options can then be used for fresh-leaf dyeing: kneading or blending.
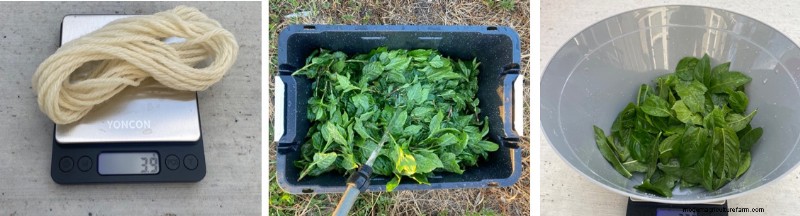 Figure 3. (left) Weighing Fabric, (center) Keeping Harvested Leaves Cool Until Use, and (right) Weighing Leaves for Dyeing
The first option is the simplest. In a container such as a large stainless-steel bowl, add the leaves and fabric with a pinch or two of salt and knead, squeeze, and mash the leaves and fabric together for 10 to 15 minutes. After several minutes of kneading, a rich, green-blue liquid will exude from the leaf mass and permeate the fabric (Figure 4). This method can be rough on delicate fabrics and can felt wool if not performed carefully. Once finished, wash the fabric with water until it runs clear and hang to dry in a shaded area.
The second option is also simple but requires using a household blender and a straining cloth. Using a separate blender from one used in food preparation is recommended. From the leaves needed to dye the fabric of choice, gently pack the blender about halfway and cover them with ice-cold water (Figure 4). Unless you dye a very small fabric swatch, you cannot blend all the leaves in one batch—this is okay. Blend the leaf matter for approximately 1 minute or until completely smooth. Strain the slurry through a fine mesh filter or cheesecloth into a large bowl or basin. Repeat this process as swiftly as possible until all leaves have been blended. Add extra cold water if needed. Submerge the prepared fabric in the dye bath and gently swish for 10 to 15 minutes (Figure 4). After removing the fabric, rinse thoroughly with water and hang to dry in a shaded area. The dye bath can be used for other fabrics until the indigo is exhausted, though these subsequent dips will yield lighter colors. Additionally, more dye baths can be created for increasingly rich colors.
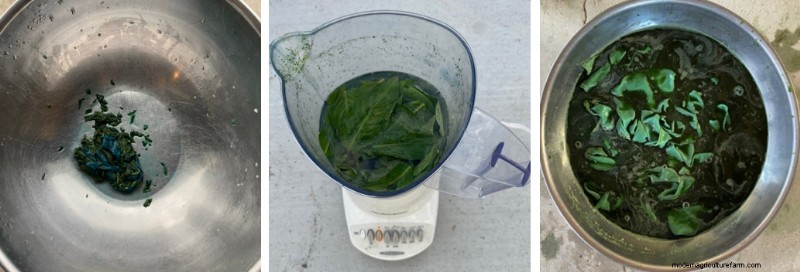 Figure 4. (left) Dyeing With Crushed Fresh Leaves, (center) Blending Leaves, and (right) Dyeing With Blended Fresh Leaves
The method outlined here is based on the 1-2-3 method popularized by French botanist and chemist Michel Garcia. A basic version is presented here, compiled from several resources (see Botanical Colors, n.d.; Maiwa, n.d.; Boutrup & Ellis, 2018).
The 1-2-3 refers to the proportions of the three ingredients in the following order: indigo powder, calcium hydroxide, and fructose. The starting amount of indigo powder will determine the vat’s dyeing ability (i.e., more indigo powder achieves darker colors). With a high-quality indigo powder, 2–2.5 grams of indigo per liter of final vat liquid will yield a lighter blue, 3–6 g/L will provide a medium blue, and 7–10 g/L will give a darker blue (Botanical Colors, n.d.). If you have extracted your own indigo pigment, you will likely need more indigo powder (sometimes as much as double, triple, or higher) as it will generally be of a lower quality than purchased powder.
As an example, if you were dyeing in a 5-gallon bucket with a 16-liter volume of liquid, you could use 64 grams of indigo powder (4 g/L), 128 grams of calcium hydroxide, and 192 grams of fructose for a medium-strength vat. A stepwise process for Method 2 using cotton fabric follows.
Find additional information regarding the continued care of an indigo fructose vat through the aforementioned resources and other sources. (Note that the inclusion or exclusion here of any particular source does not imply endorsement or disapproval.) To dispose of this vat, lower it to a neutral pH (add vinegar or introduce excessive air into the vat and let it sit without a lid for an extended period). Then, discard the liquid and throw away the debris collected at the bottom of the vat.
Figure 5. Method 2 Illustrations, Dyeing With Indigo Powder
Chemistry in indigo dyeing is an active subject of research. Interested readers are encouraged to explore additional resources that discuss the production of indigo dye from plants listed in the References section and beyond (Bechtold et al., 2002; John et al., n.d.; John & Angelini, 2009; Wenner, 2017).
The authors contributed all photos.
October 2024
Utah State University Extension
Peer-reviewed fact sheet
Download PDF
Wesley Crump,1 Toree Park,2 and Elizabeth Cohen1
1USU Extension Assistant Professor, Wasatch and Summit Counties
2Undergraduate Intern

Extension Assistant Professor | Horticulture | Wasatch County
Agriculture and Natural Resources
Phone: 435-657-3236

Extension Assistant Professor | Agriculture & Natural Resources | Summit County Director
Agriculture and Natural Resources
Phone: (435)-336-3216
Office Location: Summit County


