Welcome to Modern Agriculture!

Hedges have been used for centuries to define space, create separation, and add privacy in landscapes. In contemporary gardens, which often blend formality with natural abundance, hedges offer a sense of permanence. Taller boundaries that divide outdoor rooms bring flow and mystery into the design equation, drawing visitors from space to space in anticipation.
Clipped, linear forms lend a soothing sense of formality to a design. The hedges seen above serve as counterpoints that contain what might otherwise feel like chaotic exuberance. They help the eye make sense of this space and are a visual reminder that this is a carefully curated scene.
Growing a hedge of any size will provide year-round interest and shelter for native fauna, particularly birds. With all of these benefits in mind, let’s get down to the nuts and bolts of preparation, installation, and care.
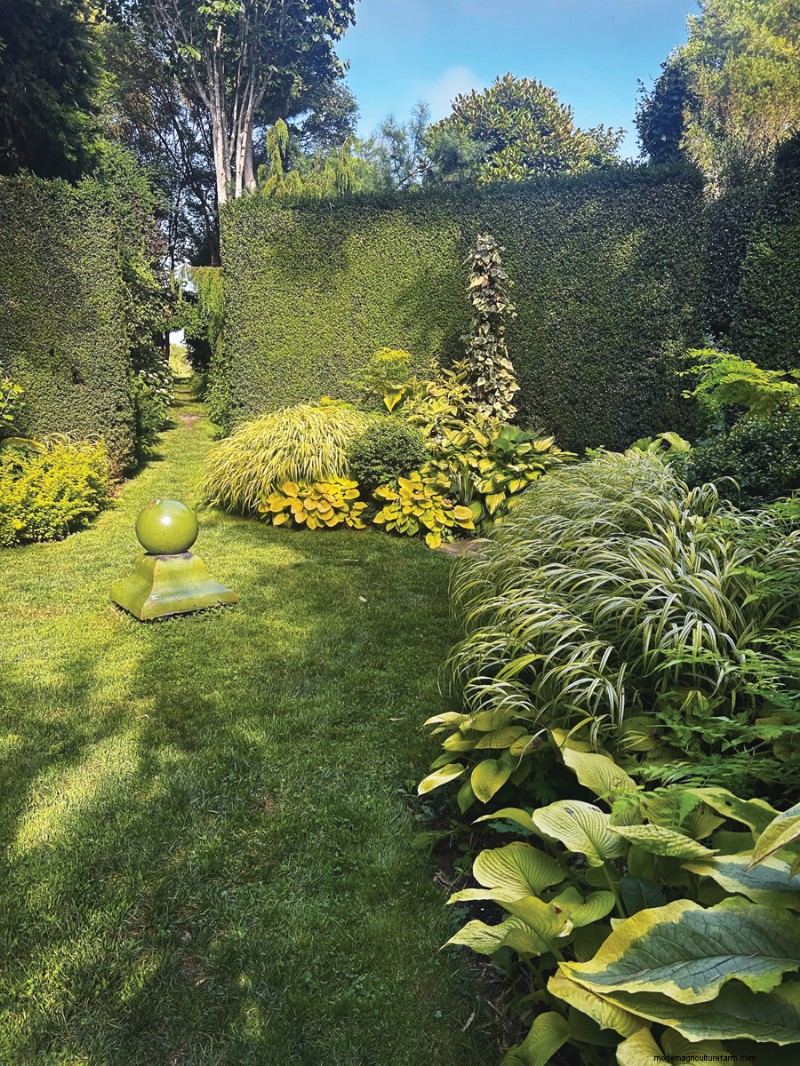 A tall wall of greenery is a straightforward guide for foot traffic. A visitor’s views are managed with calming precision, building anticipation for new discoveries that await down each opening and path.
As you consider adding a new hedge, ask yourself what you want it to do. Will its primary function be to provide screening? Will it guide foot traffic through a space? Will it be clipped tightly, or will it have a natural, informal look? Will it be a mixed-species hedge, or will you be working with just one selection?
Choosing the best plants for your living boundary means finding the right match for your site and climate. If light or soil conditions vary across the length of the hedge, seek out adaptable species that will tolerate the full range of conditions reasonably well. Once you’ve decided on the plant material you’ll use, remove sod or other vegetation and prepare the planting bed as you would do for any other new garden.
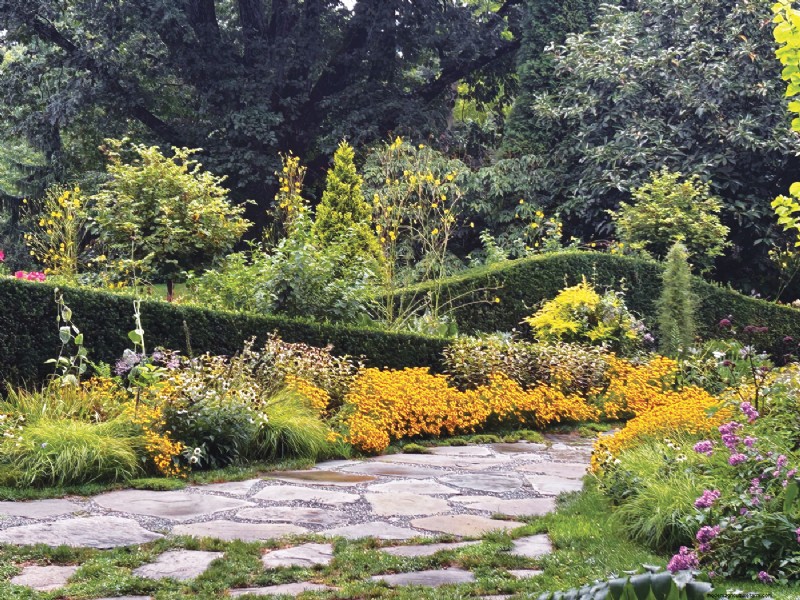 The shape, color, or texture of a hedge can have some artistic flair. Rolling, overlapping edges build excitement in a way that wouldn’t be possible with the expected parallel and horizontal lines. Even a hedge that mainly acts as a backdrop for more vibrant colors and textures can still have some personality of its own.
Calculate the number of plants needed to build your hedge, factoring in the ultimate size of the cultivar you are using. Large and fast-growing plants can be spaced farther apart and allowed to fill in, while varieties that take several years to reach full size will need closer spacing. Screens and formal hedges are typically spaced more closely to fill in densely, whereas natural or loose hedges may have wider spacing.
A good rule of thumb is that the spacing between plants is often about two-thirds of the intended height of the hedge. Using this guidance, a hedge that will be 6 feet tall will have plants spaced about 4 feet apart, and in a 12-foot-tall hedge, the plants will be spaced about 8 feet apart. Measure the length of your run, and divide that number by the spacing you’ve chosen. Round up to make sure you don’t fall short.
Follow the normal planting recommendations for your chosen trees or shrubs, keeping the spot where the trunk flares out into the root system at or slightly above the surrounding grade. If you are planting a long hedge, particularly with heavier balled and burlapped (B&B) material, it may be most efficient to excavate a planting trench with power equipment. Be sure to alleviate compaction caused by the equipment to the sides and bottom of the trench. Try not to excavate too deeply, and firmly tamp any backfill used to adjust planting depth. Completely remove metal baskets and burlap, since leaving these materials in place impedes healthy root growth.
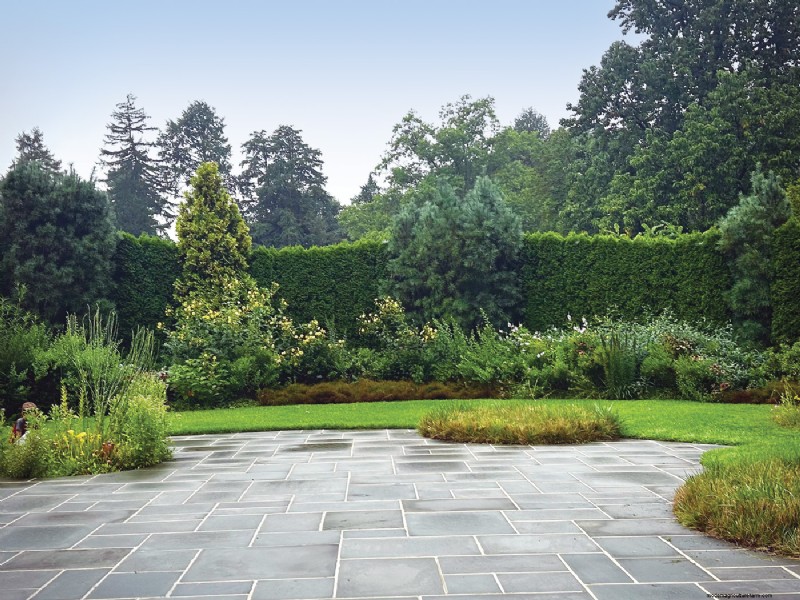 A mixed-species lineup tastefully breaks with tradition. Interjecting pillars of contrasting colors and textures into a neat row of American arborvitae (Thuja occidentalis and cvs., Zones 2–7) keeps this hedge from feeling too monolithic or taking itself too seriously. An even more assorted combination of mostly native species would be a wildlife-friendly, contemporary take on the old-world custom of planting mixed hedgerows.
If you are purchasing bare root plants, it is important to get them into the ground and watered as quickly as possible. Most bare root material is delivered and planted in early spring, before the plants break dormancy. Staking is important to keep them upright until new roots develop enough to stabilize the plant.
Immediately after planting, drench the soil thoroughly to eliminate air pockets and improve soil contact with roots. Top the soil with a 2-inch layer of shredded leaf mulch or finely ground bark mulch to conserve soil moisture, moderate soil temperature, reduce weeds, and gradually add organic matter in the root zone.
Keeping new transplants watered will be critically important during the first one to five years, depending on the size and type of plants you are using. Generally, the larger the plant is, the longer the establishment period will be. Consider adding a soaker hose or drip irrigation during planting to help ensure success. Depending on how much rain Mother Nature provides, water once a week for the first growing season, making sure to continue watering up until the ground freezes in late fall or early winter. If you choose species that are well adapted to your site condition, the plants will only need irrigation in times of deep drought once established.
Learn More: Planting Trees & Shrubs the Right Way
It is important to batter, or taper, the sides of a hedge, making it slightly narrower at the top and wider at the base. This increases the amount of sunlight that reaches the bottom portion of the hedge, which could otherwise grow thin and defoliate in the shade of the upper branches.
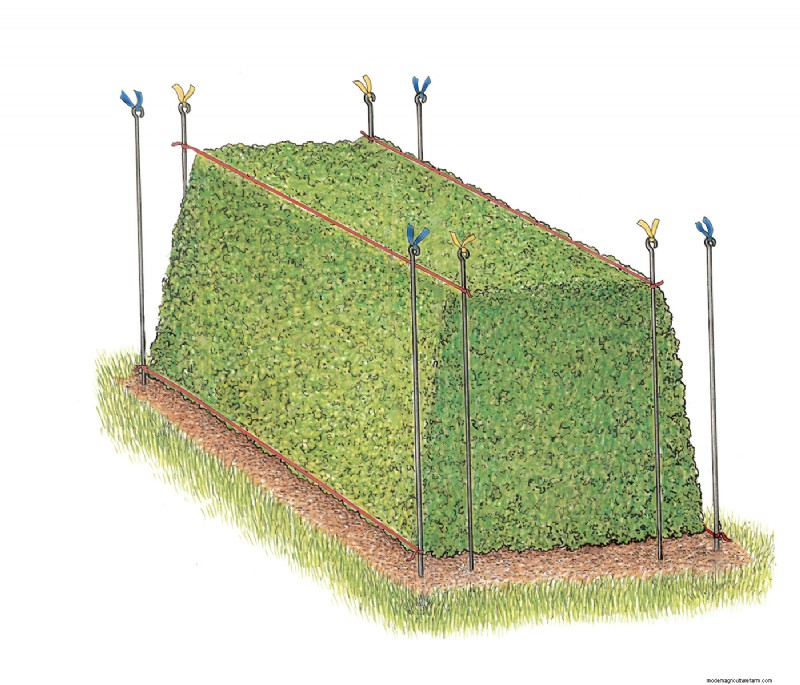 Strings help you see straight. To batter the sides of a hedge evenly, drive four stakes into the ground at either end of a straight section. Stretch level string lines between the inner stakes (marked with yellow ties in the diagram above) at the height where you’d like the top of the hedge to be. The lines between the outer stakes, shown with blue ties, will mark the width at the bottom of the hedge. Illustration by Dolores R Santoliquido
To batter your hedge like a pro, set up some stakes, strings, and line levels to help you achieve crisp lines and a smooth taper (illustration above). Place four stakes at each end of a straight run. The two inner stakes will mark the narrower width at the top of the hedge, and the two outer stakes will mark the width at the base.
Run a string between each pair of inner stakes, placing it at the desired height of the hedge. Use a line level to make sure the top of the hedge is truly level; measuring the height from the ground to the top of each plant will yield an uneven line if the ground is not flat. Run two more strings between the stakes that mark the bottom outer corners. If you’re pruning a very long hedge, you can add intermediate stakes to break up the long run, double-checking the top string to ensure that it is level between stakes.
Trim the sides and top of the hedge carefully using either a power tool or hedge shears, stepping back periodically to assess your progress. Prune in light layers, gently rather than aggressively. You can always prune a little more, but there’s no way to put back what you have cut off.
If you are pruning a more informal hedge, or if you intend to rejuvenate or reduce the hedge in the near future, it is a good practice to strategically make a few deeper cuts to permit more light into the center of the plants and stimulate interior growth.
Learn More: How to Trim a Formal Hedge
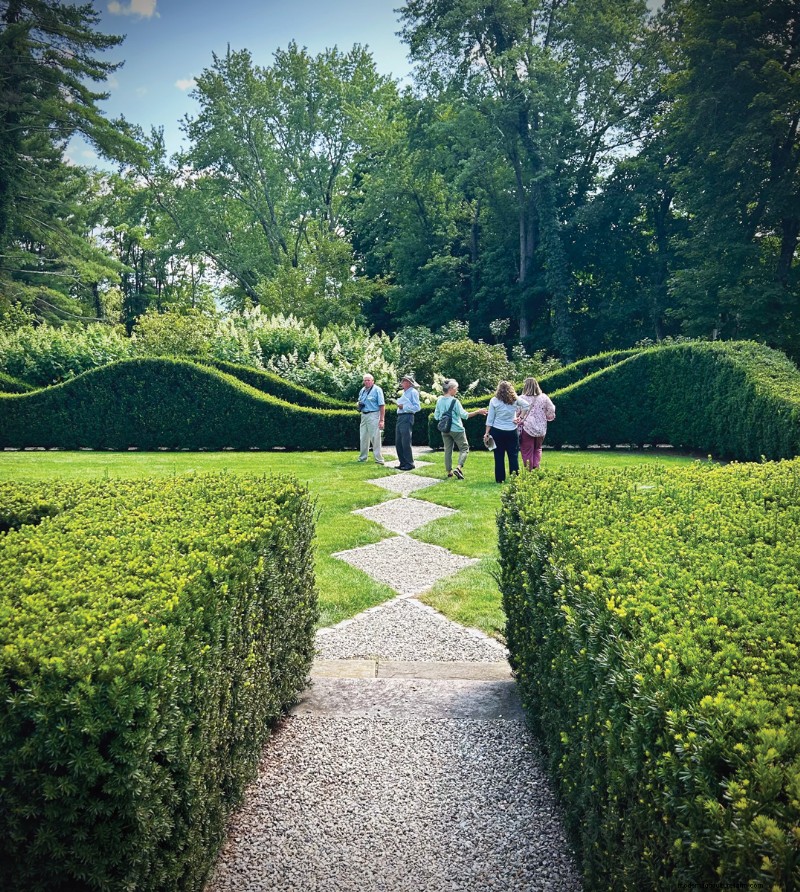 Clean, modern lines can be light and playful. Working with traditional hedging materials that can be sheared closely makes nearly any shape you can imagine possible.
How and when you prune your hedge will depend on the look you are trying to achieve and which plants you have chosen. Many hedges are trimmed in summer as the first flush of growth hardens off. Here in the Northeast, that’s usually in late June or early July. A second round of trimming often follows in late July or early August. Formal clipped hedges may require light shearing throughout the growing season, while informal hedges may require only a little annual shaping.
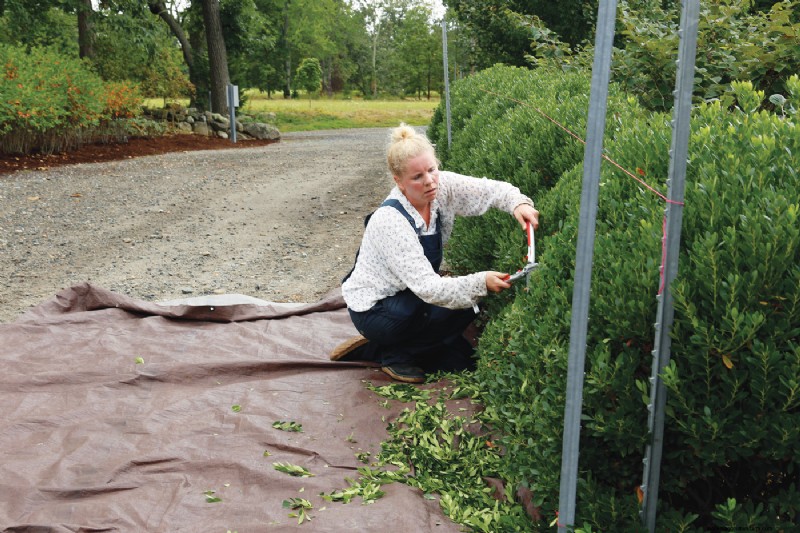 A tapered form promotes healthy growth. Setting up stakes and string lines has made it easier to evenly slope the sides of this newly planted inkberry hedge so the base is about 2 feet wider than the top.
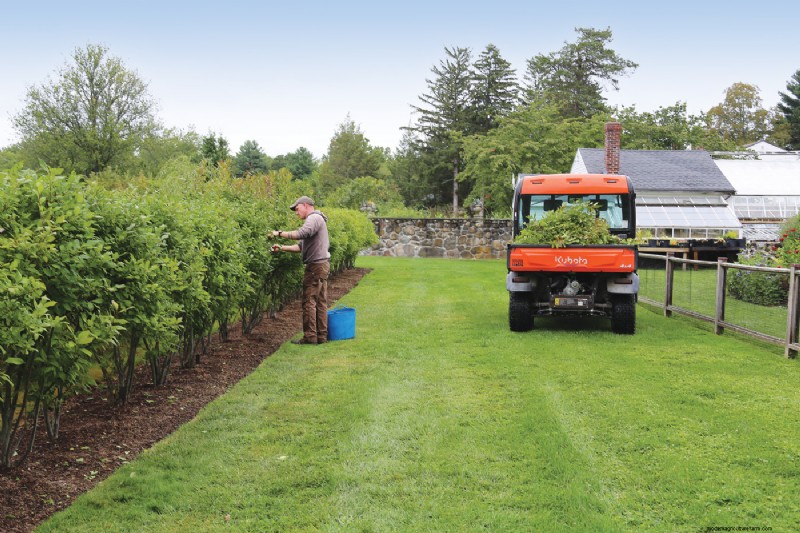 Use hand pruners to tidy up an informal shape when growing hedges. Instead of having its top and sides regularly sheared into straight lines, this winterberry hedge receives only an occasional light trim. Following the same pruning rules that would apply to a stand-alone shrub, a minimal number of stray, crowded, or crossing branches are removed at their points of origin, leaving collars intact.
Whether your goal is to make a quick privacy screen, define the boundaries of a space, or create dramatic and artistic forms, hedges offer endless possibilities. Understanding plant characteristics and growth, pruning requirements, and site conditions will get you off to a healthy start. Combine these with a dose of patience and creativity, and soon you’ll be enclosed with a vibrant living canvas.
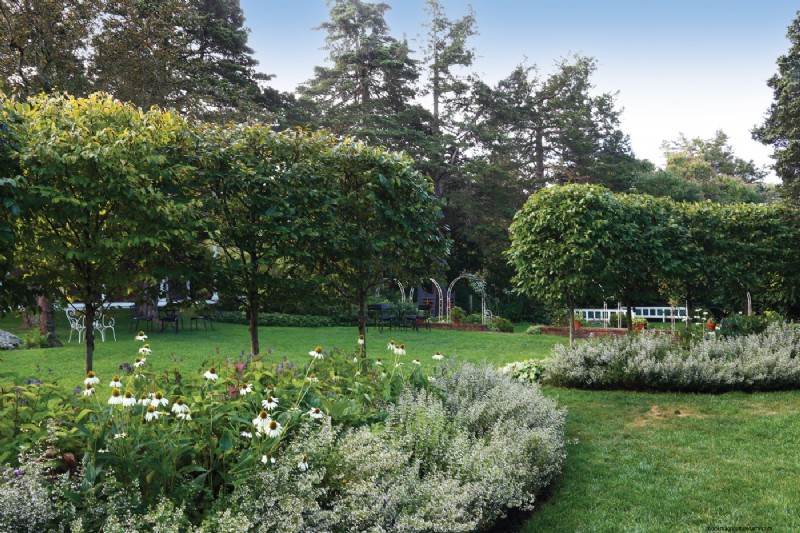 Aerial pruning opens up sight lines between adjacent outdoor rooms. Here, American hornbeam limbed up into a long, floating cloud of foliage guides circulation by revealing partial views of nearby spaces. This style of hedge would be a good choice for marking a boundary between public and private areas in a subtle, friendly manner.
Joann Vieira is the director of public gardens and horticulture at The Trustees of Reservations in Massachusetts.
Watch Our Podcast: Let’s Argue About Plants
Fine Gardening Recommended Products
The Crevice Garden: How to make the perfect home for plants from rocky places
Fine Gardening receives a commission for items purchased through links on this site, including Amazon Associates and other affiliate advertising programs.
A crevice garden replicates the environmental conditions of mountain tops, deserts, coastlines, and other exposed or rocky places on earth. These striking garden features provide perfect conditions for the plants native to these far-off places, bringing the cultivation of these precious gems within everybody’s reach.
ARS Telescoping Long Reach Pruner
Fine Gardening receives a commission for items purchased through links on this site, including Amazon Associates and other affiliate advertising programs.
Telescopes from 4 to 7'. Cut and Hold (160) Blades. Drop forged blades for unsurpassed long lasting sharpness. Lightweight, 2.3 lbs., for continued use. Perfectly balanced for easy pruning.
Pruning Simplified: A Step-by-Step Guide to 50 Popular Trees and Shrubs
Fine Gardening receives a commission for items purchased through links on this site, including Amazon Associates and other affiliate advertising programs.
Pruning Simplified shows you exactly how to do it. This must-have guide offers expert advice on the best tools for the job, specific details on when to prune, and clear instructions on how to prune. Profiles of the 50 most popular trees and shrubs—including azaleas, camellias, clematis, hydrangeas, and more—include illustrated, easy-to-follow instructions that will ensure you make the right cut the first time.


