
Welcome to Modern Agriculture!

Are you bringing home baby chicks for the first time, or need a refresher on how to best take care of them? While it might seem a little daunting to care for day-old chicks, it’s not at all difficult—and it’s an incredibly fun and rewarding aspect of keeping chickens.
In over a decade of raising my own chicks, I’ve learned a few things and changed a few things—namely, how to streamline the first eight weeks and keep messes to a minimum.
For the beginner, this is everything I know about raising healthy chicks at home!
Spring is the most common time to raise chicks because while they need to start off inside your home under a heat lamp, the weather should warm up enough by the time your chicks are fully feathered and ready to live outside.
Disclosure: If you shop from my article or make a purchase through one of my links, I may receive commissions on some of the products I recommend.
Whether you’re bringing home chicks from a farm or feed store, having them shipped to you, or hatching the eggs yourself, the preparation is all the same. Your chicks will need warmth, food, and water as soon as they arrive, so it’s important to have all the essential supplies (listed below) ready and waiting for them.
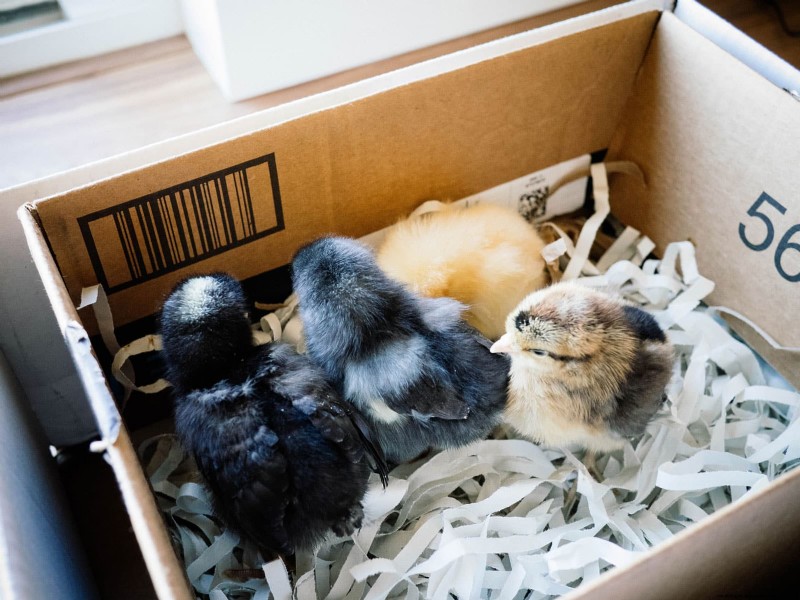
This is what you’ll need for raising baby chicks:
Note: This heat plates comes in two sizes, one rated for “up to 20 chicks” and the other for “up to 35 chicks.” In my experience, the smaller model is really more ideal for up to six baby chicks as they’ll be using it for a few weeks, so any more than that will quickly outgrow the space underneath the heat plate.
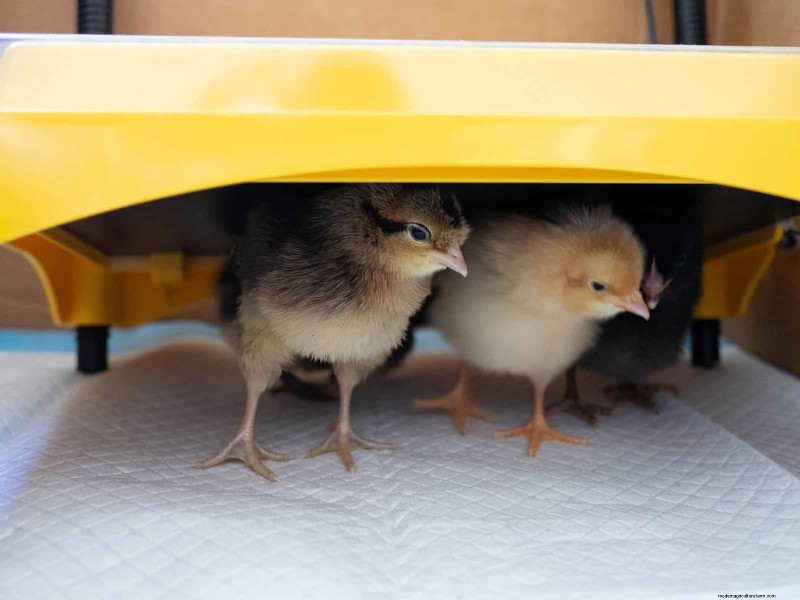 This heat plate claims to fit “up to 20 chicks” but is more comfortable for four to six chicks as they grow
A chick brooder (or brooder box) is simply an enclosed space that keeps your chicks safe and warm for their first few weeks of life before they can live outside. It’s essential for chicks that are raised without a mother hen, since they don’t have the benefit of being tucked under the mother’s body.
In your home, the brooder has everything the chicks need to survive: heat, food, and water.
If you’re raising just a handful of chicks, the easiest DIY brooder is a large cardboard box. (This is what I still use, at least for the first two weeks.)
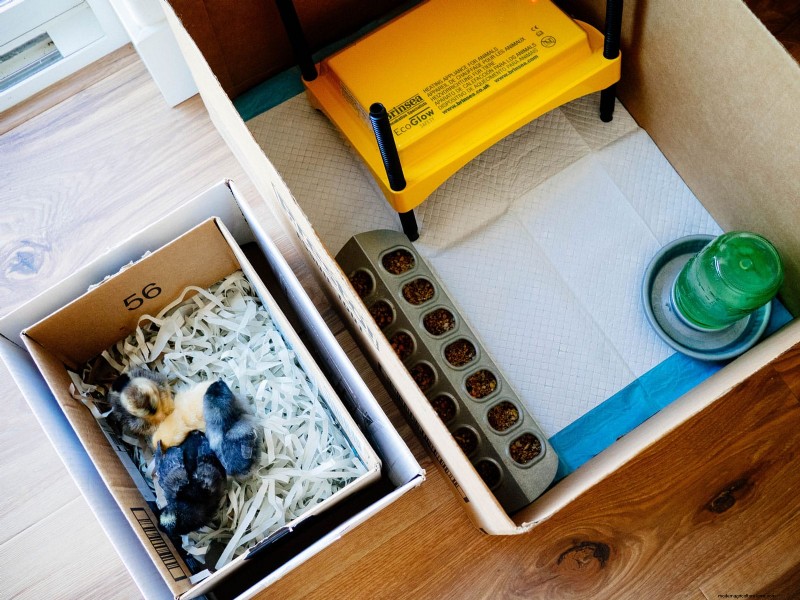 A cardboard box works perfectly as a brooder for a handful of chicks
But you can also make a brooder out of a large plastic storage bin, stock tank, animal crate, portable puppy playpen, or other sturdy enclosure. Line it with your bedding material of choice.
If you have pets or rambunctious toddlers, the brooder should have a secure, breathable, and removable lid (made from chicken wire or hardware cloth) to keep those threats out while keeping your chicks in. After a couple weeks, most chicks can easily hop on top of (or even over) the walls as they practice their newfound flying skills!
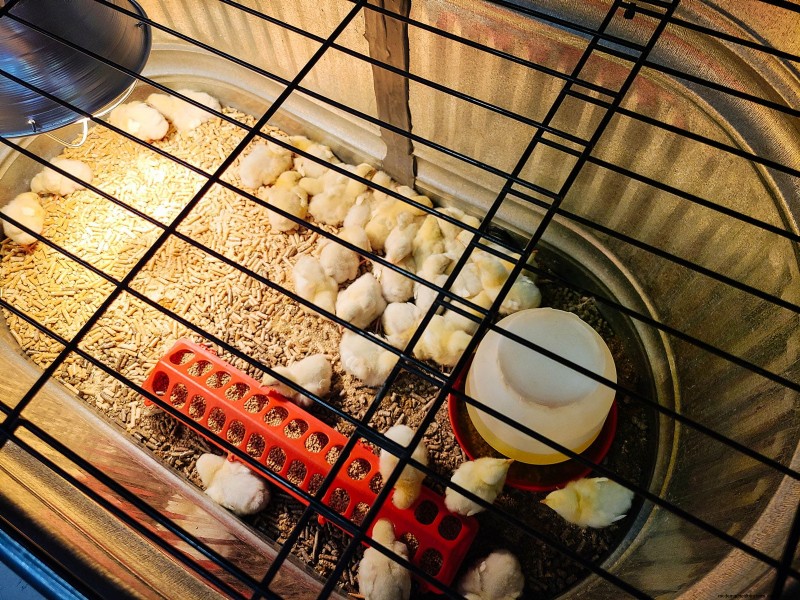 A stock tank covered with a wire grate makes a great brooder for raising dozens of chicks
Each chick will need at least 6 square inches of space for the first two weeks, increasing to about 1 square foot per chick until eight weeks old.
So if you start with four chicks, for example, they would need a brooder box with about 24 square inches of empty floor space (not including the space taken up by the feeder and waterer). But chicks grow quickly and within a couple days, you’ll find that they become too active for this small amount of space.
By week two, you should allow for at least 1 square foot per chick, which should be plenty until they’re ready to go outside (weather permitting).
So those same four chicks will need 4 square feet of empty floor space. If you want to keep it simple, get a brooder measuring around 2 feet x 3 feet, which is a good size for the first eight weeks.
The brooder should be kept in a fairly warm and sheltered location, such as a spare room, laundry room, bathroom, or insulated garage or shed (as long as the garage or shed has windows or lights on during the day).
What I currently do for my brooder:
For the first two weeks, I use a cardboard box lined with a puppy training pad. This helps keep the dust down, the chicks won’t try to eat it, and it’s quick and easy to change out dirty training pads. I prefer to keep chicks contained to a smaller area at first (since it’s easier to heat), so the cardboard box works for me.
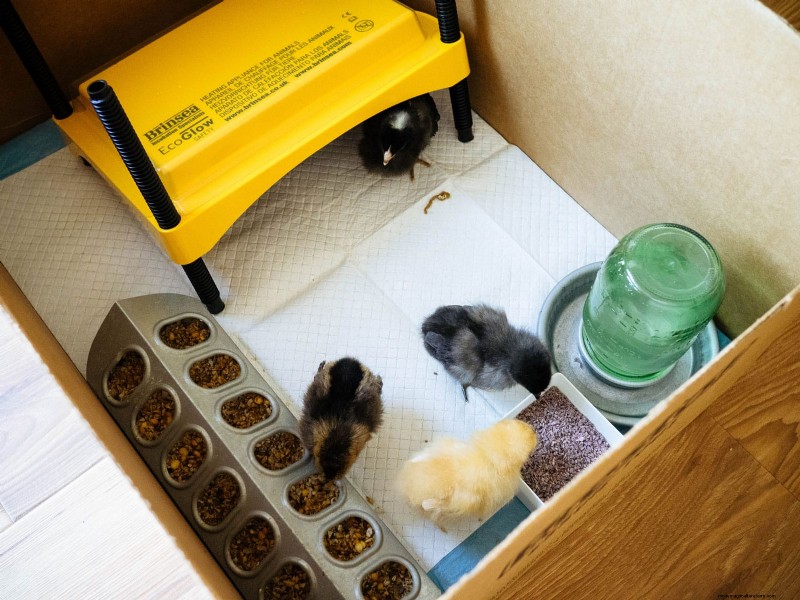 A cardboard box can easily fit a heat plate, feeder, waterer, and small container of chick grit
As they grow bigger and get feistier, I move the chicks into a portable puppy playpen that has a zippered top and a waterproof mat. I love this type of enclosure because it cleans up easily and folds away neatly when you no longer need it.
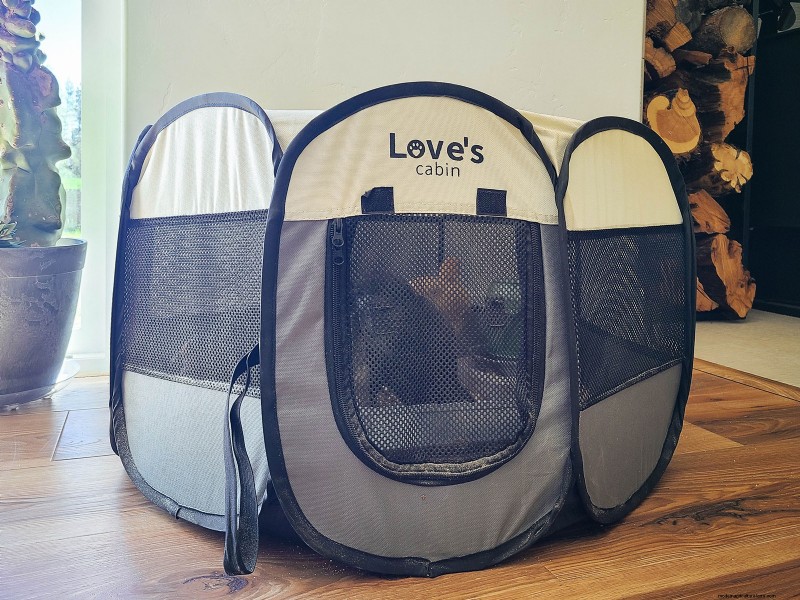 As the chicks grow, they move into a puppy playpen used as a brooder until eight weeks of age
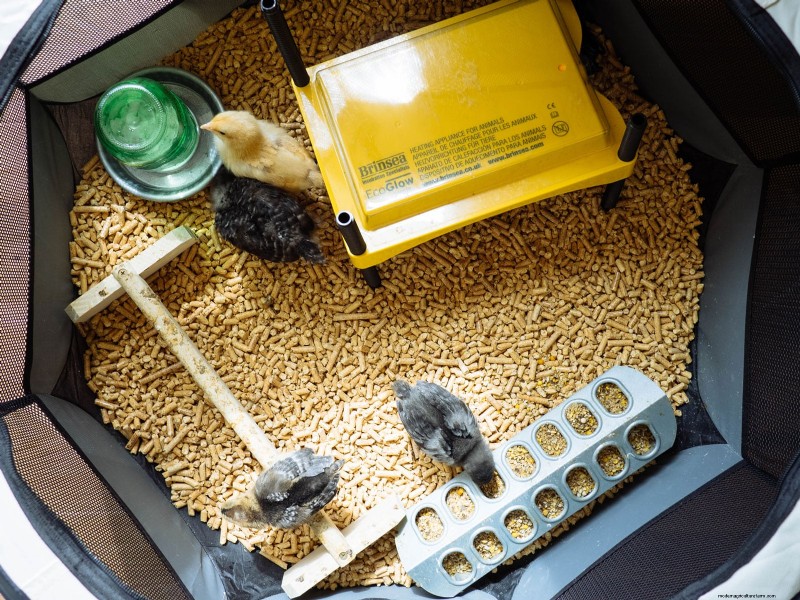 Pine pellets are a clean and economical choice for bedding
I use wood pellets in the playpen for bedding. This is the same material I use in the chicken coop, and I’ve tried a lot of things. I like pellets because they’re very absorbent, soft on the chicks’ feet, not as dusty as shavings, and in the compost pile, pellets simply break down into sawdust (their original state of clean wood fiber).
But you don’t actually have to buy wood fuel pellets for the brooder. (Save the good stuff for your grill!) You can often find pelletized pine bedding at feed and tack stores, which are less expensive and just as clean. Spread an inch or two of pellets across the floor of the brooder, then add them to your compost pile when they get too icky.
As soon as your chicks arrive, gently dip each chick’s beak in clean, room-temperature water. This shows them where their water is and triggers them to start drinking on their own. Providing room-temperature water instead of cold water helps keep their body temperature from dropping too much.
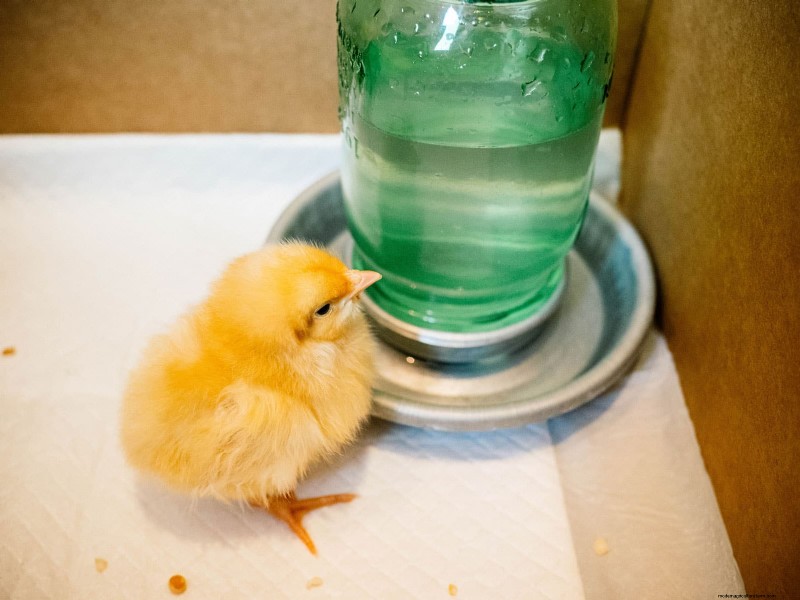
Let your chicks settle into their brooder and rest for the first day, and resist the urge to handle them. A new environment can be hard on chicks, so don’t be alarmed if they aren’t eating much or seem unusually quiet.
Warmth is one of the most important aspects of raising chicks. They need constant heat, even if they’re inside your home, because without feathers they can’t retain their own body heat. If they get chilled, they often can’t recover and will die. They also risk suffocation if they get too cold and pile on top of each other for warmth.
So always make sure it’s warm enough for them!
A brooder should stay between 90°F to 95°F for the first week, then incrementally decrease by about 5 degrees each week until the chicks’ feathers fill in. Every week, raise the heat lamp a bit or adjust the legs on the radiant heat plate to regulate the temperature as needed.
The entire brooder does not need to be 95°F—just the general area under the heat lamp or heat plate.
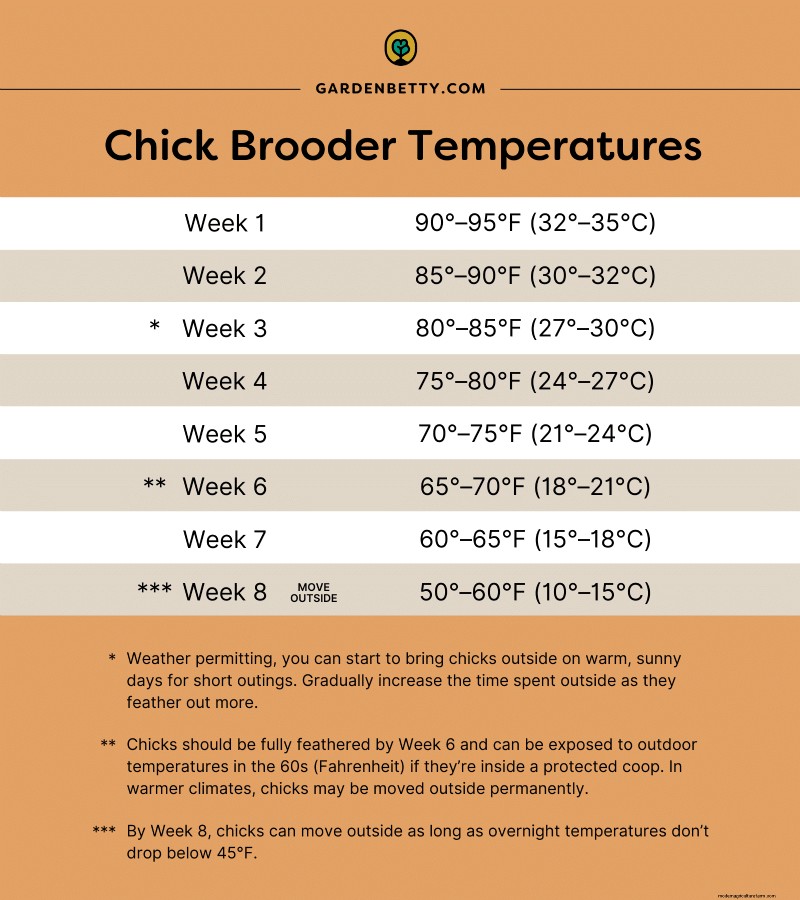
Place a small thermometer under the heat source, at chick level, to monitor the temperature. Chicks will tell you if they’re too cold or too hot.
When the brooder is too cold, they’ll chirp loudly and huddle together directly under the heat source. If the chicks are overheating, they’ll move away from the heat and pant or hold their wings out. (In my experience, it’s rare that the temperature inside the box ever gets too hot.)
If you use a heat lamp, it’s a good idea to keep a spare bulb on hand in case one burns out. You don’t want to be caught without backup heat!
Chicks that are happy and comfortable will be scampering around the brooder, eating, drinking, peeping quietly, and taking regular naps.
What I currently do for heat:
I used to use a red heat lamp, but have since switched to a radiant heat plate and I find it so much better (especially with little kids around). With a heat lamp, I was constantly worrying about the lamp falling over or getting too hot, and I didn’t love leaving it on all day when I wasn’t home.
A radiant heat plate, on the other hand, provides just the right amount of warmth and there’s no risk of catching fire. Even when the chicks (or you) are touching the heated part of the plate, there’s no risk of injury.
I use this model from Brinsea, which has adjustable legs so you can make it taller as your chicks grow. Typically I raise four chicks at a time, and the medium size provides enough room for them to grow.
I leave one side of the heat plate lower and the other side higher so my chicks can move where they feel most comfortable: toward the back for more heat, or toward the front for less heat. Sometimes the chicks will even sit on top of the heat plate to warm their bellies!
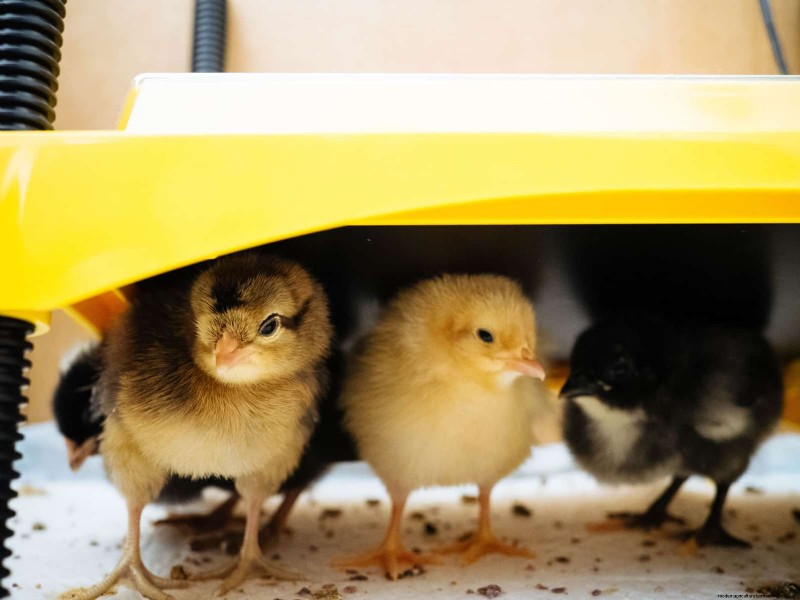
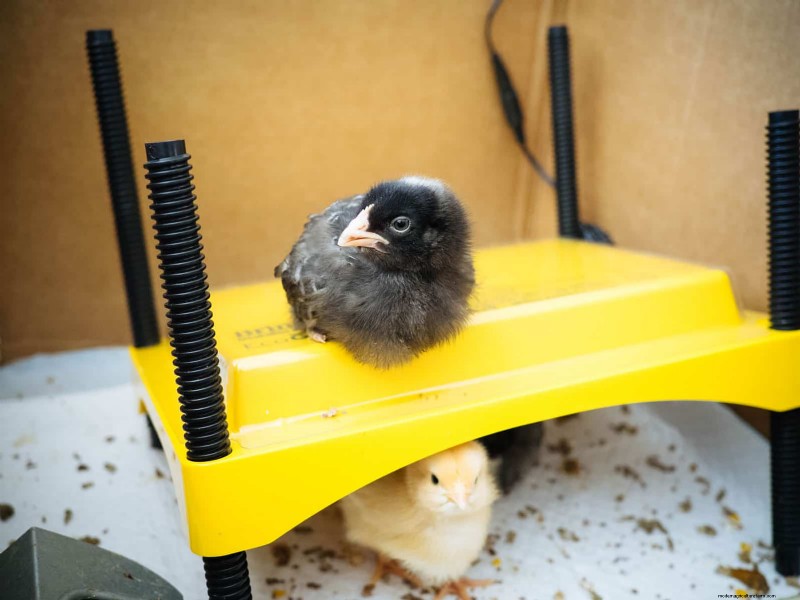
Around six weeks, when the chicks are fully feathered, I move the brooder into my garage near a window. This naturally lowers the temperature to start acclimatizing them, but the heat plate keeps them warm in case temps drop below 50°F at night.
Water and food containers should always be kept within your chicks’ comfort zone in the brooder—that is, not right under the heat source but not too far away from it. You don’t want your chicks getting too hot or too chilly to get to them.
Always have fresh, clean, room-temperature water available in the brooder 24/7. For mail-order chicks, adding electrolyte powder to their water for the first few days can help maintain proper hydration and support their adjustment to a new environment.
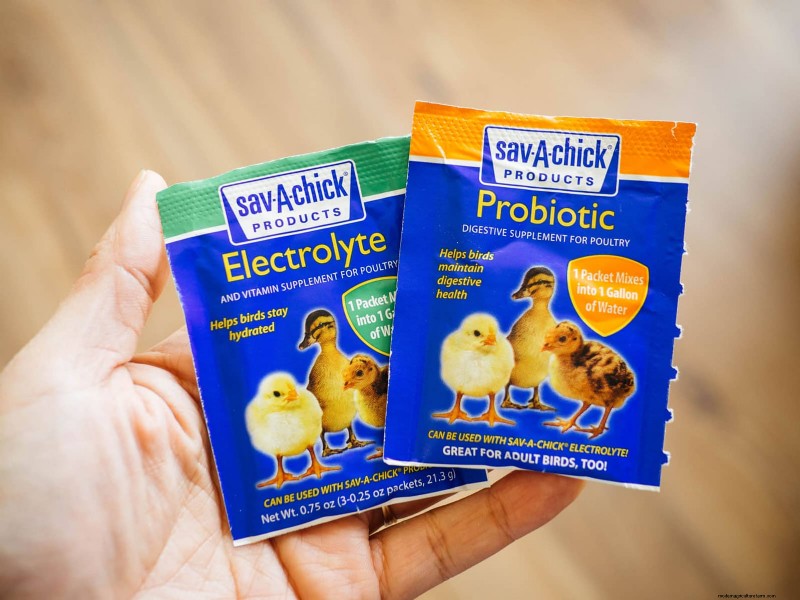
I personally like to use both electrolytes and probiotics in their water to boost their immunity, aid in nutrient absorption, and give them a strong start. (Yes, you can mix them!)
Baby chicks need their own type of food called chick feed or starter feed. Most chick feed is a high-protein ration of around 20 percent protein to help baby chicks get off to a good strong start and feather out faster.
Chick feed comes in two forms:
If you decide to feed a starter mash, you should place a separate dish with chick grit next to the feeder. Chicks help themselves to the grit as needed, which helps them digest the grains and seeds more easily.
(You don’t need to offer grit if you’ll be feeding starter crumbles.)
What I currently do for chick feed:
I use a starter mash, as it more closely resembles the soy-free and corn-free chicken feed I make at home for my laying hens.
And depending on space, I’ll either offer a container of chick grit or put a mini dust bath in the brooder (more on that in the next section below) so chicks always have a source of grit available.
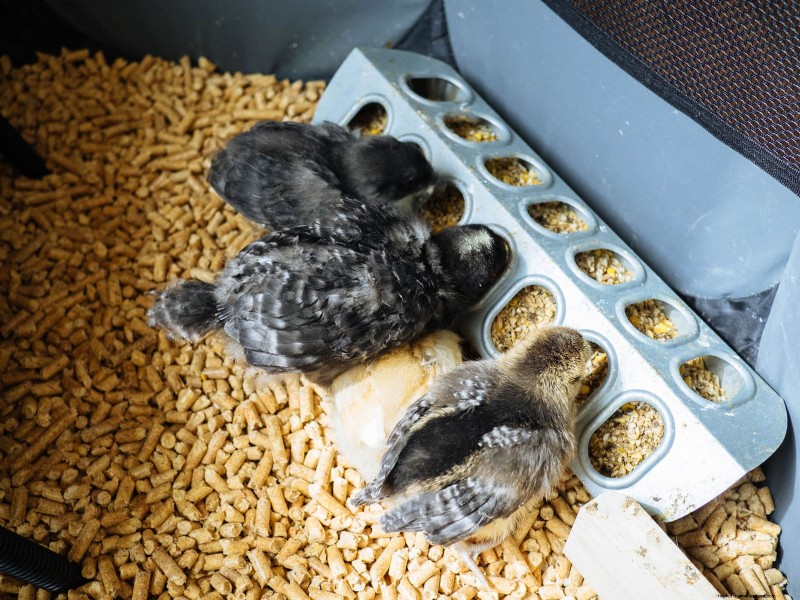
As your chicks get bigger, you’ll want to elevate their waterer and feeder so they don’t kick so much of the bedding material into the containers.
There’s a lot of debate in the chicken-keeping community about whether or not you should use medicated feed. Stores sell both medicated and non-medicated feed, and choosing one or the other is a personal decision that you have to make for yourself.
When I raised my first batch of chicks many years ago, I gave them medicated starter feed because that’s what the store had front and center. But on my second and subsequent batches of chicks, I used non-medicated feed.
Medicated chick starter contains a thiamin blocker (Amprolium) that helps reduce the chances of coccidiosis in young birds. Coccidiosis is a condition in which protozoal parasites (oocysts), which naturally live in the soil and in your chickens’ intestines, become too widespread for the chicken to handle and make her sick. The oocysts spread through feces and can infect an entire brood. If left untreated, coccidiosis often becomes fatal, and it’s one of the leading causes of death in baby chicks.
So why wouldn’t you give medicated feed to your chicks?
What I currently do to build immunity:
I use non-medicated feed but I also help my chicks build immunity as soon as I bring them home. Since it’s usually too cold to let them explore outside in early spring (at least until they start to feather out), I bring the dirt to them—and put it right in the brooder.
I like to make a mini dust bath for my chicks using coarse dirt from my yard and often toss a small clump of grass or weeds into the brooder as well. It keeps them occupied and provides low-level exposure to oocysts and other pathogens in the soil, which boosts their immune system naturally.
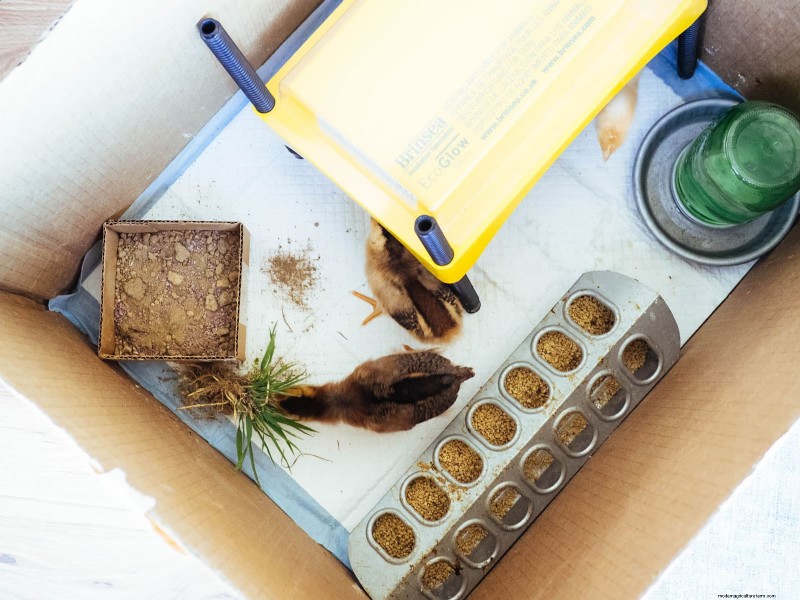 A clump of grass and a mini dust bath filled with coarse dirt from the yard can help build immunity
This mimics the way chicks are raised by hens outside. As soon as the babies are dry, give or take a few days, exposure begins and they learn to be chickens by scratching in soil for food. Subsequently, hen-raised chicks rarely get coccidiosis.
Once the chicks turn eight weeks old, switch them to grower feed (unless they’re already eating a starter/grower combo feed) to slow down their development and keep them healthy. Grower feed is typically around 17 percent protein. Make the transition gradual by mixing increasing amounts of grower feed with decreasing amounts of starter feed over a few days.
By the time your chicks (now pullets) are 18 weeks, they can move on to 16 percent layer feed to get ready for laying eggs. Just like you did before, mix in the layer feed with their grower feed a little at a time to transition your chickens gradually.
When they’re ready to lay, offer free-choice calcium (such as crushed oyster shells or crushed eggshells) in a separate container near the feeder.
Do baby chicks get treats just like older hens? Sure—but sparingly. I typically wait until they’re a few weeks old before I begin offering treats, and when I do, I make sure there’s a source of chick grit in the brooder.
Grit helps baby chicks digest what they eat, and store-bought chick grit is specially sized for their tiny beaks. If you raise chicks with their own mini dust bath in the brooder, then the coarse dirt you provide is already a good source of grit. Otherwise, place a small dish of grit in the brooder, separate from their food.
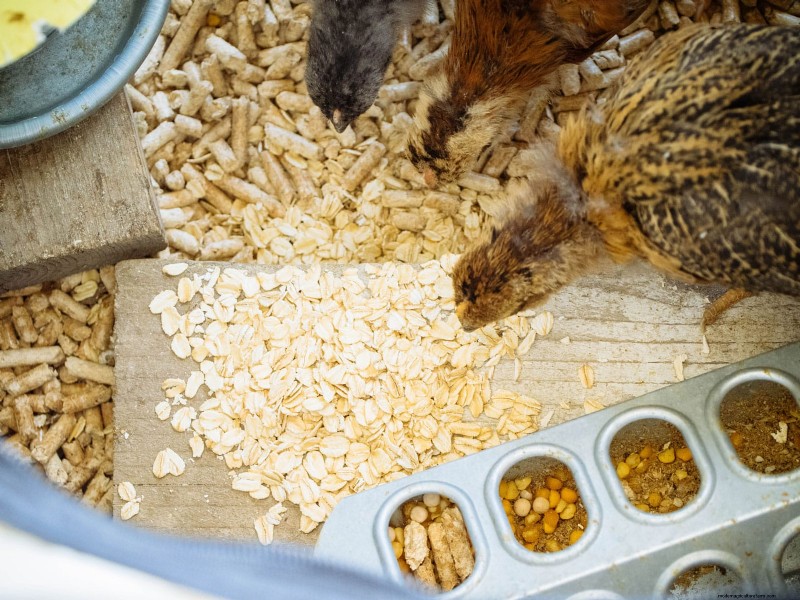 Raw oats are a good occasional treat for chicks (don’t forget to offer a separate container of chick grit)
Occasional treats can include weeds, fresh herbs, leafy greens, scrambled eggs, or raw oats.
Chicks are quite malleable at their age and will form a strong bond to you if you handle them regularly. But start slowly: don’t just reach in to the brooder and pluck them out without warning. Set your hand on the floor of the brooder with some chick feed in your palm, inviting the chicks to approach you.
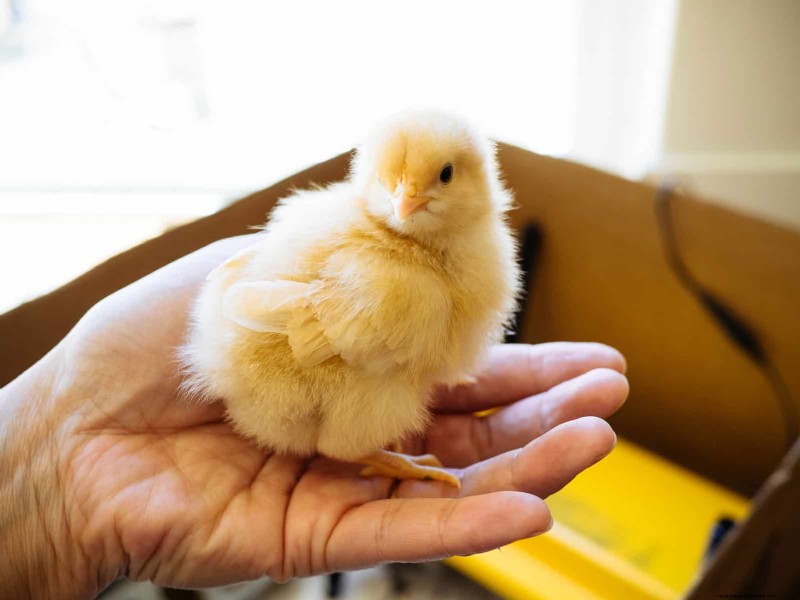
Once they’re comfortable with your presence, feel free to pick them up for some snuggles outside of the brooder. Be attentive to their behavior, as chicks will shriek if they’re scared or cold. Some enjoy being handled more than others, so you don’t want to stress them unnecessarily.
Your chicks should have fresh water daily, and their feeder cleaned and replenished as needed.
Chicks poop a lot, and their poop gets bigger and stinkier as they grow! In the beginning when my chicks are on a puppy training pad, I change the pad daily. But once they transition to a larger brooder lined with pine pellets, I only change the pellets every week or two.
You have to strike a balance between keeping the brooder clean, but not too clean that your chicks can’t build immunity.
Yep, chicks love to roost, even if they aren’t sleeping on it right away. Give them a flat, wide roost, which is easier to perch on than a round dowel. It will help them get used to roosting in the big coop, which makes them less likely to sleep in the nest boxes later.
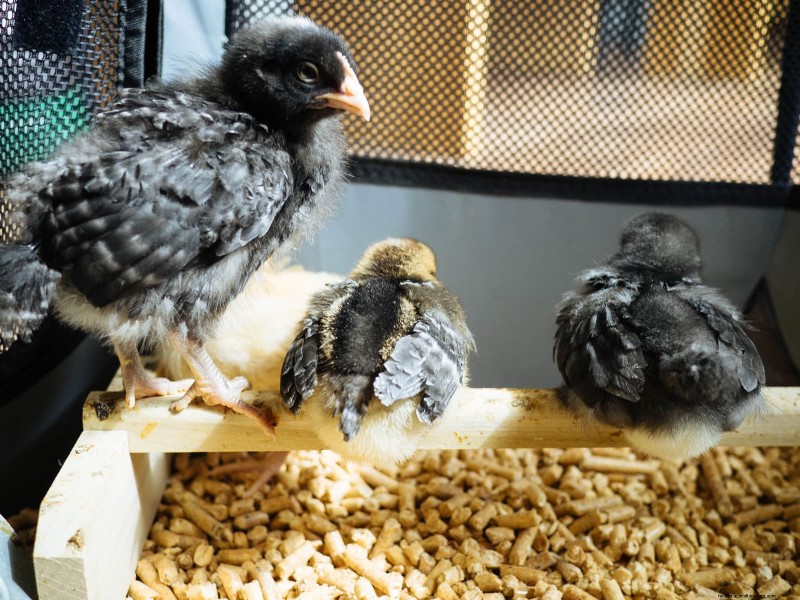
If you have room inside the brooder, place a small branch or rock as additional perches they can explore.
Once your chicks start feathering out around three weeks old, you can bring them outside for short adventures on warm, sunny days in the grass or in the dirt.
I bring my chicks in and out of the house in a large bucket and use another pop-up playpen (with the floor zipped out) to keep them confined and safe while able to scratch in the grass. It’s set up in a spot that gets both sun and shade, where I can monitor the chicks the whole time I’m working in the yard.
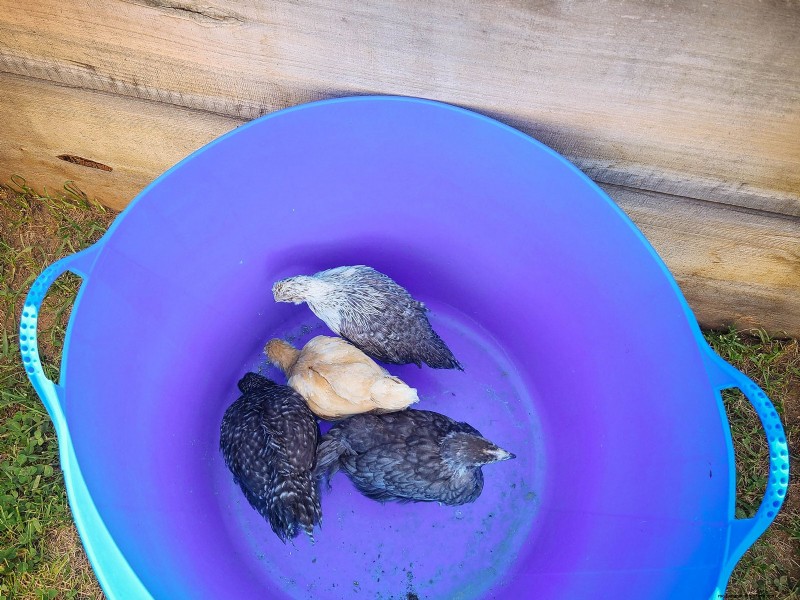
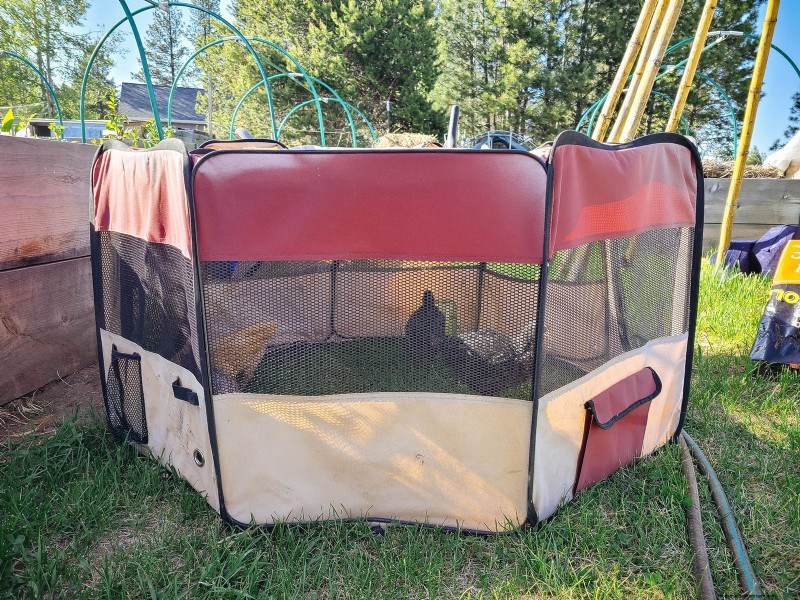 The chicks keep me company while I work in the garden
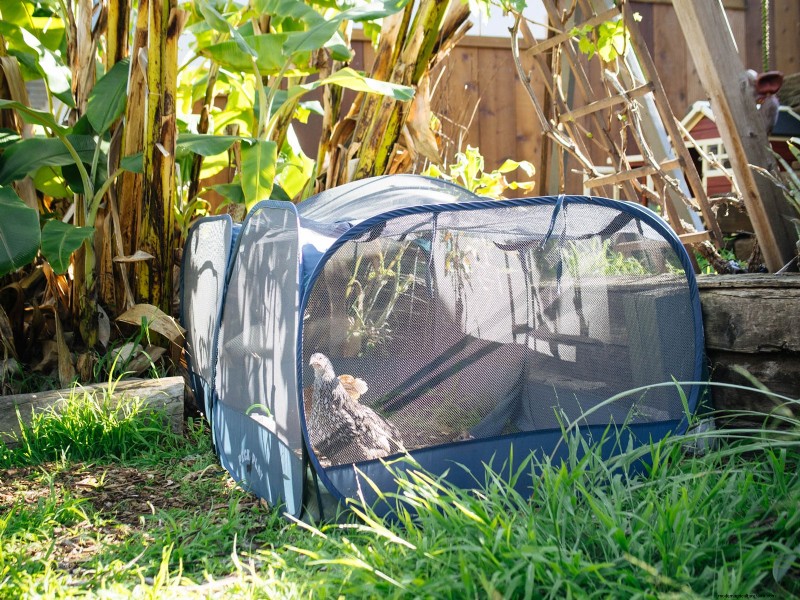 This was a previous batch of chicks that I raised in a different home (and yard)
It’s important that chicks have access to fresh water at all times. Keep an eye (and ear) on their comfort level as they’re very susceptible to overheating or getting chilled at this age.
As they get older, gradually increase the amount of time they spend outdoors until they’re eight weeks old, when they’re fully feathered and should be ready to move to the coop (as long as overnight lows don’t drop below 45°F).
If you already have chickens, it’s crucial to integrate the new and existing flocks gradually. This makes it safer for all of them as it limits the spread of disease and keeps picking to a minimum.
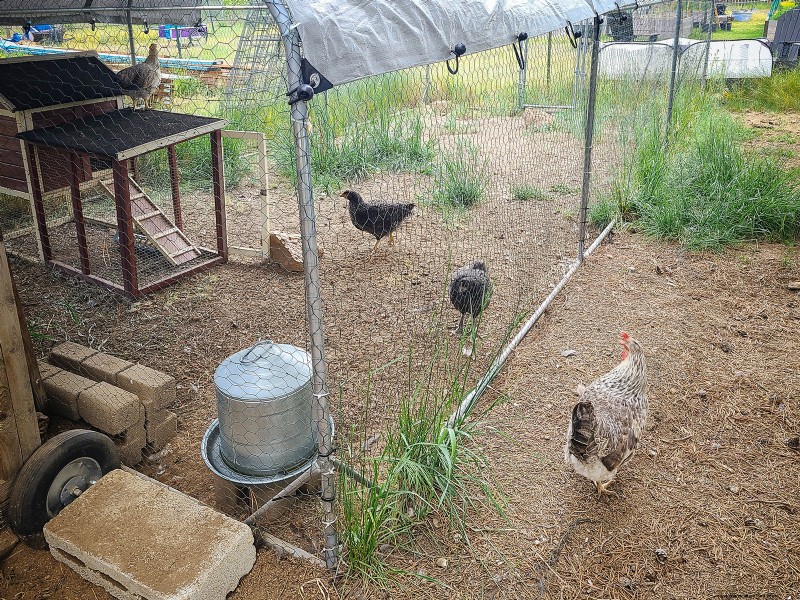 Look but don’t touch—new chicks are kept separate from the existing flock in their own enclosure
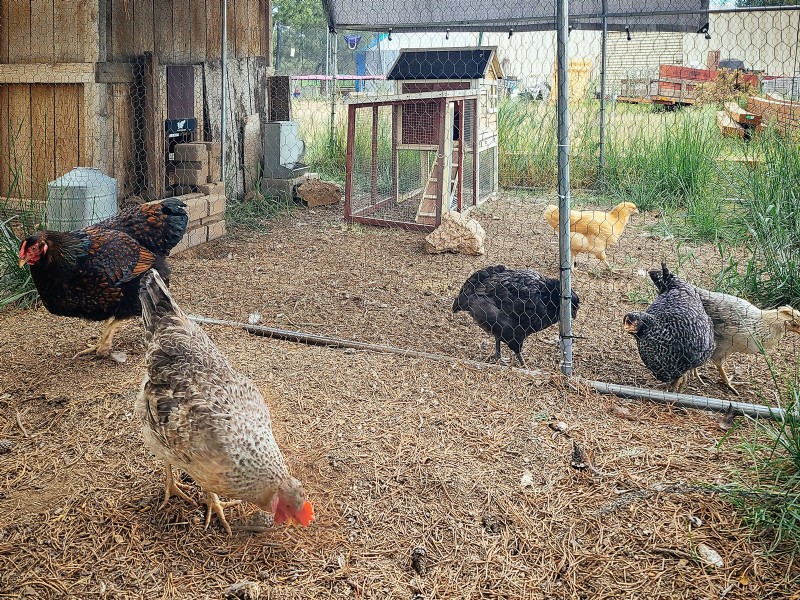 Separating the new and existing flocks helps them get to know each other first (I use a rabbit hutch as a temporary coop for the new chickens)
Important things to know:
I wrote a complete guide here on how to properly quarantine and introduce new chickens to your flock.

Linda Ly
I'm a plant lover, passionate road-tripper, and cookbook author whose expert advice and bestselling books have been featured in The Wall Street Journal, Time Magazine, HGTV, and Food & Wine. The Route 66 Cookbook is my latest book. Garden Betty is where I write about modern homesteading, farm-to-table cooking, and outdoor adventuring—all that encompass a life well-lived outdoors. After all, the secret to a good life is... Read more »


