Welcome to Modern Agriculture!

Loofah sponges are great in the shower and handy for doing dishes in the kitchen, but did you know you can grow them in your garden? A loofah sponge is the fibrous interior of a loofah gourd, which are produced on vining plants that are closely related to cucumbers and squash. Growing loofah gourds isn’t difficult but they do need a long growing season. I grow them successfully in my short season garden by starting the seeds indoors in mid-spring, giving the plants plenty of sun, and providing consistent moisture during the summer months. If you want to learn how to grow this unique – and edible! – gourd, read on.
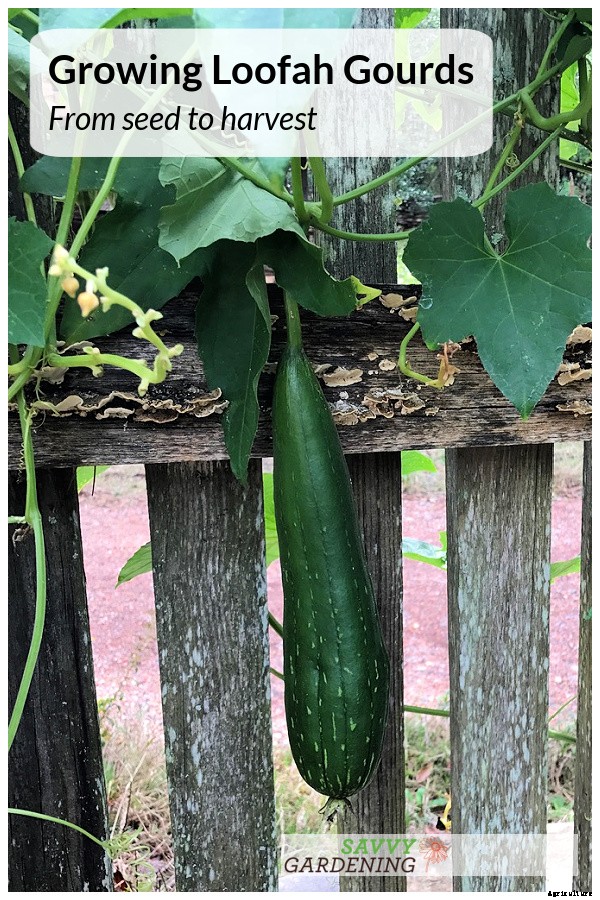
There are two species of loofahs grown around the world: Luffa acutangula is known as the ridged or angled loofah and Luffa aegyptiaca, the smooth or common loofah. Ridged loofahs can grow up to 30 inches long, although in my zone 5 climate I’ve found 18 inches is more common. The fruits are slender with deep green skin and sharp ridges that run down their entire length.
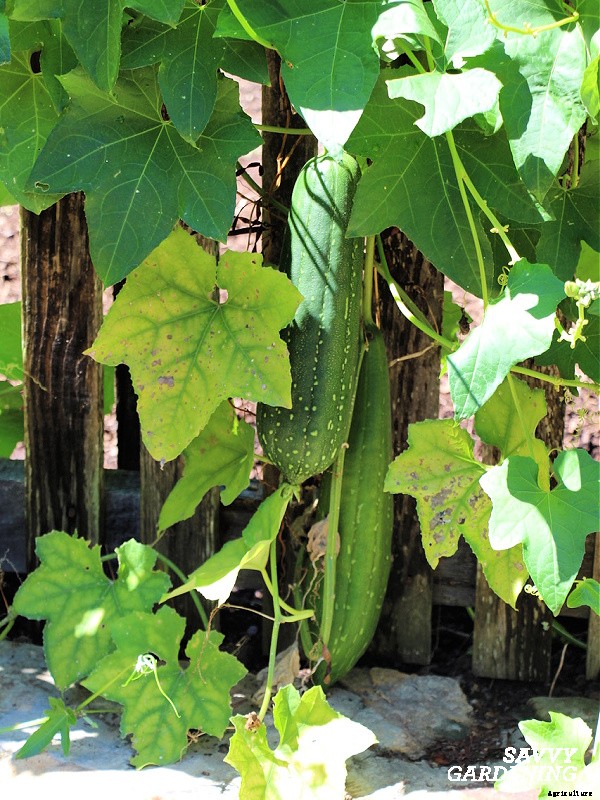
Smooth loofahs, as you may have guessed, have smoother skin with visible, but not sharp, ridges. The fruits are also wider and grow up to two feet long. There are several cultivars of smooth loofahs including an extra long cultivar with fruits that mature to almost three feet in length. It needs a longer growing season than I can provide so I stick to quicker maturing varieties.
Loofah, or luffa or loofa gourds, need a long growing season and it’s best to get a head start by sowing the seeds indoors. The first step to success is buying fresh seed. In the past I’ve had trouble germinating seeds that were older than two years so I always buy a new seed pack each spring.
A step-by-step guide to growing loofah gourds from seed:
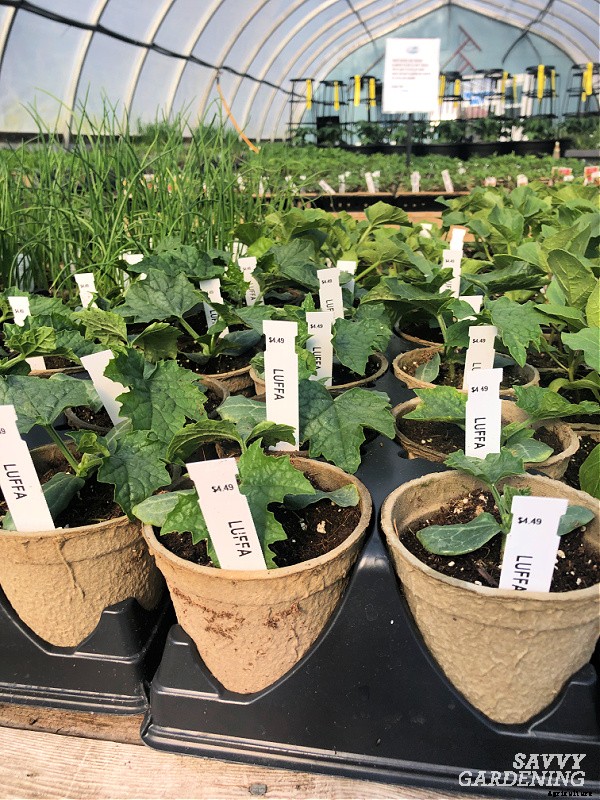
When the spring weather has warmed and the risk of frost has passed, it’s time to harden off loofah seedlings and move them to the garden. Hardening off is the process of acclimatizing indoor grown plants to outdoor conditions. Learn more about how to harden off seedlings in this article.
Because the plants are sensitive to cold temperatures, don’t rush them into the garden too early. By the time I transplant, it’s usually about a week after our last frost date. And for extra insurance, I place a mini hoop tunnel covered in clear plastic or a row cover overtop the bed for the first week or two. This creates a microclimate around the plants and helps reduce the risk of transplant or cold shock. I’ve got all the details on using garden covers and creating simple mini tunnels in my book Growing Under Cover. You can also cover individual plants in garden beds or containers with cloches.
Loofah gourds are produced on vigorous plants that can grow up to thirty feet long. It’s important to provide a site and with full sun and encourage fast, consistent growth by maintaining soil moisture and feeding the plants regularly. I give my plants a good start at planting time by digging in several inches of compost or aged manure.
The plants are robust climbers and happily scramble up or across a strong support like a chain link fence, trellis, arbor, garden arch, tunnel, or other structure. It makes a great summer screening plant if you’re looking for more privacy in your yard or adds shade to a pergola over a seating area. You can also let the plants roam freely over the ground, but be warned they cover a lot of space. They fruits also grow straighter if trellised.
You can grow loofah in a container but choose one that is large enough to accommodate the rootball of this sizeable plant. Select a pot or grow bag that is around 20 gallons or 18 to 24 inches across. Fill it with 2/3 potting mix and 1/3 compost or aged manure. I would also suggesting adding some slow-release organic fertilizer to the growing medium.
A potted loofah plant grows very large so keep that in mind as you choose where to place your pot. Ideally, it would be near a trellis or fence, but you can let the vine trail over the sides of the pot. Just be mindful it make take over your patio or deck!

Whether you’re growing in a pot or garden bed, you’ll need to maintain moisture and feed regularly. I check the soil a couple of times a week in summer, watering deeply if it’s dry when I insert a finger at the base of the plant. Loofah gourds appreciate consistent moisture but don’t want to be sitting in saturated soil. I also apply a liquid organic fertilizer every two to three weeks. If you’re meeting the growing needs of your loofah gourd plants, they’re more likely to pump out plenty of flowers and produce the biggest gourds.
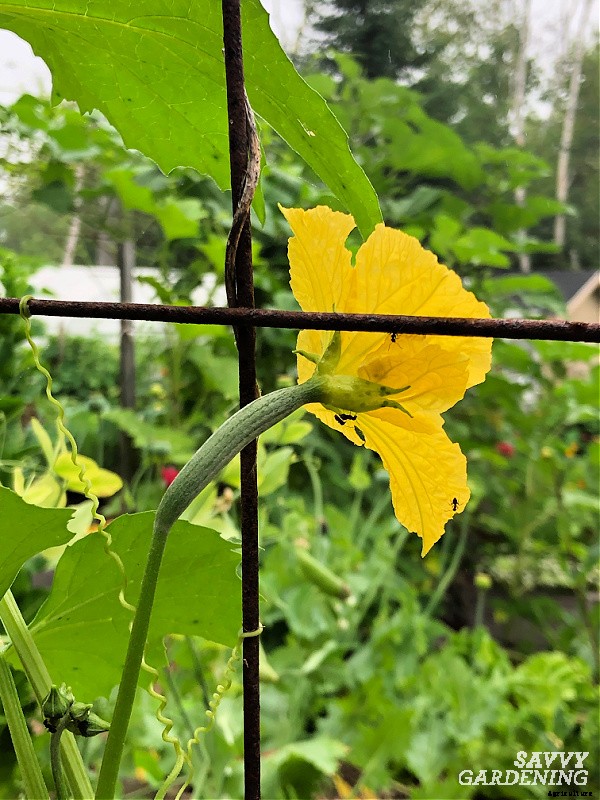
Besides watering and fertilizing, there is another summer task I do to ensure plenty of gourds – I hand pollinate. Why? Several reasons: 1) I live in a northern zone where the growing season is short. Hand pollinating helps ensure the first flowers produced are pollinated and can develop into gourds. 2) Local bees and pollinators which adore my cucumbers, squash, and pumpkins, aren’t as keen on my loofah gourd plants. I’ve found if I don’t hand pollinate, I get fewer fruits.
Hand pollinating loofah gourds is quick and easy. You do need to know the difference between boy and girl flowers, however (I bet you didn’t know you’d be getting a talk on the birds and bees in this article!) A female loofah gourd flower has a baby fruit beneath the bloom (see the photo above). A male loofah gourd flower has no fruit, just a straight stem.
To pollinate: Use a clean, dry small paintbrush or cotton swab to transfer pollen from a male flower to a female flower. Or, you can pick a male flower, remove the petals and press the pollen against the female flower. I try to do this when the flowers are fresh and recently opened. Once the flowers are produced in abundance in early to mid-summer, hand pollinate a couple of times a week.
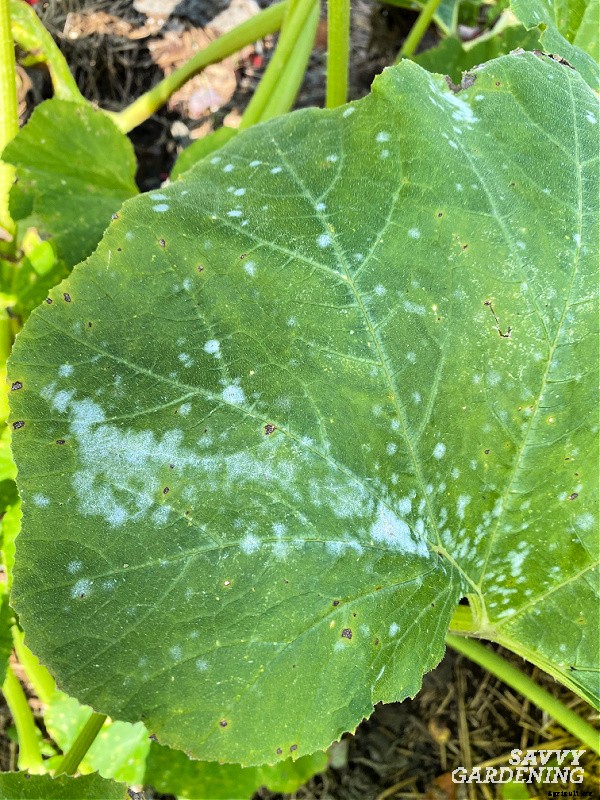
While gourds are low-maintenance plants, I do keep an eye out for problems, taking action where necessary. Here are three potential issues you may encounter when growing loofah gourds:
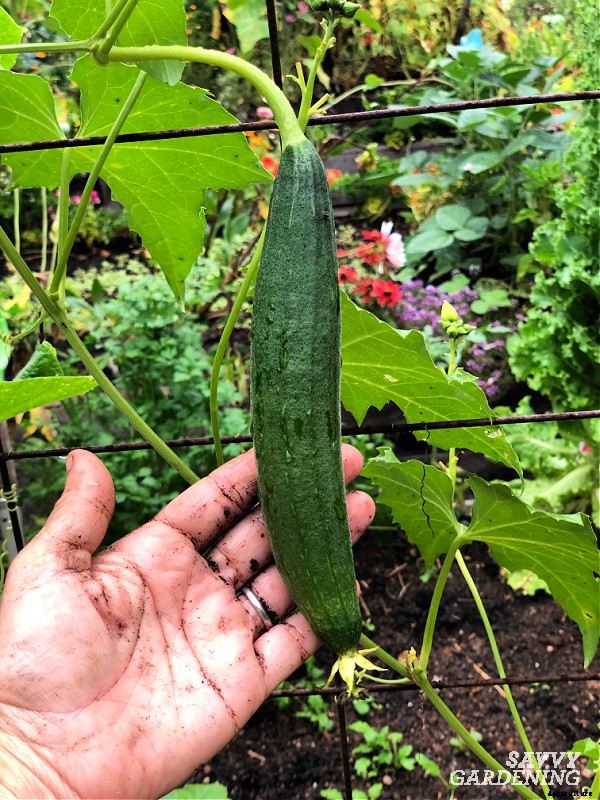
There are two main times to harvest loofah gourds: 1) as a tender young vegetable for stir-fries, stews, and curries. 2) for the mature gourds to be used as sponges. Yes you can eat loofah gourds! The immature fruits are not only edible, but delicious with a squash-like flavor. That said, I don’t harvest the first fruits that develop on the plants for eating. This is because loofah gourds grown for sponges need a long growing season and I want to give those first fruits plenty of time to develop and mature. Once I’ve got a dozen or so set on my vines, I’ll start to harvest newly set fruits for the kitchen. Pick when the gourds are four to six inches long for optimum tenderness.
After we’ve had a few harvests of baby gourds, it’s time for some tough love. About six weeks before the first fall frost (mid-August in my garden) I cut the plants back to the last gourd that I think still has time to mature into a sponge by the end of summer. Going forward, I also pinch or snip off new flowers that develop. This directs the energy of the plant into maturing the existing gourds, not trying to make new ones. This is an essential step when growing loofah sponges in a short season climate.
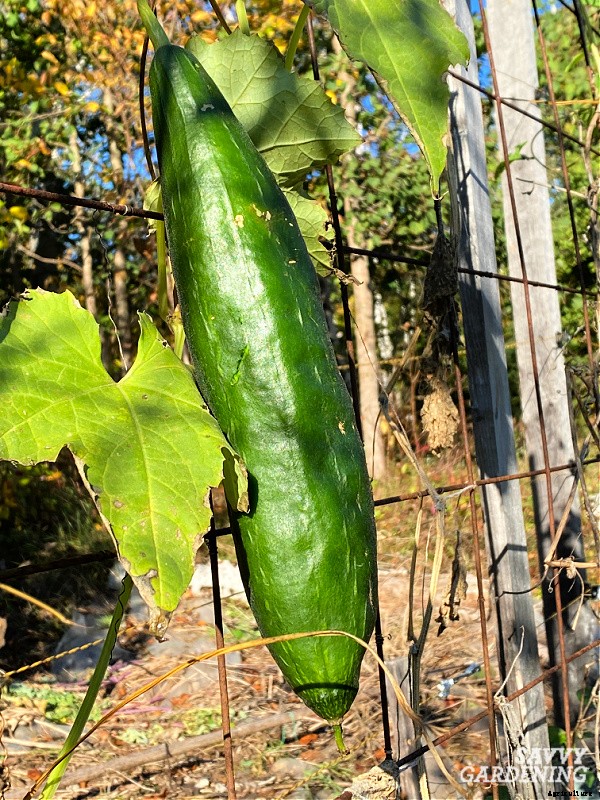
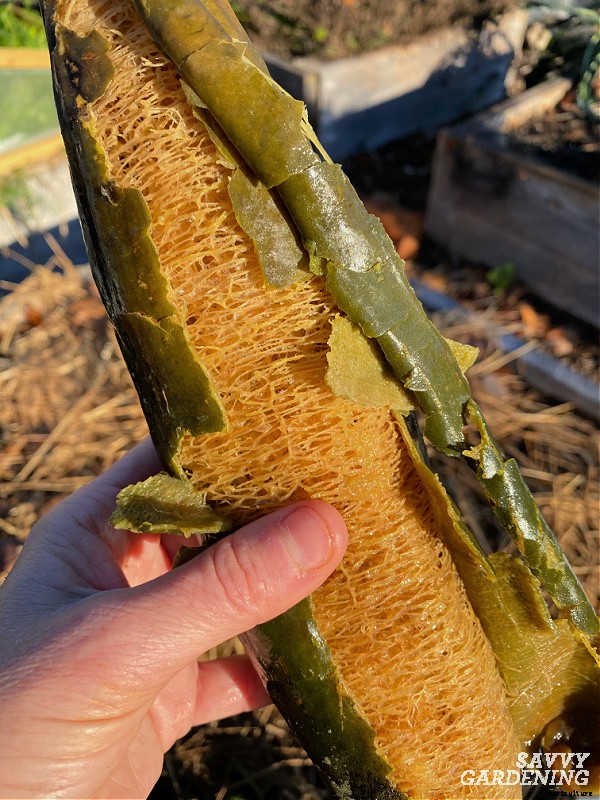
If you wish to grow your loofah gourds for sponges, let the fruits mature on the vine. They’re ready to pick when the skin has turned from green to brown or yellowish-brown and the gourd itself feels light when lifted in your hand. In short season climates like mine, sometimes a hard frost is forecast before the gourds have completely browned. In that case, I pick all of the fruits and bring them inside to be processed. Frost can damage the gourds and reduce their quality.
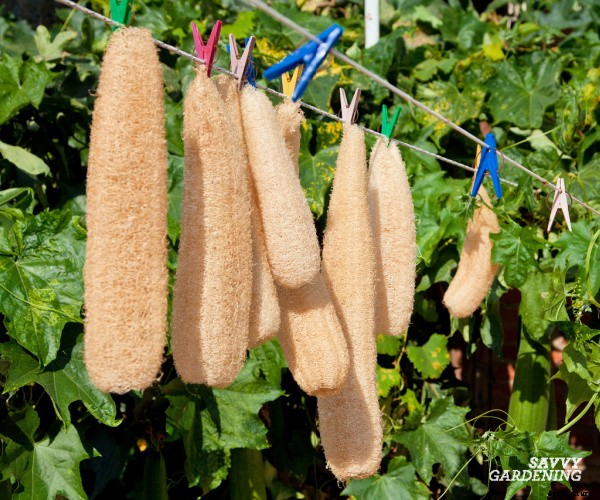
Before you can start using your homegrown loofah sponges, you need to process the mature gourds. Here are four steps to cleaning and drying the sponges.
Use your homegrown loofah sponges in the bath and shower. Tie a cord to the sponge for easy hanging in between showers. You can also DIY loofah gourd soaps from your garden-grown loofahs. These are perfect for scrubbing dirt-caked hands after a day in the garden. Of course loofah sponges are also handy in the kitchen for scrubbing pots and pans.
To read more about growing unique veggies be sure to check out these articles:
Are you growing loofahs in your garden this year?