
Welcome to Modern Agriculture!

By Matt Gibson and Erin Marissa Russell
One of the most perfect vegetables to grow in the fall garden, rutabagas are a natural cross between the cabbage and the turnip. Rutabagas were one of the first crops that were used as Jack-o-lanterns, often carved for decorative purposes just like pumpkins. They ripen during cool autumn weather and their best flavor only develops after a little bit of exposure to frost.
Known by a long list of names, most of which refer to them as some kind of turnip, the Rutabaga is also known as Russian turnip, Swedish turnip, Swedes, winter turnip, yellow turnip, and Canadian turnip. The turnip names are given to the rutabaga for good reason, as the two plants are very similar, both in overall appearance, and in growing environment and care needs. They are both great additions to soups and stews and they both can be cooked or mashed and paired with meats for In fact, some people use the terms rutabaga and turnip interchangeably, thinking that turnip and rutabaga are the same plant.
Despite their similarities, rutabagas and turnips are two different plants. Turnips produce a more potent flavored vegetable with white flesh, and rutabagas produce round, firm roots with sweet, yellow flesh. Though they are both members of the cabbage family, the two vegetables have some distinct differences.
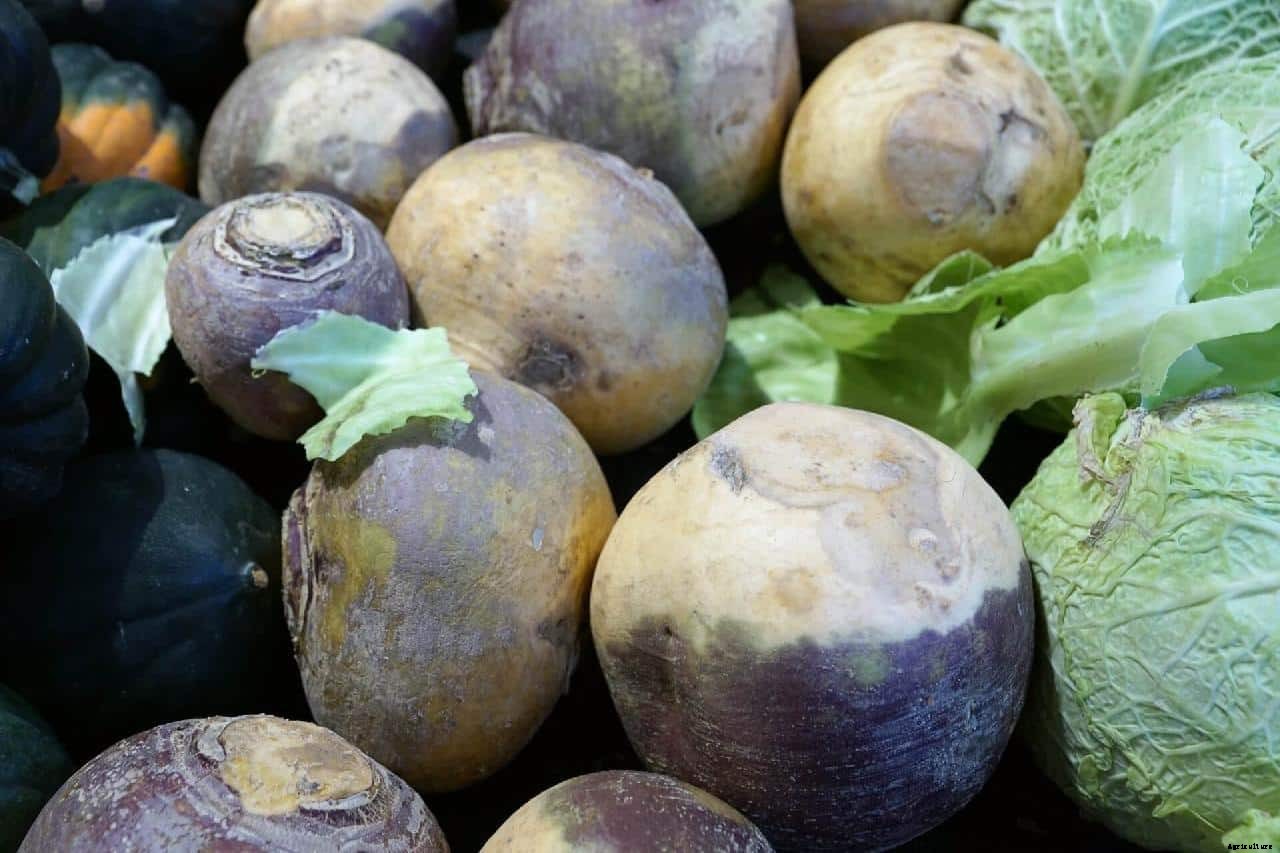
Rutabagas are typically yellowish or brownish and are usually much larger than turnips. Turnips are generally white and purple and are harvested at a much smaller size than the rutabaga. Turnips can be grown in a variety of climates with success, but rutabagas are a cold weather crop that will not grow in warm climates.
There are about a dozen different types of rutabagas available to modern gardeners. Here, we have gathered together a little bit of information on some of the most popular cultivars to help you decide what varieties to grow in your garden.
Laurentian – This Canadian heirloom rutabaga cultivar is one of the more popular varieties for several reasons. It is attractive, easy to grow, mild flavored, and one of the smaller rutabaga options perfect for container gardening or for small garden spaces. The Laurentian rutabaga produces small to medium-size roots ranging from four to six inches in diameter. The eye-catching roots are cream-colored with red tops. This variety matures in 100 days, stores well in cool storage areas, and self-seeds in the garden.
American Purple Top – Often confused with Purple Top Turnips, this rutabaga cultivar can be identified by its yellow or cream-colored bottom, as opposed to the white-bottomed turnip variety. The flesh of the American Purple Top turns a deep-orange when cooked and is a great choice for winter storage. Maturing in 90 days, this cultivar produces large, uniform roots and self seeds in the garden.
Joan – Well suited for fall harvesting, this disease-resistant, purple-topped cultivar produces round roots in 120 days. When harvested early, roots are mild and sweet, but should be left in the ground through the first frost to improve the flavor.
Nadmorska – This Lithuanian cultivar is more elongated than the more common varieties (Laurentian and American Purple Top). These early maturing rutabagas are large, round but slightly elongated, quick to mature and prolific producers. The Nadmorska rutabaga produces large, green-topped tubers with golden flesh and a slightly more mustard forward flavor than purple top varieties.
Marian – A great selection for late summer and early fall harvesting, the Marian cultivar matures in 85 to 95 days, producing large, yellow tubers with purple tops. The Marian rutabagas grow up to eight inches in diameter and store well in cool storage areas like root cellars.
Other Heirloom and Gourmet Rutabaga Varieties:
Champion A Collet Rouge – Excellent fried or roasted, this cultivar boasts a subtle sweet flavor from yellow roots with purplish-red tops. Popular with gourmet chefs.
Collet Vert – Yellow roots with green tops, favored by gourmet chefs for its rich flavor and colorful appearance.
Wilhelmsburger – An elongated (not round) German heirloom variety with a strong flavor, green skin, and yellow or golden flesh.
Gilfeather – This American heirloom is coveted for it’s sweet flesh and delicious green tops. It has golden root-bottoms with green tops.
Helenor – Known for high yields
*Macombers – Several cultivars with white bottoms and bright green tops.
Long Island Improved – Has a small taproot but large bulb
Sweet Russian – Very frost tolerant, due to its habitat.
Pike – Also quite frost tolerant, this variety can be left in the field for multiple light frosts which will greatly improve its mildly sweet flavor.
*There are several different Macomber cultivars, and there is some debate over whether they are turnips or rutabagas. Their white flesh points to turnips, but their sweet taste points to rutabagas. Grow them and decide for yourself.
Rutabagas are biennials commonly grown as annuals in the US, and will often go to seed in the first year if they are planted in the spring. Rutabagas enjoy full sunlight but can tolerate partial shade. They prefer a nutrient-rich, well-draining soil with a slightly acidic pH in the range of 6.0 to 6.5. Good soil fertility is required to help them thrive during a long growing season. Well-draining soil is essential to avoid bulb rot issues.
Plant rutabagas in early summer or midsummer, allowing ten to 12 weeks of growing time before the first fall frost in your area. Start seedlings indoors during especially hot summers, setting them outside when it’s cloudy. In cool climate areas, direct seed in the ground and thin to every eight inches once seedlings have germinated.
Pick a location with full sun and prepare the soil before planting by digging in a good amount of organic fertilizer or well rotted manure. Too much nitrogen can stunt bulb formation, so only use half of the product’s suggested amount when preparing your beds, waiting to apply the other half until several weeks later, after the plants have been thinned and the beds have been treated for weeds.
Keep an eye out for boron deficient soils, as rutabagas are very sensitive to boron deficiency. If you think your soil might be lacking in boron, sprinkle some borax into the planting row or mix some borax with water during a single watering while your plants are still young. Either way, be careful not to add too much borax, as it is highly concentrated, and each plant only needs a few pinches.
Plant seeds 2 inches apart and one-half inch deep in rows spaced 14 to 18 inches apart. Allow four to seven days for germination. After germination, thin to eight inches or more between each plant. Overcrowding your rutabaga plants will cause excessive top growth and stunted roots. Rutabagas are a cool season crop and they will not stand high temperatures for extended periods. Sustained temperatures over 80 degrees F will cause plants to bolt prematurely.
Provide at least one inch of water per week to ensure proper root development. More water may be needed during particularly hot or dry weather periods. If rutabagas are exposed to extended dry soils, they will crack and won’t become sweet as they mature. If you amend your soil before planting and start the season off with lots of organic matter in your beds, you won’t need to add any fertilizer during the season. Side dressing with well-rotted compost around mid-season will give them a nice boost that will get them through to harvest time.
Rutabagas are propagated by seed, and if planted in the spring, most varieties will readily self-seed if left in the ground.
Caring for your rutabaga crop well and ensuring they get the sun and soil type they need will go a long way toward preventing issues with pests and disease. However, even the most careful gardener is bound to experience an infestation or plant disease now and again in his or her garden. Rutabagas often deal with many of the pests and diseases that cabbages and other brassica crops struggle against. Here are the most common problems people experience when growing rutabagas, along with tips on what you can do to resolve them.
Rutabaga greens can be harvested anytime after they reach four inches tall. If you take care not to harm the bulb during harvesting, greens will continue to grow for multiple harvests. Garden grown rutabagas tend to be more top-heavy than round, as the roots start to push up as they gain size. You can start harvesting rutabaga bulbs when they get to two or three inches in diameter, but keep in mind that larger bulbs will have better flavor, but can grow a bit tough. Early harvested roots at two to three inches in diameter will be very tender, but mild in flavor.
Rutabagas are also sweetened by a little bit of frost. For optimal taste, wait until bulbs are four to five inches in diameter, and have been exposed to one or two light frosts. You can dig them up in the fall, or in late winter in warmer areas, or leave them in the ground to experience a few frosts.
If you choose to leave them in the ground, protect them with a thick layer of straw mulch. As long as they are protected with a thick mulch layer and there is no hard freeze on the horizon, they will be fine left in the ground and harvested as needed.
Rutabaga foliage is edible, but most people prefer young leaves or the nutrient and antioxidant-rich sprouts instead. Before storing rutabagas, the foliage should be cut to within one inch of the crown with a sharp, clean knife.
Once your rutabagas have been harvested, do ot wash them until you are ready to use them. You can store your rutabaga crop in plastic bags, either in the refrigerator or in a cold cellar, for months at a time. Make sure to store them well away from raw meat products that may drip juices onto the vegetables and contaminate them. When you are ready to prepare your rutabagas, scrub them well with a vegetable brush and cool or warm water (not hot water), and use a vegetable peeler to remove the outer peel.
If you have more rutabagas than you can eat before they will spoil, there are several ways you can preserve them. Canning is usually a good way to store homegrown vegetables, but rutabaga should not be canned, as their color and taste will change, making the flavor extremely strong. Instead, freeze any rutabaga you need to store long term.
To freeze your homegrown rutabaga, peel them and cut them into cubes, then blanch them in boiling water for three minutes. (To blanch, simply bring a pot of water to boil, then drop the rutabaga cubes in for exactly three minutes. Remove them with a slotted spoon, and transfer them to an ice water bath to stop the cooking process.)
Once the rutabagas have cooled, move them to a colander or rack where they can drain. Then load them into either freezer safe plastic zipper bags or freezer safe plastic storage containers, and put them into the freezer, labeled with the contents and the date. They will be good to eat for six months to a year after freezing them this way.
Considered a mix between a turnip and a cabbage, rutabagas were originally cultivated to feed livestock until humans recognized their nutritional value and appealing flavor. High in nutrients, dietary fiber, and antioxidants, and low in calories, rutabagas quickly found a role in the culinary world. Rutabagas, like other root vegetables, are high in anticarcinogenic compounds.
They are also a good source of vitamin C and several B vitamins, as well as several essential mineral compounds. Their nutritional value and low caloric content have earned them a place at the table as well as a spot in the garden.


