
Welcome to Modern Agriculture!

For you DIY-ers out there, we have the perfect project on the agenda today: a raised bed hoop house. These are essentially roofs that top the walls of your raised garden bed.
With a garden hoop house, your plants will be protected from outside dangers with little maintenance on your part. Not to mention, these houses are perfect for an extended and delicious year-round harvest!
We’ll walk you through the process of building your hoop house and get you set up for success.
Good Products At Amazon For Building Your Hoop House:
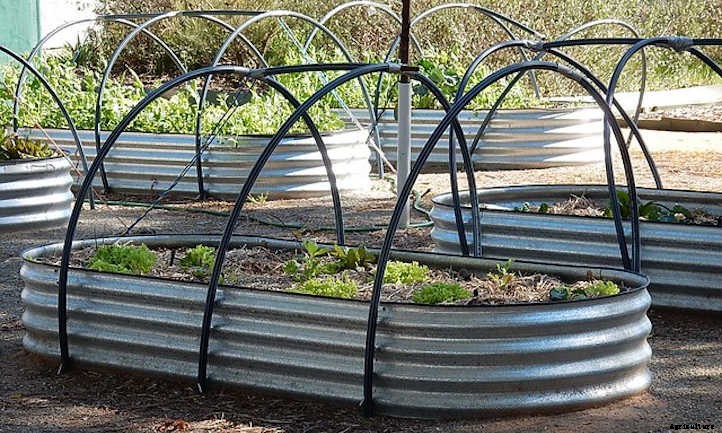
A hoop house is a type of garden bed cover that has a “hoop” shape. The supports are bent around the top of the garden raised beds, creating a dome-like space inside. This shape holds up the cover material, be it plastic, netting, or fabric.
Some hoop houses are hinged or retractable, which provides easy access to your plants. The style and dimensions you choose should depend on the type of raised garden bed you have. In this article, we’re going to focus on a hoop house designed for the Birdies raised beds. If you don’t have garden beds picked out yet, we highly recommend these for their durability and customization options (you’ll love them!).
If your backyard experiences cold weather, choose hoop houses. If wandering wildlife likes to munch on your plants, choose hoop houses. If you want a greenhouse effect… well, you get it.
There are countless benefits to these covers. Perhaps the most common reason for building them is to extend the growing season. By covering up your plants in the fall, you’re protecting them from frost. This is especially useful for fall veggies that wouldn’t survive that long otherwise.
When made from the right material, these covers work as cold frames. In fact, they’re so effective at keeping roots warm that you may be able to grow crops year round if you live in a zone with mild winters.
We mentioned that there are many styles of bed covers out there, so why choose a hoop house in particular? These structures are popular for two reasons: they’re easy and inexpensive. You can build your own in a single afternoon while spending less than you did at the nursery last spring. Plus, their tried-and-tested structure holds up well in most conditions and takes little maintenance.
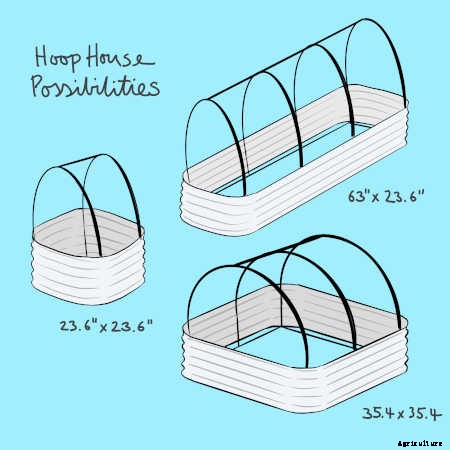
We’ve designed a DIY hoop house that can be customized to whatever shape the Birdies raised garden bed has been built as (there are many configurations!). This cover anchors underneath the soil inside the bed and has a removable top that’s perfect for keeping your plants warm and happy. So let’s get started on this fun and easy hoop house!
Take a good look at your garden raised bed. How many hoops will fit across it? Where do you want to access the plants from? It may help you to do a quick sketch of what you expect the hoop house will look like on your bed. This design is meant to be customized to fit your garden raised beds, so don’t be afraid to change things up!
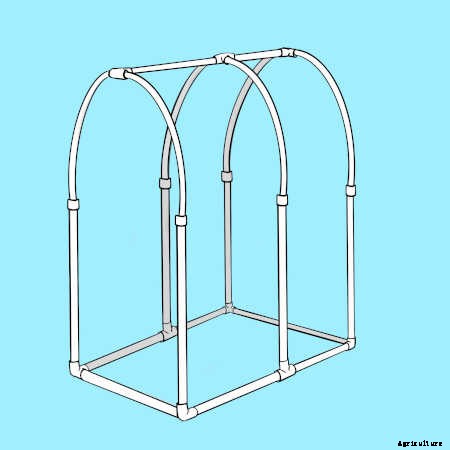
In this plan, we’ll be setting the base inside the beds before the soil. Because of the rectangular base that sits on the ground, the vertical supports will stay up on their own while you’re filling in the soil. They’ll also be more grounded, providing great support for the hoops.
If your garden raised bed is already filled, no need to worry! Simply skip steps 2 – 4 when making the base. Insert the supporting, vertical pipes into the soil and pack them in tight. This should still be enough to keep the structure strong – especially if you use a larger diameter of pipe for this part.
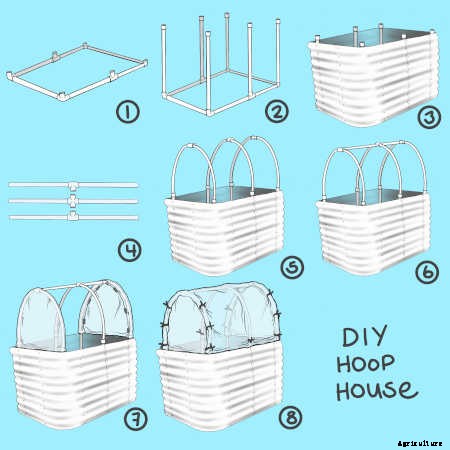
Congrats! You now have a fully functioning hoop house! To access your growing plants, simply remove the clamps on one side, lift up the material, and clamp it out of your way. If later in the season you decide to remove the top entirely, just disconnect the hoop portion from the base fittings (you may need to use a demount clip). In the meantime, plant some seeds and watch your garden grow!

