
Welcome to Modern Agriculture!

This guide on how to grow kabocha squash will teach you how to start kabocha squash seeds, transplant seedlings, and harvest kabocha squash.
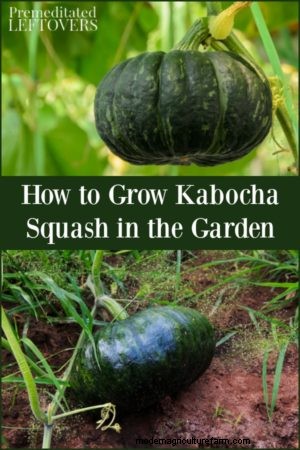
If you are not familiar with kabocha squash, it is a smaller squash with what some would consider a nutty flavor. It can be grown all summer and harvested late fall, making it perfect for fall bisques and stews. If you are curious about growing kabocha squash, look below at some helpful planting and harvesting tips. These tips on how to grow kabocha squash can help you grow a crop you can be proud of.
Because kabocha squash isn’t one of the more popular types of squash, you might have a hard time finding seeds or seedlings at your local gardening center. Using a reliable internet seed company is ideal for getting your hands on quality kabocha seeds.
Start your kabocha squash seeds indoors about 4 weeks before the last frost of the winter/spring season. When planting, you should use peat pots that can be planted directly in the ground along with the seedling. Kabocha squash plants aren’t crazy about being transplanted, so this will help keep disruption to the roots to a minimum.
When planting kabocha seeds, make sure you use a nutrient-rich soil, keep the soil moist at all times, and provide the seeds with at least 6 hours of direct sun per day.
Once the outdoor soil temperature has reached a steady 70 degrees and all threats of frost have passed, then you can prepare to transplant the kabocha squash seedlings. Choose a space for planting that gets partial to full sun, has soil that drains well, and has ample space for the squash to grow. Because this is a vining plant, you can plan on it spreading out and don’t want other plants in its way.
Your kabocha squash seedlings will be planted using the mound method, which is most common with other squash varieties as well as pumpkins and melons. To plant the seedlings, create a mound around 3 inches tall. You want the mound to be at least the length of the root of your seedling and at least 3 times the width.
Place the kabocha squash seedling in the mound and pile some loose soil around it. If your seedlings are at least 3 inches tall, one seedling per mound will do. If your seedlings are still quite young and small, you can add up to three and then thin out the weaker seedlings in a few weeks.
Once your kabocha squash seedlings have been planted, use some compost around the mound to add some nutrients to the soil, and place some mulch around the base of the plant to help keep roots moist.
Because of the amount of space that kabocha squash plants need to grow, it is not advised that you plant them in containers. Spacious raised beds will work for this plant, but any type of container should be avoided as the roots and vines won’t have the space they need to thrive.
Now that the mounds have been created and your kabocha squash seedlings are planted, you will need to provide them with regular care. Kabocha squash plants like to be watered evenly, so keep that in mind when getting out the hose. Apply water directly to the base of the plant to better feed the roots and keep the outer foliage from burning.
Apply a thick layer of mulch around the base of your plant, as this will help keep the soil cool. This is a cooler weather plant so avoiding overheating through even waterings and mulch is key.
As far as pests, your kabocha squash may be susceptible to squirrels and even raccoons who want to nibble. Providing adequate garden fencing can help keep those pests out. You can also find some over the counter pest sprays that are supposed to repel larger garden pests such as those.
Aphids, slugs, and certain varieties of worms and beetles may also be on the prowl. It is always best to remove these pests by hand when you see them, then use a natural or food safe pest control spray to keep them away.
When this squash is ready to be harvested, you will notice that the stem around the squash will start to shrivel and dry. It is smart to cut the squash from the plant right before the first frost of winter. When you cut the squash, be sure you are leaving at least 2 inches of the stem intact. Allow the kabocha squash to remain outdoors and harden for an additional week, as long as the weather is permitting and there is no threat of frost.
Kabocha squash can be grown right up until winter hits, making it the perfect fall garden addition. Consider these tips on how to grow kabocha squash and see why you should add it to your gardening line up!


