
Welcome to Modern Agriculture!

I garden in a mountain area, and frost often takes us by surprise here. Knowing this, it’s important to prepare our raised beds for winter while the weather still allows it. Many plants and winter greens are still going strong, but as nights get cold, I know we’ll be dealing with frosts and snow soon. I used to think winterizing your garden was something that you would do all at once. Actually, it’s more of a process. If you’re new to it, fear not: it’s a lot easier than you think.
When preparing your raised beds for winter, you need to follow these steps. Firstly, pull out any weeds. Then remove the annual plants and either chop&drop them onto your raised beds or put them in the compost pile. Lastly, feed your soil with a layer of compost and optionally use a cover or mulch on top.
There’s a lot of work and knowledge that goes into each step of preparing your raised beds for winter. It goes much deeper than just clearing out surfaces. Our goal is to imitate nature’s way of preserving the soil’s fertility. You should also pay attention to other tasks – like protecting your winter greens from the frost or mulching your perennials. Ready to learn more?
Freeing up the raised beds is a gradual process. If it looks overwhelming, consider that you’ll most likely do it one bed at a time. Some plants like hardy greens or leeks will continue to grow well into the winter and keep some of your raised beds full.
The first plants you need to get rid of are weeds. Do your best to pull all the large weeds out entirely, trying not to leave any roots behind. You can remove any small weeds by hand or use a Dutch Hoe to displace them from the soil.
Don’t be afraid to throw weeds into the compost heap. If your compost pile is big enough it will heat up and kill all the weed seeds.
Next, remove your annual plants like peppers, tomatoes, peas, beans, etc. Try not to pull the plants out of the ground so as not to disturb the soil. Instead, use pruning shears to cut them at the base. Leave the roots to break down and provide nutrients for the earth.
You can throw your plants in the compost pile. Another option is the chop&drop method where you sprinkle them onto your raised beds to help them decay faster. If your plants have signs of disease, such as powdery mildew, you can still throw them in a compost heap. The heat from the compost is usually high enough to destroy the pathogens. If you don’t feel comfortable doing that, either burn them or get them to the municipal compost area.
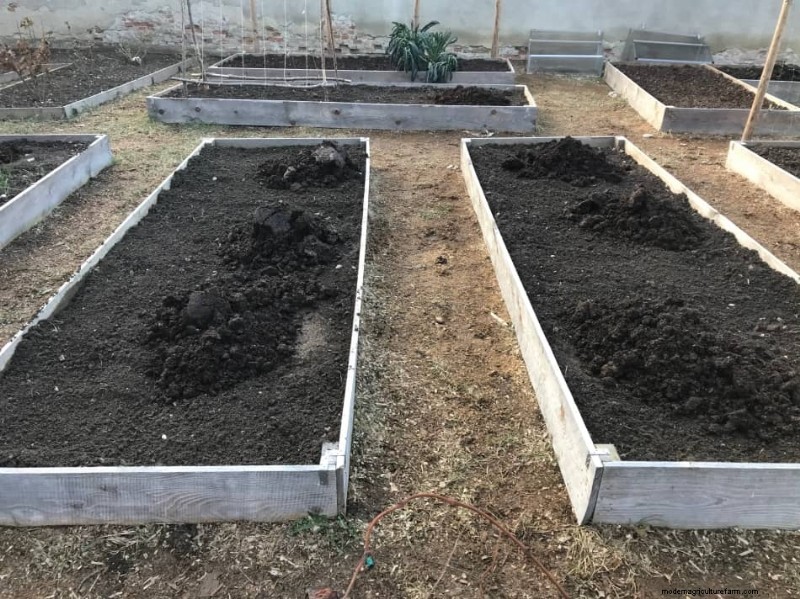
After clearing your raised beds, give the soil a light rake. When using the no-dig method, it’s essential not to disturb the soil’s microorganisms by excessive tilling or mixing in materials.
Modern farms typically fertilize their soil in spring, but in nature, autumn is when things break down naturally. Autumn is the perfect time for enriching your soil with fertilizers such as manure or compost.
Don’t mix the compost in! Nature’s way of enriching soil is in layers. Mixing in compost, manure, and other elements will disturb the ground. This could cause something called nitrogen tie-up, or what we call in gardening terms, giving our soil a stomach-ache.
Evenly apply a layer of at least 4 inches of compost on top of your raised beds. If you prefer to use wood-chips on your raised beds, I would recommend that you first add a compost layer. Next, add wood-chips or the mulch of your choice on top.
Adding mulch on top of your compost, however, is not necessary. If you have quality compost that is weed-free, it will act as a mulch, retaining water and protecting your soil. Compost is also a natural weed suppresser if you add it in a layer that’s thick enough.
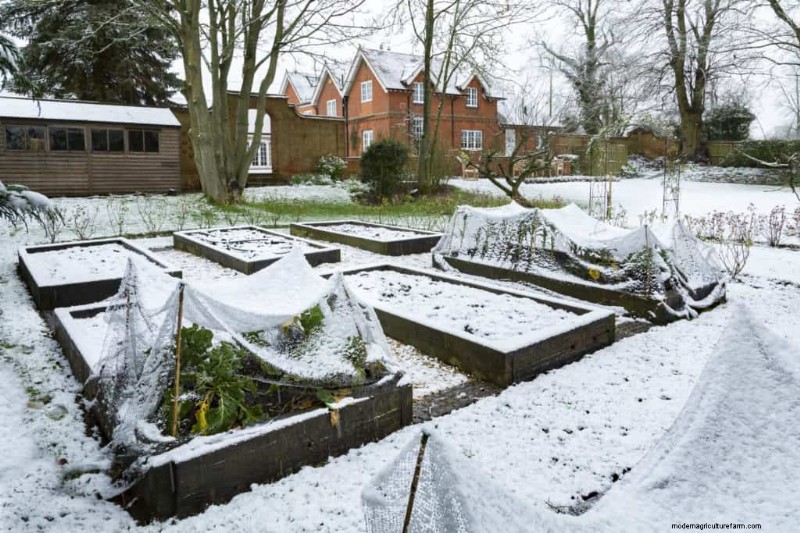
Once you add the compost, covering your raised beds is optional, and it depends on the area you’re in. Here are some benefits of protecting your raised beds that will help you decide how to prepare your raised beds for winter:
You can use 2-3 layers of cardboard, multiple layers of newspapers, black plastic, or synthetic covers. Non-degradable covers aren’t very eco-friendly, but it would be a shame not to use them if you already have them around. After putting the covers in place, make sure you secure them with rocks or something heavy that will prevent the wind from blowing them away.
If you’re a new gardener, you’ll soon wonder about the possibilities of having some veg all year round. In late autumn, there are likely some cold-hardy crops still left in your garden.
You won’t be able to clear the beds and spread compost on the sections that contain overwintering plants, like kale and leeks, but don’t worry. You can still use compost in between your kale plants, and if your climate is mild enough to overwinter leeks, you’ll take care of the leek bed in February after harvesting them.
Right before the first frost, make sure to cover your winter crops with hoops and a few layers of horticultural fleece. Sowing them inside a cold frame in early autumn is even better. They’ll continue to grow slowly through the winter months and provide you with precious salad leaves.
Late autumn is also the time to mulch your perennials to protect them from the cold and stake your tall overwintering plants such as broccoli to protect them from high winds.
Taking care of the pathways is a great finishing touch that will dramatically improve your garden’s look and feel. If you have grass on your garden paths, it’s time to give it one last cut and trim the edges.
If your pathways are mulched with woodchips, this is the perfect time to supplement them with an additional layer. This will suppress the sunlight necessary for weed growth in spring. You’ll still have weeds, but not nearly as many as you would if you skipped this step.
Autumn and winter are great times for DIY work in the garden since you no longer have to deal with plants all the time. You can create new raised beds, trellises, and work in repairing and reinforcing old raised beds.
Nature will take care of your garden, whether you prepare your raised beds for winter or not. Earthworms and microorganisms in your soil will break down roots, and dead leaves, while all the spent plants will act as mulch. However, keep in mind that if you don’t optimize this process yourself, come spring, you will have a lot more work to do.
There’s nothing more satisfying than starting everything with a clean slate. That’s why gardening is so great: we learn from each season and then have the chance to do it again the following year.
Take the extra step to prepare your raised beds for winter thoroughly. When your seedlings are ready to go in the ground in spring, all you’ll have to do is pull the covers and start gardening: no digging, no weeding, no soil mixing – this is the beauty of the no-dig method and a little bit of foresight.
It’s time to put your small garden to bed so that it can be teeming with life again, and now you have all the resources to do it. Happy gardening!


