Welcome to Modern Agriculture!

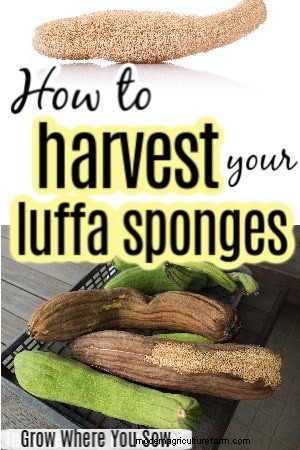
Harvesting my luffa sponges was a bit of a confusing endeavor. I read so many “How-To” articles and felt they were pretty misleading in ways. The truth is these little cucurbits and their gourd family is bewildering!
I’m going to explain to you what I’ve learned about harvesting luffa sponges. I’ll also let you know how I did it; what worked for me and what did not.
Keep in mind that you might find a different method that works better for you – and that’s fine. This is a great starting point if you’re starting out in the luffa club.
Table of contents
I told you all I’d be back about harvesting when I wrote about growing luffa sponges. Harvesting time does not have to be stressful like it was for me and harvesting loofah gourds can be fun.
After all the reading I did without finding what I was looking for, I was so frustrated. Additionally, I was scared to harvest my gourds!
I wondered if I was going to harvest them to early, or too late, and ruin them. Growing luffas had been such a fun activity and I didn’t want all my energy put it to go to waste.
So, I decided to start in phases when my gourds started changing colors and try to find what worked. This was a great decision because now I can let you know what worked for me. You can avoid the frustration I experienced!
Enough chit-chat, though. Let’s learn how to harvest our luffa sponges today without letting our gourds and energy go to waste!

You can’t go by color alone when it comes to harvesting loofahs sponges. That is slightly aggravating.
When reading about harvesting loofahs, you’ll read to only pick your luffas when they’re brown and dry on the vine. You’ll also read to only pick them when they’re still yellow/green.
In my experience, you do not want them dried up and hard hanging on the vine. This means your luffa sponge is more likely to already be molding (at least if you live in Central Florida).
Instead, look for gourds that are turning from green to yellow, making their way to a brown luffa.
With mine, a little brown was okay. Once they started to brown, I took them down.

Harvest your loofah sponge before it has completely dried out. Keep an eye on your luffa plants so they stay healthy and don’t dry out. Your loofahs will have a slight “give” when you squeeze it and be anywhere from 6-12 inches long.
If the gourd feels pretty soft and squishy, leave it a day and check again tomorrow. Pick the luffa if your luffa sponge feels like it’d be pretty hard if you waited a day!
The browner your gourds get the harder they will get. I read this was the perfect time to pick them. As mentioned before, this method always meant more mold in my sub-tropical climate.
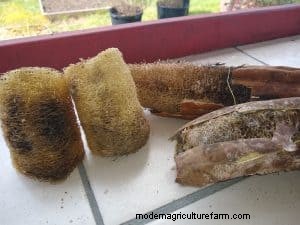
The confusing part comes when I tell you the very first luffa sponge I ever harvested was rock hard.
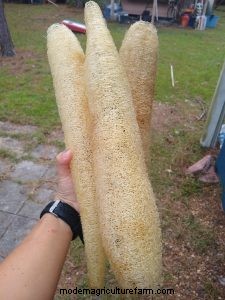
It sounded like a maraca when I shook it from the seeds; this luffa revealed no mold when peeled!
For the rest of the luffas I waited to peel, they looked like this:
After harvesting your luffas sponges using a pair of pruners, you’re ready to peel them!
First, you’ll want to hit the gourd on a hard surface a few times to loosen the seeds.
Next, cut the bottom end of the luffa sponge off. To be clear, this is the end that was not attached to the vine.
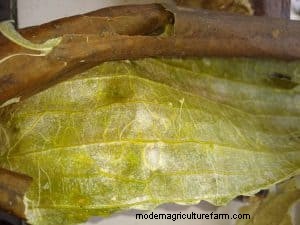
If your gourd is extremely dry and sounds like a rattle, the seeds will fall out quite easily. My luffa sponges needed to be harvested a little sooner than that. It was a little more difficult to get the seeds out when peeling them immediately.
Grab some bypass pruners, cut down the inside of the luffa flesh and peel the skin all the way off! They’ll be much harder to peel if you wait until they’re completely dried on the vine.
If you find your luffa sponges are difficult to peel, fill a vessel with water and soak your gourds for 2-5 minutes.
Soaking your luffa sponges with the skin on should soften and loosen the skin, making peeling much easier.

After you’ve removed all of your seeds and peeled your luffa sponge rinse all the sap off the sponge itself.
The easiest way to do this is to get a garden house with a sprayer. Use the “pressure wash” or “jet” setting, or something close to it. You’re looking for a straight stream of water that comes out with high pressure.
Spray your sponge up and down until the slimy feeling has gone away. There’s no reason to be super persnickety doing this. You’re going to use your sponge in the water later anyway and the sap won’t harm you.
But just get as much out as you can anyway so it’s one step completed. You’re also removing any extra dirt or plant particles while spraying the gourd.
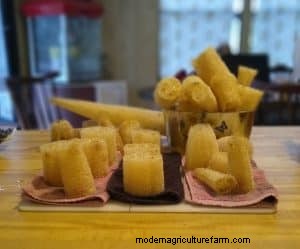
After you dry your luffa sponge, you’ve successfully harvested your luffa sponges!
I laid out a couple of towels on my kitchen counter, put my luffas on top of them and patted them down with another towel. You can also elevate them with some baking racks if they’re saturated.
Over a day or two, rotate your sponges and pat/squeeze them dry (be gentle). Once they’re completely dry, they’re ready to use!
If you’re wondering how to dry green loofahs, the answer is ‘carefully’. When luffas are still green, they’re still quite saturated with sap/natural moisture.
If you had to pick your loofahs early, spray them well with a hose and let them dry. Check them often to make sure they don’t mold. If you can put a fan on them for constant airflow, that would be great!
Any time you can let your luffa gourds mature on the vine and avoid peeling when they’re green, harvesting with be easier.

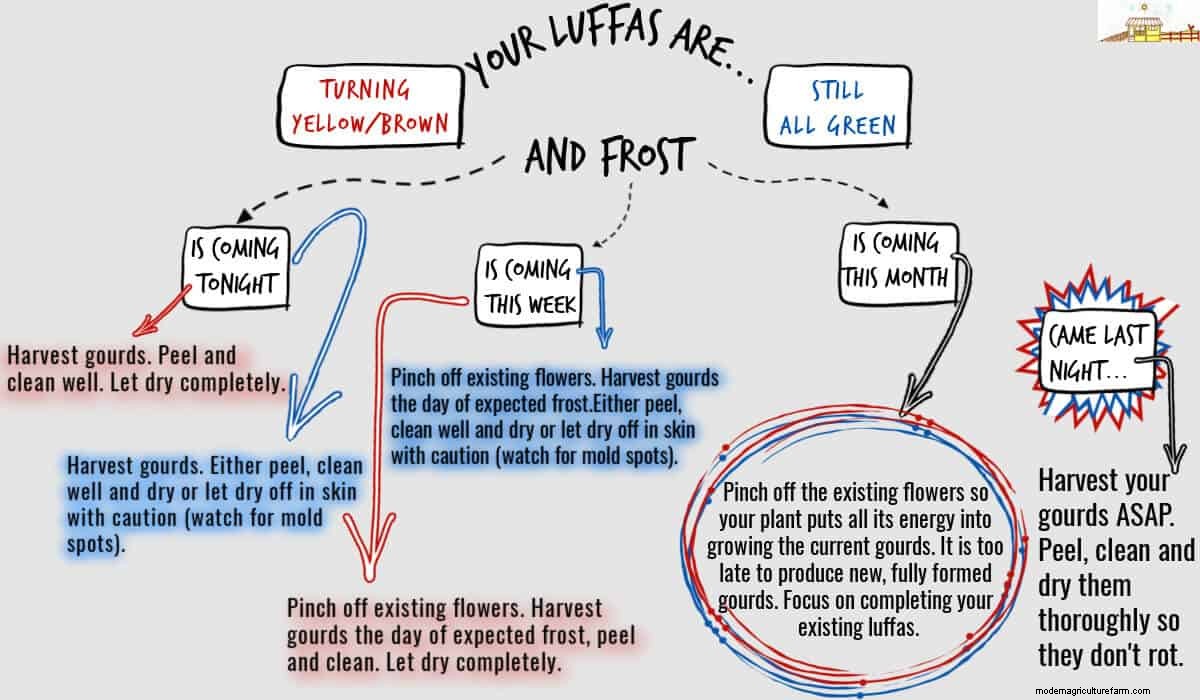
If you’ve had a fruitful luffa season but are expecting danger of frost, here are a few tips for saving your loofah gourds!
Before we talk about your options in this situation, I want to remind you that I’m in Florida. I’ve not personally had to deal with luffas in the winter.
BUT since I appreciate you being here on my page, I did some research for you and we’re going to solve your problem. By the time you leave this page, I hope you have a plan that you feel good about!
Keep in mind that gardening is sometimes a trial and error deal. I truly hope you don’t lose your luffas.
If they’re grown but green, remember you can harvest and peel them. They’ll just be a little harder to peel and have more sap. No big deal! In any case, the longer you can leave them in full sun, the better.
Use this flow chart to figure out what your next step should be.
Have you grown and harvested luffa sponges before? How did it go and what was your method? What have you used your luffas for?
I plan to try growing other types of gourds eventually since the luffas grew so great. It’s so interesting how the processes change in with each different climate. I’d love to hear about your experience in the comments below!