Pea sprouts and shoots: A step-by-step growing guide
There’s no need to wait months to enjoy the delicious flavor of homegrown peas. You can grow pea sprouts and shoots year-round inside your home. And while you can buy sprouts and shoots from the supermarket or farmers’ market, these nutrient dense foods are quick and easy to grow indoors. Plus, you don’t need any fancy equipment to produce a bumper crop of sweet, tender pea sprouts and shoots. In this article you’ll learn all you need to know to grow your own non-stop crop of pea sprouts and shoots.
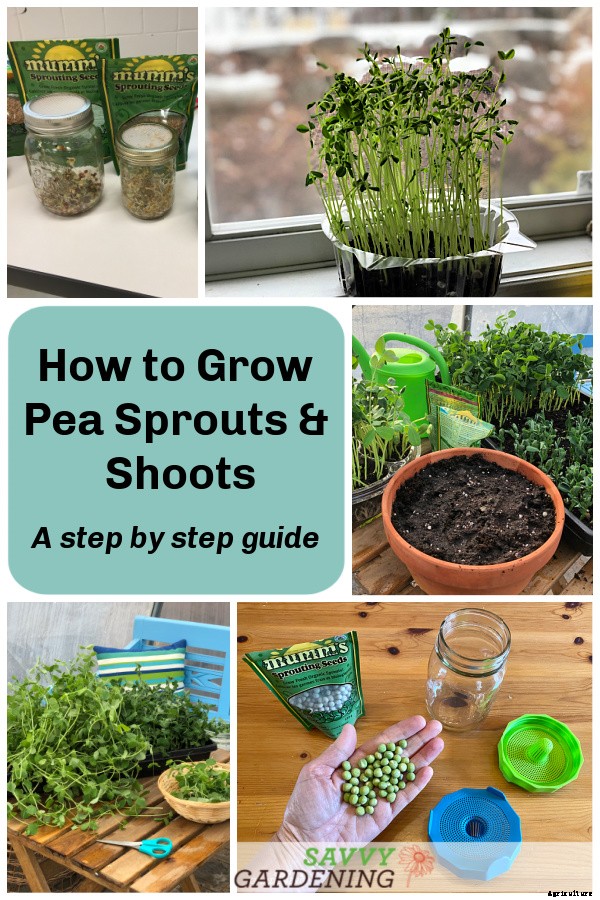
Pea sprouts and pea shoots
You may have noticed there are a lot of terms used for describing immature pea plants: sprouts, microgreens, pea tips, and shoots among others. However there is some overlap and I divide them into two main groups: sprouts and shoots.
Pea sprouts – Sprouts are the first stage in the lifecycle of a plant. They’re grown in water and harvested after just a few days when the root tip begins to grow. The entire seed and young root are consumed.
Pea shoots – Shoots are immature plants that are grown in soil. The stems and leaves are harvested after the true leaves have emerged and the plants are several inches tall. Pea shoots are ready to eat in about two to three weeks.
Three reasons to grow pea sprouts and shoots:
They’re quick and easy to grow. Sprouts need just two to three days and shoots are ready in just a few weeks. This is also a fun DIY for kids who can watch the plants grow and then eat them.
You don’t need to spend a lot of money to grow pea sprouts and shoots indoors. Sprouts can be grown in jars on the kitchen counter and shoots in pots or trays in a sunny windowsill or under grow lights.
They’re delicious and nutrient dense. Yup, not only do sprouts and shoots taste great, but they’re also good for you!
Types of peas for sprouts and shoots
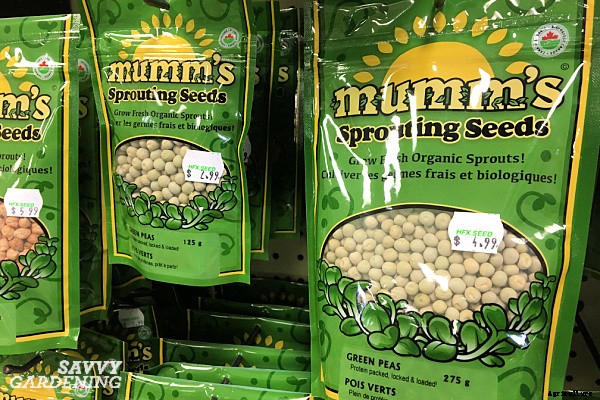
I recommend buying organic pea seeds intended for spouting or microgreens. There are many types to try and you’ll find packages of seeds at garden centres, health food stores, and online.
Dwarf Gray Sugar pea – This popular pea yields very sweet shoots, perhaps the sweetest. They’re also tender and never stringy.
Green pea – Green peas are a sprouting standard and have rounded green seeds that make excellent sprouts and shoots.
Speckled pea – When grown as a shoot, speckled peas have slender stems and leaves.
Yellow pea – Like green and speckled peas, these have a bright fresh flavor reminiscent of the spring garden. The seeds are light yellow but deepen in color when soaked.
Petite Snap-Green pea – This unique variety from Johnny’s Selected Seeds is grown for its delicate clusters of leaflets. I grow this variety indoors but it also makes an excellent outdoor container plant in spring, summer, and autumn. Harvest the tender leaflets as needed.
Tendril pea – Tendril peas produce leafy shoots but also lacy leafy tendrils that add crunch to salads and sandwiches.
Equipment for growing pea sprouts
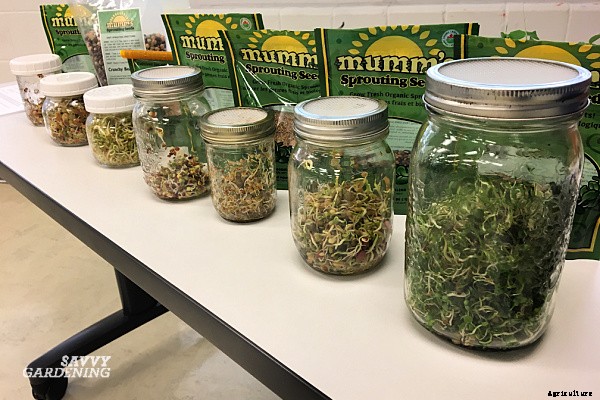
For sprouting, I like to keep it simple and use mason jars with sprouting lids. If you’ve got serious sprouting in mind you may wish to pick up an inexpensive seed sprouting system. Here are some of the common supplies for growing pea sprouts.
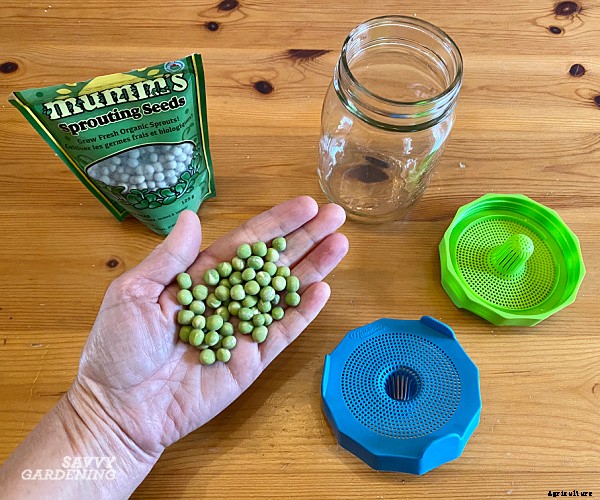
Jars – You can buy dedicated sprouting jars or use mason jars. Sprouting jars typically come with a mesh lid to make it easy to rinse and drain the seeds.
Sprouting jar lids – Sprouting lids are available in garden centers, health food stores, or online. They usually cost just a few dollars and are made from plastic or metal. Some are for standard jars, others for wide-mouth jars.
Cheesecloth – Cheesecloth or another loosely woven fabric can be cut into small pieces and secured around the top of a jar with a rubber band, twine, or string. It can be re-used, just be sure to wash and dry it between each batch of sprouts.
Seed sprouters – Seed sprouters can be round or square and may have several levels so you can sprout different types of seeds at the same time. They allow water to flow down through the layers for easy rinsing and draining.
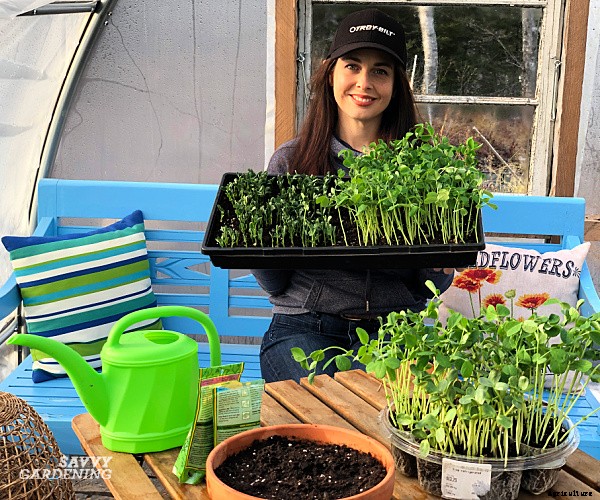
Equipment for growing pea shoots
You also don’t need to shell out a lot of money to grow pea shoots and likely have items lying around your home or garden shed that you can use – seeding trays, potting mix, and so on.
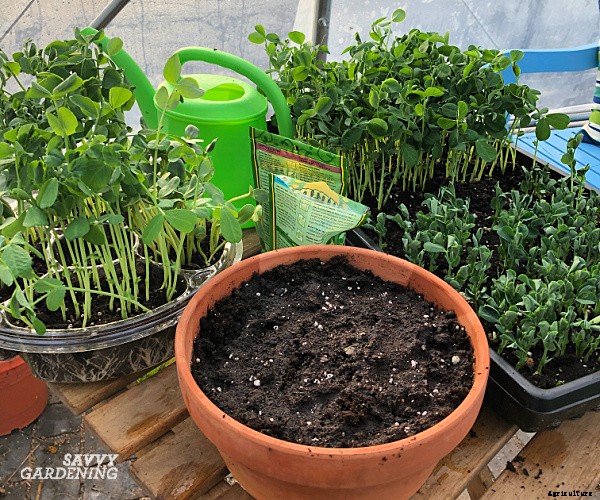
Containers – You can use any shallow container that offers drainage, but I like using 10 by 20 by 3 inch seeding trays. They’re an efficient use of space and fit perfectly under my grow lights. Plus, each one gives me about 7 to 10 days worth of yummy pea shoots. You can also use plastic or clay pots, recycled salad containers, or just about any type of container that holds a bit of soil. Just be sure the container you use has drainage holes.
Growing medium – I use a high-quality soil-less potting mix or compost to grow pea shoots.
Watering can or mister – The growing medium needs to be kept evenly moist as the shoots grow. Initially, I use a hand mister to spritz the trays every day or so. Once the seeds have sprouted, I use a watering can with a rose that provides a soft flow of water that doesn’t dislodge the seeds or flatten the young plants.
Optional items for growing pea shoots – Other items you may wish to use include clear domes or plastic wrap to hold soil moisture when the seeds are germinating, labels if you’re growing different varieties of pea shoots, scissors for harvesting, and an oscillating fan to provide air circulation in a basement or other closed off room.
Growing pea sprouts in six simple steps
I always have a couple of jars of sprouts sitting in the corner of my kitchen counter. Favorites include alfalfa, arugula, mustard, and pea sprouts. They take just a few days to sprout and we love to sprinkle them on sandwiches, scrambled eggs, salads, stir-fries, pasta, and a million other dishes. Here are step by step growing instructions for pea sprouts:
Measure the seed. I add four tablespoons of pea seeds to a large wide-mouth jar. It may not look like much but trust me, the seeds swell up as they absorb water and soon fill the jar.
Soak the seeds for six to eight hours or overnight in clean water. Once the soaking time is up, drain well.
Rinse the soaked seeds thoroughly with clean water. Drain. Cover the top of the jar with a sprouting lid, cheesecloth, or another mesh material. Or, add the seeds to a sprouting tray if using.
Place the jar or seed sprouter out of direct sunlight.
The most important step to remember is to rinse and drain your seeds with clean water two to three times a day. I usually do this in the morning, late afternoon, and before bed. Once I’ve rinsed the seeds, I drain well over the sink and then place the jar inverted on a bowl or plate at a slight angle. This helps any remaining water drain away.
The sprouts are ready to eat when you see the little white roots emerge. This takes about two to three days.
How to harvest pea sprouts
Once the pea sprouts are ready to harvest, I give them a final rinse and then lay them on a clean kitchen towel to drain and dry a bit. You don’t want to store them soaking wet as that can reduce storage life. I give them an hour or so to dry on the towel and then place them in a paper towel lined food storage container in the refrigerator. They should keep for at least a week.
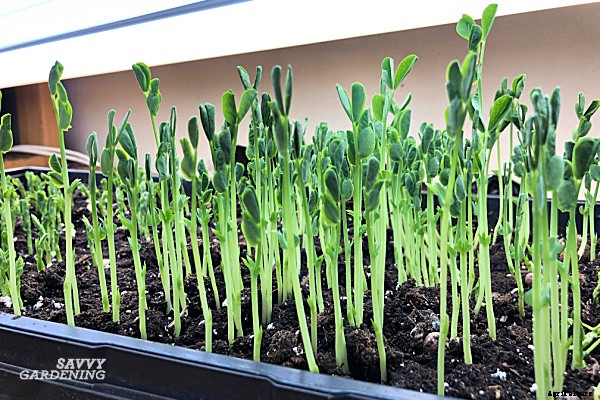
Growing pea shoots in eight easy steps
Planting a tray of pea shoots takes just a few minutes and in just two to three weeks you’ll have plenty of tender greens. Here is a quick guide to growing pea shoots:
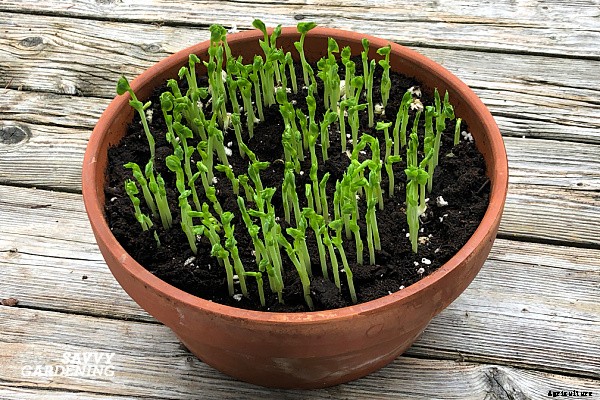
Measure the seed. For a 10 by 20 inch seeding tray I use about one to one and a half cups of seed.
Soak the seeds for six to eight hours or overnight in clean water. Cover the seeds with at least two inches of water to ensure they don’t dry out as they soak.
Fill the containers with two inches of pre-moistened potting mix, pressing down gently to firm the soil. If you have a very shallow tray, you can get away with just an inch of potting mix.
Sow the seeds densely. They should be touching or almost touching one another. Once the seeds have been spread out evenly across the soil surface, cover them with a thin layer of moistened potting mix.
Top the tray or container with a plastic dome or a sheet of plastic wrap to retain moisture and increase humidity. Remove as soon as the seeds germinate.
Place the planted seeds in a sunny window or beneath grow lights. If using grow lights, use a timer to keep them on for sixteen hours a day. If placing the tray in a window, turn it every few days to encourage the shoots to grow straight.
Use your finger to check the soil moisture daily, misting or watering if the potting mix seems dry.
Begin harvesting when the shoots are large enough to clip (see below for more info on harvesting).
If you want a non-stop supply of pea shoots, start a fresh tray every two weeks.
Watch this video for step by step instructions for growing shoots and microgreens.
Growing pea shoots outdoors
You don’t have to limit growing pea shoots to the inside of your home. They can also be planted in pots and trays in greenhouses, cold frames, or on decks and patios. In spring and fall I often start a tray on my sunny back deck. In summer when the weather is hot, I’ll place the container in a spot that offers a bit of shade.
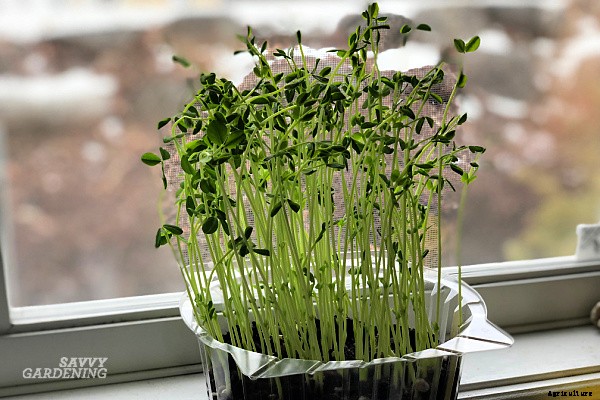
When to harvest pea shoots
Pea shoots can be scissor harvested anytime they’re big enough to clip, but I usually wait until they’re six to eight inches tall. Using clean scissors or herb snips, cut them about an inch to an inch and a half above the soil line.
I don’t typically harvest the entire tray at once, but instead harvest what I need over the course of seven to ten days. If you do wish to clip them all you can store harvested pea shoots in a plastic bag in the refrigerator. Don’t wash the shoots before storing but instead wash them just before eating. They should keep for about a week. Pea shoot plants won’t resprout and should be tossed in the compost bin once you’ve finished harvesting the tray.
How to use pea shoots
Pea shoots taste like sweet spring peas and we love to stir-fry the shoots (with a dash of sesame oil, ginger and garlic), add them to salads, sandwiches, pastas, omelets, and even smoothies. Just don’t overcook pea shoots as their fresh crunch is part of the appeal.
For more information about growing microgreens, shoots, and sprouts, be sure to check out these articles:
How to grow broccoli sprouts and microgreens
Edible sunflower microgreens
Indoor food garden ideas: 11 easy vegetables and fruits to get you started