
Welcome to Modern Agriculture!

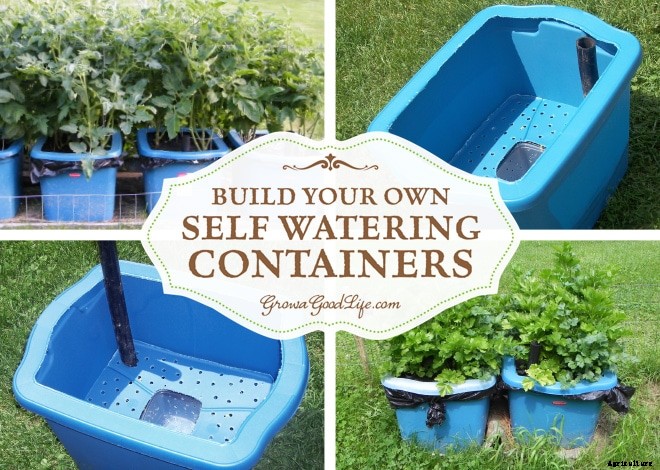
Many versions of self watering containers, also known as self watering grow boxes, self watering pots, and self watering planters are sold online, but you can make them yourself for a fraction of the cost out of some easy to find items.
This post on constructing self watering containers out of 18-gallon storage totes was originally written in May 2009 and continues to be popular. I updated the photos, copy, and added additional information.
I still use the original self watering containers each year. I have early blight in my garden soil that often reduces the health and production of my tomato plants. Growing tomatoes in self watering planters allows the plants to grow early blight free for the whole season. Celery also grows very well in self watering pots because they receive a steady moisture level. I have also grown peppers, melons, eggplant, cucumber, and summer squash in self watering containers with great success.
Self watering containers are an enclosed growing system that decreases moisture evaporation and offers a consistent water supply to your plants. It is made up of two chambers, the growing chamber and the water reservoir chamber. The growing chamber contains a wick that descends into the water reservoir that pulls water up into the growing chamber as needed for the plants.
Many versions of self watering containers are sold online. For example, this Self-Watering Planter is almost the same size as an 18 gallon tote. You can make your own self watering container for a fraction of the cost out of some easy to find items.
Materials:
1 18-gallon storage tote with lid (see notes below)
3-4 inch wide container for wicking basket
2 coffee cans to support aeration shelf (see notes below)
24-inch pipe for fill tube, one end slanted
Landscape fabric
1 black plastic garbage bag
Zip ties
1 2 cu ft. bag of organic potting mix (about 52 quarts)
Organic fertilizer
Tools:
Drill with assorted drill bits
Heavy scissors or saw to cut cover
Saw to cut pipe
Marking Pen
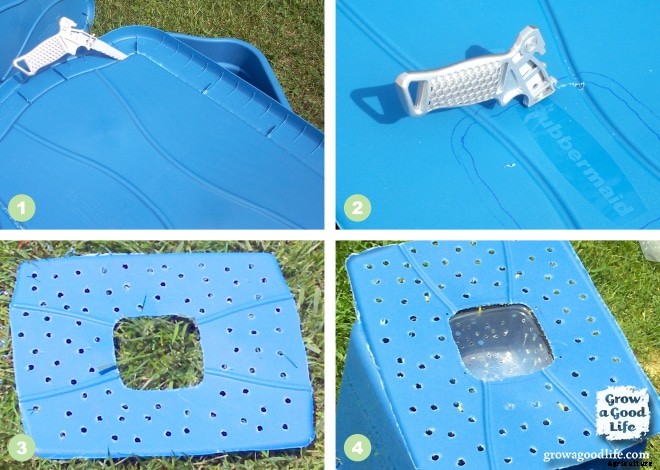
1. Remove the center of the lid. Carefully cut out the center of the lid to be used as the aeration shelf between the soil and the water chamber. Leave about two inches around the lid, so it can be used to hold the plastic mulch to the top of the container later.
2. Cut an opening for the wicking basket. Place your wicking basket at the center of the aeration shelf and trace the edges with your marking pen. Cut the opening slightly smaller (about 1/4-inch) than the outline.
3. Drill holes in the aeration shelf. Drill holes about 1-inch apart for air exchange.
4. Attach Wicking Basket to the aeration shelf. Drill holes a bunch of holes in the wicking basket to allow water to soak through. Drill holes around the edges and attach to the aeration shelf with zip ties.
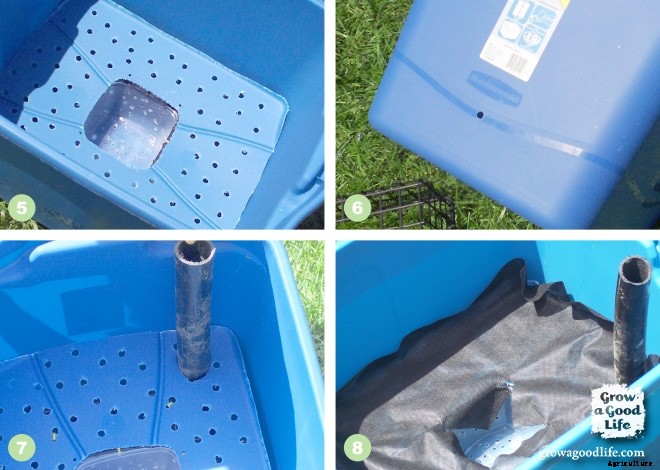
5. Check the fit. Assemble your shelf supports and aeration shelf inside the tote to check the fit. The shelf should fit snug against the tote with no buckling. Trim the shelf if needed.
6. Drill a 1⁄4-inch overfill hole about 1⁄2-inch below the aeration shelf. Water will come out the overfill hole when the container is full. The hole also allows air circulations between the aeration shelf and the water.
7. Cut an opening for the fill tube. Position fill tube, trace an outline, and cut out the hole for the tube.
8. Add landscape fabric. Trim a piece of landscape fabric to cover the aeration shelf. Try to leave a 2-inch overlap. Cut holes for the fill tube and the wicking chamber. The landscape fabric prevents the soil from dropping down into the water reservoir.
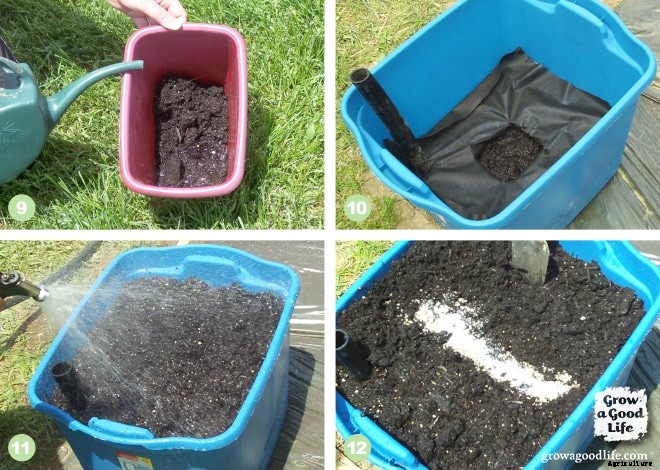
9. Add wet soil to wicking basket. Mix potting soil and water in a container until it is saturated. Pack into the wicking basket.
10. Move container to its final location. Place your self-watering container in its permanent location because it will be too heavy to move after adding the potting mix. Be sure the fill tube is easily reachable to fill with a hose.
11. Fill container with potting mix. Add the rest of the potting mix to the self watering container 3-inches at a time saturating each layer with water until the container is full. This is important, as dry potting mix will not wick water.
12. Add fertilizer. Dig a trench in the soil across the middle of the self watering planter and add 2-cups of fertilizer along the trench. Cover the fertilizer strip with potting mix and water in. Do not mix the fertilizer into the potting mix or spread it around.
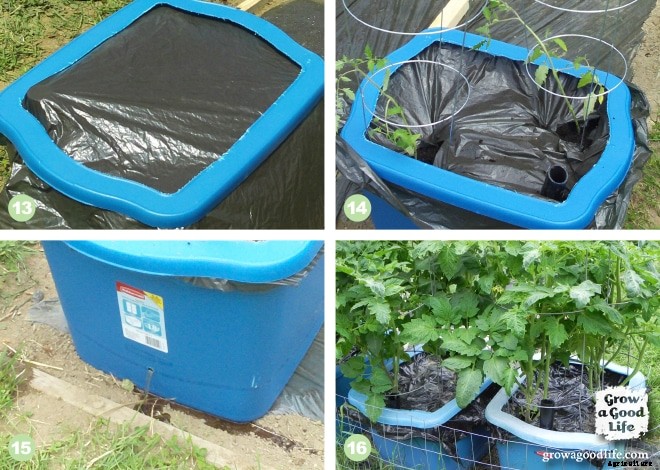
13. Layer plastic mulch. Lay the plastic garbage bag over the filled self watering container and snap on the cover. Cut a hole for the fill tube. The garbage bag will serve as a plastic mulch and help hold moisture in.
14. Plant. Avoiding the fertilizer strip, cut holes in the mulch and add your transplants. I plant two determinant or bush tomato plants in each 18-gallon self watering container, so I cut an X into the solar mulch where the tomatoes will be planted in opposite corners of the self-watering container.
15. Fill water reservoir compartment. Water through the fill tube until water comes out the overfill hole. Add plant supports if necessary. Keep water reservoir full or the wicking action will cease. Top off every day in the heat of summer.
16. Watch your plants grow and enjoy the harvest.

Recycled coffee cans used to support the aeration shelf. Note: this photo shows the shelf upside down.


