Planting a container vegetable garden is not much different than planting your in-ground vegetable or kitchen garden. The same seasonal requirements apply–plant cool-season crops in early spring or late summer; plant warm-season crops in spring and summer.
Because your container garden space is limited in size–including the depth of the soil for root growth–first, select a container that is big enough for the crop you want to grow, next choose crop varieties or cultivars that will grow well in containers. You will have success with vegetables that are described as “compact,” “bush,” or “dwarf.”
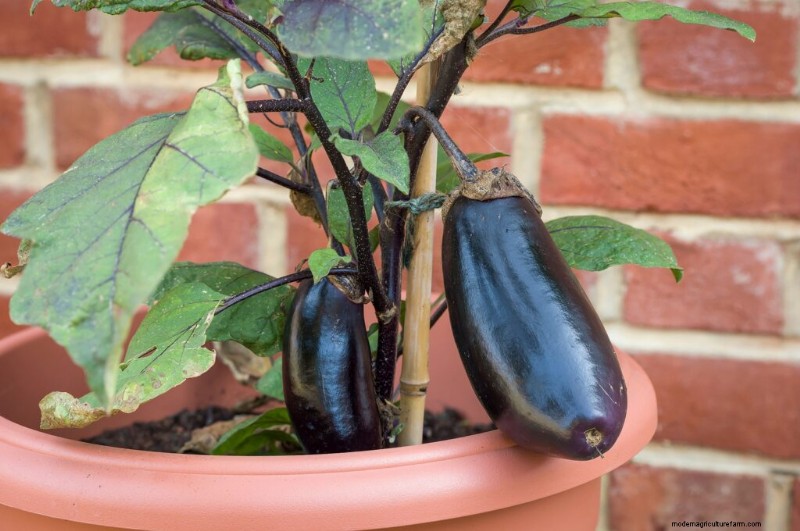
Eggplant growing in a plastic pot
The advantages of container gardening
- All you need to start is a trowel, premixed soil, and a container.
- Care is easier: container gardens rarely get weeds; diseased soil is easily tossed; water is almost always close by since most container gardens are on patios, porches, or balconies
- Containers are mobile: you can take advantage of sun and seasonal changes; plants are more easily sheltered from the cold.
- Harvest is quick: place your containers near the kitchen.
- Almost every plant that grows in your in-ground garden will grow in your container garden provided the container is large enough.
Because container gardens offer so much freedom, add to the adventure by growing gourmet varieties that you do not commonly find at the farm market or produce store. Here are a few suggestions: snap peas (round, fat, and crunchy), Mizuna (frilly salad leaves), winter purslane (small succulent leaves); salad burnet (salad green tastes like cucumber), spice basil (tastes like its name), garlic chives (on potatoes or in salsa), fava beans (try them fresh), beets (how about red-swirled), purple tomatillos (enough said), miniature sweet peppers (try Jingle Bells).
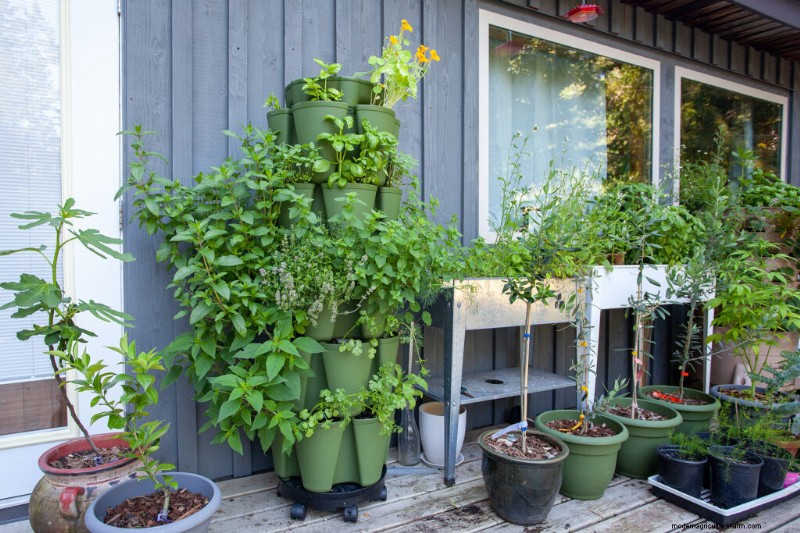
Growing in vertical towers and pots on a deck
Check out seed catalogs–most will recommend varieties for container growing. Here is a list of kitchen garden vegetable and herb varieties and cultivars that you can try and suggested a minimum container size for growing one plant. If you want to grow more than one plant in a container add three-quarters again the width of the container.
You can grow a miniature vegetable garden. Growing vegetables in containers is an easy and pleasurable way to garden if you live in an apartment, townhouse, or condominium. A sunny balcony, patio, courtyard, porch, doorway, or windowsill is all you need to get your small garden growing. Most vegetables and herbs will succeed in containers. In fact, your ability to move a container from shade to sun and from a chilly location to a warm location almost assures success.
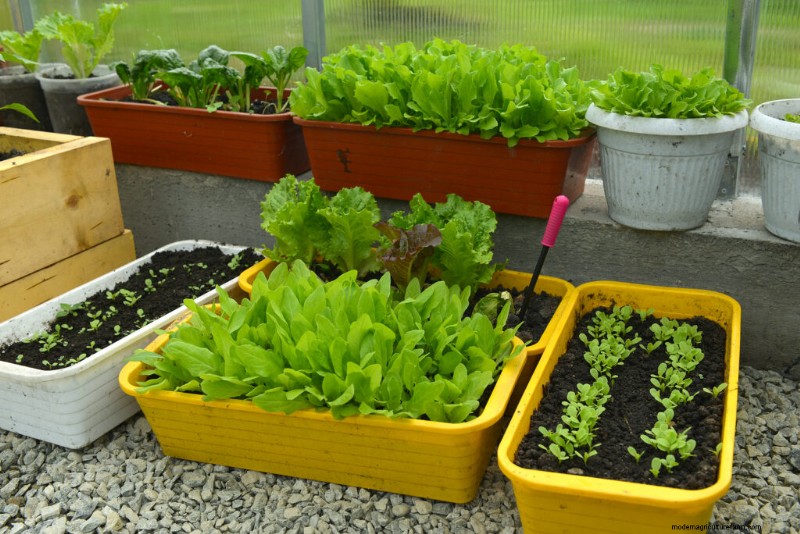
Boxes and pots with lettuce and sprouts
Choosing a container
Containers may be almost anything that suits your fancy: plastic or clay pots, plastic or wooden window boxes (redwood or cedar is durable and slow to deteriorate), tubs, bushel or wire baskets, or barrels. I’ve even seen vegetables growing in old watering cans and garden boots. You can improvise with all sorts of containers depending on which vegetables you want to grow.
Container Garden Products at Amazon:
- Gardzen 10-Pack 10 Gallon Grow Bags
- Raised Bed on Wheels for Vegetables
- Self-Watering Planters for Vegetables
- Captain Jack’s Dead Bug Brew
- Harris Neem Oil Plant Disease Control
Plastic pots are lightweight and usually inexpensive. Molded polypropylene is popular–many with a clay pot look to them. (These will insulate the soil from cold better than thin plastic.) Clay and terracotta pots are more expensive but very attractive. Clay and terracotta need more frequent watering if a plastic liner is not used. Glazed pots also are attractive, but double-check to make sure they have drainage holes. Wooden boxes, tubs, and half barrels are a good choice where freezing weather is common. Make sure wooden containers have drainage holes and once planted, don’t let them dry out or they will crack or lose their form.
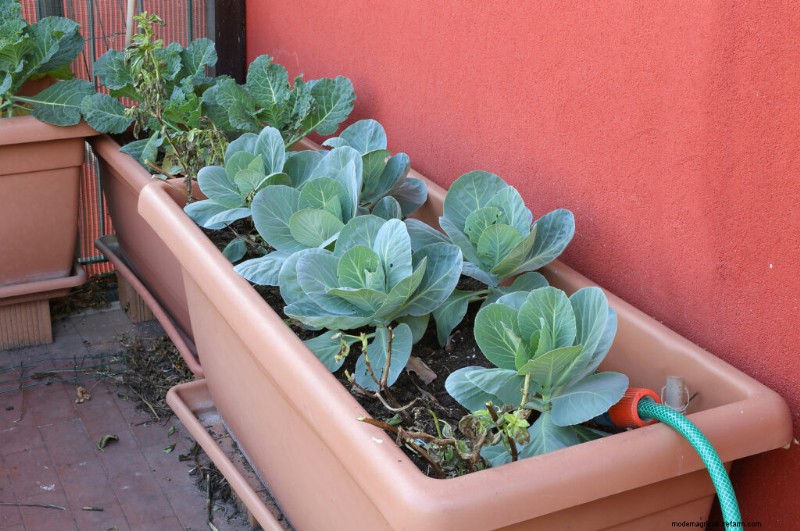
Cabbages growing in a plastic planter
Types of containers
Containers for container gardens can be terracotta, wood, plastic, or metal. Choose the style that best fits your patio, balcony, or roof terrace.
The larger the container the less watering and feeding will be needed since larger containers can hold more soil or potting medium, moisture, and nutrients required by plants. Small pots and window boxes will likely require watering every day in warm and hot regions. Large pots can commonly sustain soil moisture for three or more days.
Containers on wheels will allow you to move plants around to get the best sun or to take advantage of shade in hot weather. Plant caddies come in a variety of styles with wheels and casters rated for the weight they can bear.
Good drainage is essential when growing plants in containers. Containers less than 10 inches/25 cm in diameter should have a hole ½ inch/ 1.2 cm in diameter to provide good drainage. Containers greater than 10 inches in diameter need two to four holes.
A soil depth of at least 8 inches/ 20 cm will hold sufficient soil, nutrients, and moisture to support a good yield from almost every vegetable and herb growing in a container. (Expect to water two or three times per week.) Smaller containers holding less soil may require more frequent watering and fertilizing.
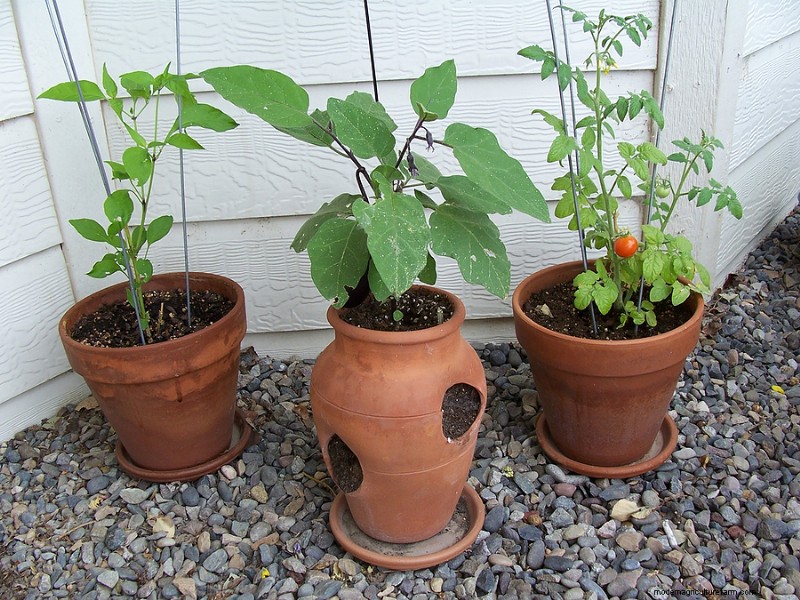
Pepper, eggplant, and tomato growing in terracotta pots
Generally, uniformity in a container’s look and material will be visually pleasing.
- Terracotta and glazed pots and planters are tried and true and have a classic feel. Terracotta is porous and draws moisture from the soil. Glazed pots retain moisture longer. Clay and glazed pots can be heavy and can be difficult to move without breaking once planted. A plant caddy can help you move these containers.
- Wooden boxes and half barrels have a rustic appearance. Redwood and cedar containers can withstand moisture and are slow to rot—for several years. Wood containers can wick moisture so you will need to pay attention to watering. Placing a plastic liner in your wooden container will slow evaporation and protect the wood.
- Galvanized steel has a modern look and resists corrosion. You can find metal buckets and troughs at feed stores and hardware stores. Metal pots retain water well, but they also heat up quickly when exposed to direct sun. Line metal containers with sheet plastic or landscape fabric to keep the metal from overheating the soil.
- Fiberglass and resin pots and planters are lightweight and are often manufactured to look like heavier terracotta or ceramic.
- Plastic pots—from the most colorful to basic black nursery pots—are the least expensive, lightweight, and durable, and come in many sizes. Plastic pots are ideal if containers need to be moved often. Plastic containers hold moisture and require less watering. In cold-winter regions, you can double-pot plastic with a layer of sphagnum moss or newspaper between the pots to provide insulation. In hot-summer regions, you can paint the outside of black plastic pots with latex to reflect the sun’s heat.
- Fiber pots—paper impregnated with binders—are tough, durable, lightweight, and very inexpensive. Fiber containers must be well drained and can not sit in saucers of water.
- Self-watering containers–planters with built-in reservoirs are a good choice for roof or balcony gardens. Self-watering containers have an upper section for soil and a lower reservoir for water with a wicking system to deliver the water to the soil. These containers eliminate daily watering and are well-suited for thirsty crops such as tomatoes, eggplants, peppers, and squashes.
- Window boxes are a good choice where space is limited and narrow. Wooden, terracotta, and plastic window boxes are easy to find. Window boxes require bracket kits to secure them safely to sills and balconies.
- Hanging baskets can help you utilize all of your vertical space. Half baskets can fit against walls. Choose hooks and brackets rated for the weight of the planted and watered hanging basket. Keep in mind that hanging baskets because of their exposure to wind and sun will generally dry out quickly.
- Grow bags are lightweight flexible fabric bags that can fit into nearly any space. Grow bags are commonly lined with plastic and retain moisture. They are easy to move and store once empty. The sides of the bag can be rolled up and down for differing amounts of soil—depending on the crop you are growing.
- Wide-bottomed containers and troughs are good choices for balconies and roof gardens because their center of gravity is low and they are less likely to be blown over or scooted around by wind.
- Lightweight mini raised-bed can be used on patios, balconies, and roof terraces. They require an underlay of landscape fabric to keep soil and moisture off the surface and should be positioned for optimal drainage.
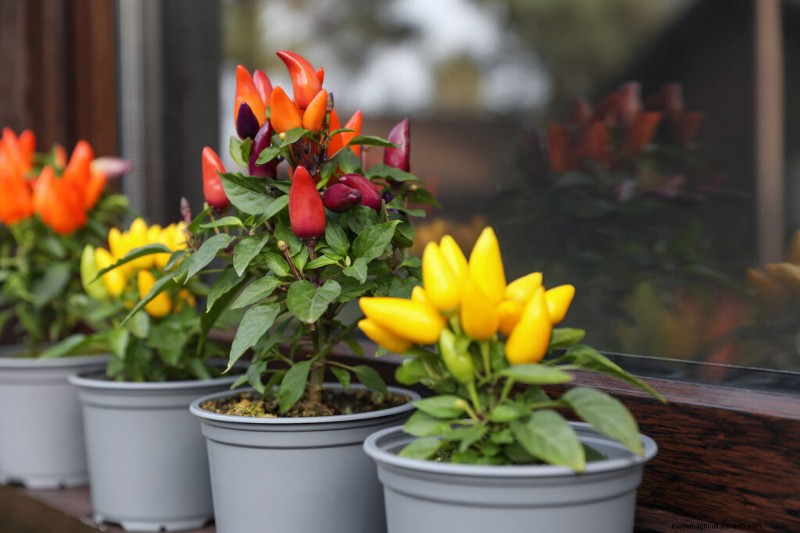
Peppers growing in 3-gallon plastic pots
Container sizes
Your best choice is to choose as large a container as possible. Beans, cucumbers, green peppers, and tomatoes require five-gallon containers (dwarf varieties will get by in two-gallon pots). Radishes, lettuce, scallions, cress, parsley, carrots, chives, and other herbs flourish in a container six inches deep and about six inches wide. A single small vegetable such as lettuce or spinach will grow in a six-inch pot. A 12-inch pot will accommodate four lettuce or spinach plants. An 18-inch pot will hold as many as ten herbs. Avoid shallow containers that will cramp roots and can either dry out quickly or become waterlogged. Perforate the base of any container so excess water will drain away. If you are using a container that’s been used before, be sure to wash it thoroughly before planting.
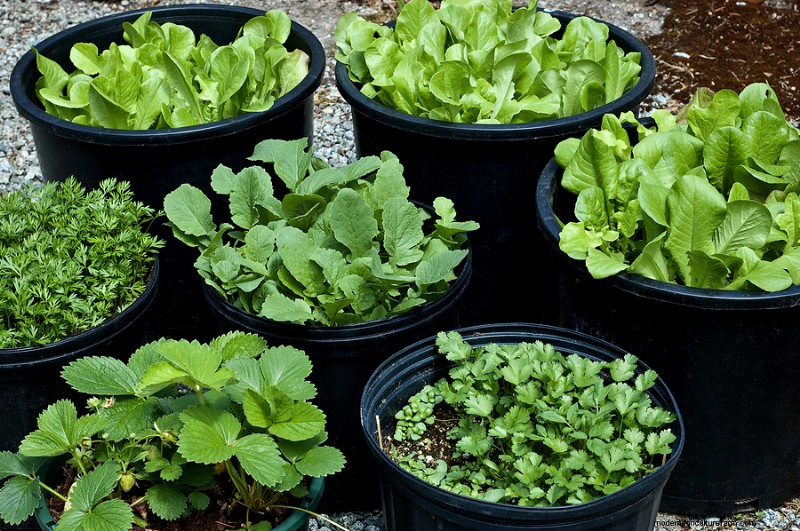
Leafy crops in small containers
Soil mix for containers
Buying pre-mixed potting soil is the easiest way to fill your container. Bagged potting mixes come in several sizes. Garden centers and most hardware stores sell potting mixes–which are usually multi-purpose soil or compost. If you have good growing soil in your garden, you can use it: add equal parts aged compost, pulverized topsoil, and a combination of worm castings, spent coffee grounds, and perlite to make your own mix. (Soil from the garden alone is almost always too dense for container plant growing.)
Place a layer of peat or sterilized bark at the bottom of the container over the drainage hole to keep your potting mix from washing away. Next, add a layer of compost and then the potting mix. Place large containers–such as tubs and half barrels–in their final position before filling them with soil. If you plan to move large containers during the year set them on wheels or rollers. Fill the container to within 1 inch (2.5 cm) of the top.
Soil delivers nutrients and water to plant roots and anchors plants in place. Because the planting medium in containers is limited its composition is very important to plants growing there.
A container planting mix must be nutrient-rich and hold moisture for several days. It must be soft and friable and resist compaction so that roots develop properly. A potting mix must be free of soil-borne fungus pathogens and predatory pests such as grubs, cutworms, and larvae that can destroy plants.
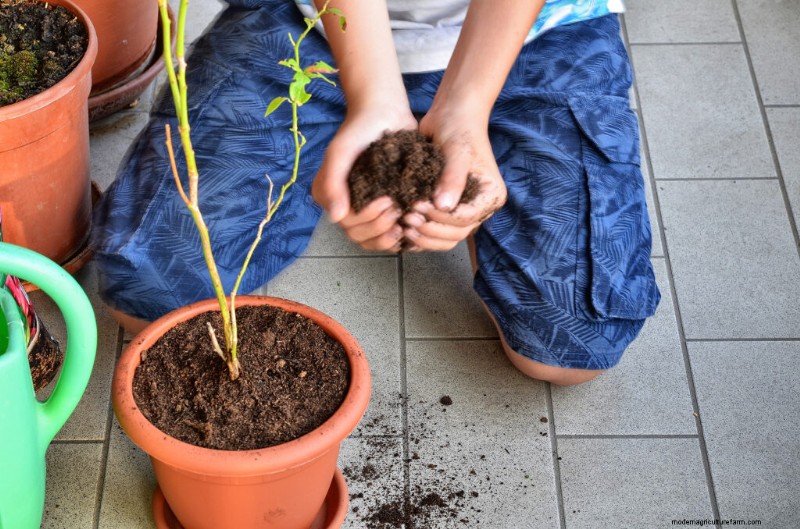
Adding soil to a pot for a blueberry
Commonly, backyard soil is not suitable for container planting. While backyard soil may be fertile it often contains too much clay or too much sand or can be too acidic or too alkaline. Such concentrations in the limited space of a container can be detrimental to plant growth.
To ensure healthy plant development, the best course is to either buy a planting mix for container growing or blend your own. There are many brand-name potting mixes available at garden centers and nurseries. Ask your nursery person what she recommends. Two commercial light mixes suitable for balcony and rooftop gardens are Supersoil and Jiffy Mix. Other commercial potting mixes are Pro Mix and Redi-earth.
Blending your own potting mix is an alternative to buying ready-made mixes. Blending your own may be cost-effective if you require a large amount of potting mix—and if you have a place to store it.
Here are three potting mixes you can blend at home:
Cornell University Potting Mix:
Here is a potting mix developed by Cornell University (this formula makes enough mix for about three to four 1-gallon (4L) containers):
- 8 quarts (7.5L) vermiculite
- 8 quarts (7.5L) shredded peat moss (note: peat moss is a non-renewable resource; substitute aged compost)
- 2 level tablespoons of superphosphate
- 2 tablespoons limestone
- 8 tablespoons steamed bone meal or dried cow manure
Mix all the ingredients in a trash can lined with a can liner. Shake vigorously. This is an odorless mix and what you don’t use can be stored in plastic bags.
The University of California potting mix:
Here is a potting mix developed by the University of California (this formula makes one cubic yard or 27 cubic feet (0.76 cm) of planting mix that is equal to 202 gallons (765L)):
- 13 cubic feet (0.36 cbm) of composted redwood sawdust
- 7 cubic feet (0.2 cbm) of ground fir or pine bark
- 3½ cubic feet of coarse sphagnum peat moss (note: peat moss is a non-renewable resource; substitute aged compost)
- 3½ cubic feet of horticultural grade or sharp builder’s sand
- To 1 cubic yard (0.02 cbm) of these ingredients add:
- 5 pounds (2.2 kg) of dolomitic sand
- 2 pounds (0.9 kg) superphosphate fertilizer
- 1 pound (0.45 kg) of calcium nitrate
Home-made vegetable potting mix:
This mix is enough for one 10-gallon (38L) container (for larger batches, increase the ingredients proportionally):
- 5 gallons (19L) of fully mature compost (either commercially prepared or homemade)
- 1 gallon (4L) sharp sand
- 1 gallon (4L) vermiculite or perlite
- 1 gallon (4L) ground sphagnum peat most
Blend these ingredients and then add 1 cup (236 mL) of 5-10-10 chelated fertilizer and then blend again.
Commercially blended potting mixes come to you sterilized. The home blends that contain garden soil or homemade compost are not. You may want to sterilize your mix to destroy weed seeds and nematodes (small microscopic worms) and to neutralize fungus diseases. You can sterilize your mix by spreading it out in a shallow pan and baking it at 275°F (135°C) for an hour; soak the soil before baking to avoid odor.
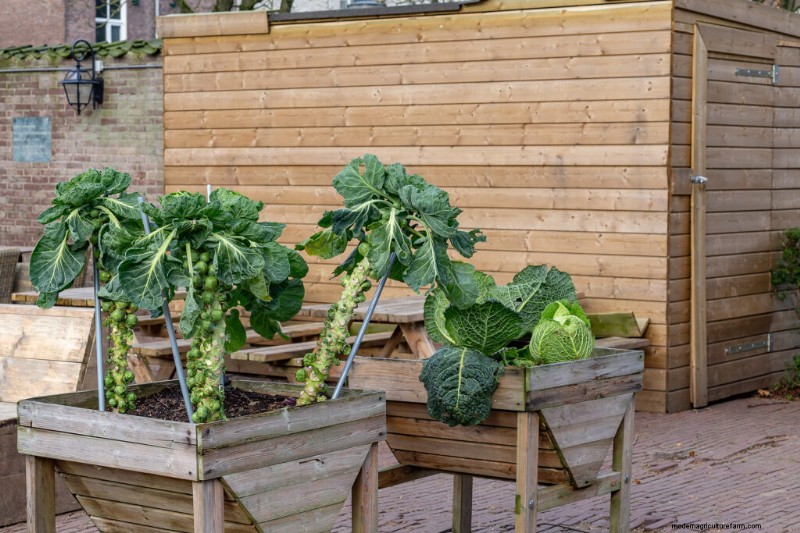
Brussels sprouts and green cabbage growing in wooden boxes
Crops for containers
Choose compact, dwarf, or fast-maturing vegetables for your container garden. Leafy vegetables such as lettuce, spinach, chard, green onions, and cabbage can thrive with just five hours of sun each day. Root vegetables such as radishes, carrots, and beets need an hour or two more. Fruiting vegetables require the most sun and warmth; cucumbers, eggplants, peppers, and tomatoes insist on at least 8 hours of full sun each day. The same is true for beans. Tomatoes, peppers, and cabbage plants are especially recommended to the beginner. Herbs are easy to grow in containers: try chives, parsley, basil, dill, rosemary, sage, summer savory, tarragon, and sweet marjoram.
Seeds for Success at Amazon:
- 55 Heirloom Vegetable Seed Varieties
- 32 Variety Pack Survival Gear Food Seeds | Non-GMO
- 60-Cell Seed Starter Kit with Grow Lights
- Durable Waterproof Seedling Heat Mat
Look for vegetables specifically recommended for container gardening–these are compact or dwarf vegetable varieties such as Little Ball beets, Short ‘n Sweet and Little Finger carrots, Tom Thumb and Salad Bowl lettuce, and Tiny Tim or Pixie tomatoes.
Container gardening is a good way to practice vertical gardening. Cucumbers, beans, peas, and tomatoes can be trained on a trellis. Place the trellis in your container before you fill it with soil and plant. Choose a larger container that is broad-based to avoid tipping when vining crops reach maturity.
Vegetable varieties to grow in containers
Vegetable variety names are followed by suggested container sizes.
- Artichoke: Green Globe, Imperial Star, Violetto; container 24″ deep.
- Lima beans: Bush Baby, Bush Lima, Fordhook, Fordhook 242; container 12″ wide x 8-10″ deep.
- Snap beans: Bush Blue Lake, Bush Romano, Contender, Provider, Rushmore, Tendercrop Stringless; container 1′ wide x 1′ deep.
- Beets: Baby Canning, Burpee Golden, Little Ball, Red Ace Hybrid, Ruby Queen; container 6″ wide x 6-12″ deep.
- Broccoli: Arcadia, Green Comet, Munchkin, Small Miracle; container 8-12″ wide x 20″ deep.
- Brussels sprouts: Jade Cross, Oliver, Rubine; container 12″ wide x 18-20″ deep.
- Cabbage: Baby Head, Dwarf Morden, Earliball, Fast Ball, Flash, Minicole; container 8-12″ wide x 1′ deep.
- Carrots: Amini, Baby Fingers Nantes, Baby Spike, Best of the Bunch, Danver’s Half Long, Early Horn, Gold Nugget, Kinko, Nantes Half Long, Little Finger, Round Baby, Short & Sweet, Thumbelina, Tiny Sweet; container 10″ wide x 10″ deep.
- Cauliflower: Snow Cross, Violet Queen; container 18″ wide x 2-3′ deep.
- Celery: Conquistador, Early Snowball, Redventure, Ventura; container 8-10″ wide x 10″ deep.
- Chard: Bright Lights, Fordhook, Fordhook Giant, Lucullus, Ruby Red; container 12-18″ wide x 1′ deep.
- Chinese cabbage: Bok Choy, Michihli, Wong Bok; container 1′ wide x 20″ deep.
- Collards: Any variety; container 12″ deep.
- Corn: F-M Cross, Golden Bantam, Kandy Korn, Luther Hill, Precocious; container 3′ wide x 1′ deep; 3 per container to ensure pollination.
- Cress: Curly Cress, Upland Cress; container 8″ wide x 6-8″ deep.
- Cucumber: Burpee Hybrid II, Burpee Pickler, Bush Baby, Bush Champion, Bush Crop, Bush Pickle, Fanfare, Patio Pik, Pickalot, Picklebush, Pot Luck, Salad Bush, Spacemaster. Pickling: Lucky Strike; container 1′ wide x 16″ deep.
- Edible Flowers: Bachelor’s Button, Calendula, Dianthus, Marigold, Nasturtium, Sunflower, Violas; container
- Eggplant: Bambino, Black Beauty, Dusky, Easter Egg, Florida Market, Long Tom, Millionaire, Morden Midget; container 16″ deep x 18″ deep.
- Endive: Bianca Riccia, Nataly, Neos; container 8-10″ deep.
- Herbs: Basil, Borage, Chamomile, Chives, Cilantro, Dill, Fennel, Hyssop, Lemongrass, Lemon Verbena, Marjoram, Mint, Oregano, Rosemary, Sage, Savory, Shiso, Tarragon, Thyme; container 8-10″ deep.
- Horseradish: Maliner Kren; container 5-gallon tub – 3′ deep.
- Kale: Any variety; container 8″ wide x 8″ deep.
- Kohlrabi: Grand Duke; container 12″ deep.
- Leeks: King Richard, Lincoln; container 10-12″ deep.
- Lettuce: Black-Seeded Simpson, Buttercrunch, Cos, Green Ice, Green Looseleaf, Little Gem, Mignonette, Oakleaf Red Sails, Red Fire, Red Looseleaf, Salad Bowl, Tom Thumb; container 8″ wide x 6-8″ deep.
- Mustard: Green Wave, Osaka Purple, Red Giant; container 8-12″ deep.
- Onion: Bunching types: Beltsville Bunching, Crystal Wad Pickling, Japanese Bunching, White Bunching, White Pear. Standards: Copra, Early Yellow Globe, South Redport; container 10-12″ deep.
- Parsley: Dark Moss Curled, Paramount; container 8″ deep.
- Peas: Burpee’s Blue Bantam, Early Patio, Laxton’s Progress, Little Marvel, Melting Sugar, Snowbird, Sugar Ann, Sugar Bon, Sugar Daddy, Sugar Mel, Sugar Rae. Snow Peas: Little Sweetie; container 1′ deep x 1′ wide.
- Peppers: All varieties: Canapé, Jalapeno, Jingle Bells, Keystone, Peppery Pot, Pimento, Resistant Giant, Red Cherry, Yolo Wonder; container 16″ deep x 18″ deep.
- Potatoes: Charlotte, Cobbler, Irish, Epicure, Kennebec, Red Pontiac, Rose Finn Apple, Russian Banana, Yukon Gold; container
- Pumpkins: Autumn Gold Hybrid, Baby Boo, Baby Bear, Bushkin, Jack Be Little, Small Sugar, Sweetie Pie; container 24″ deep.
- Radicchio: Chioggia Red Preco, Fiero, Indigo, Pall de Fuoco Rossa; Daikon; container 8″ wide x 6-8″ deep.
- Radish: Burpee White, Champion, Cherry Belle, Comet, Icicle, Early Scarlet Globe, French Breakfast, Red Boy, Sparkler; container 5″ wide x 4-6 inches deep.
- Spinach: Any variety: American Viking, Long Standing Bloomsdale, Melody; container 6-8″ wide x 4-6″ deep.
- Summer squash: Crookneck, Early Yellow Summer, Eightball, Gold Rush, Goldberg, Park’s Creamy Hybrid, Peter Pan Scalloping, Pic-N-Pic Hybrid, Richgreen Hybrid, Straightneck, Sunburst, Zephyr; container 24″ deep.
- Winter squash: Butterbush, Bush Acorn, Bush Delicata, Bush Table, Cream of the Crop, Table King, Queen Heart of Gold; container 24″ deep.
- Strawberries: Alpine, Sarian, Tristar; container 8-12″ deep.
- Sweet potato: Beauregard, Georgia Jet, Vardaman; container 20 gallons.
- Tomatoes: Basket Pak, Container Choice, Gardener’s Delight, Husky Gold, Husky Red, Lunch Box, Micro-Tom, Patio VF, Pixie, Red Cherry, Rutgers, Saladette, Small Fry VFN, Spring Giant, Sundrop, Super Bush, Sweet 100, Tiny Tim, Toy Boy, Tumbling Tom, Yellow Canary, Yellow Pear, Whippersnapper; container dwarf cultivars: 6-8″ wide x 1′ deep, standard cultivars: 2′ wide x 2-3′ deep.
- Turnip: Hakurei, Purple Top White Globe; container 10-12″ wide x 12″ deep.
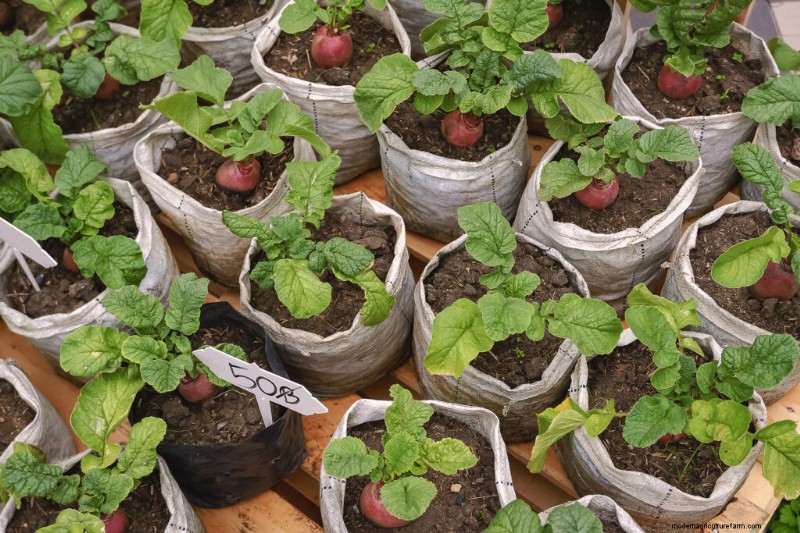
Beets growing in grow bags
Dwarf and miniature vegetable varieties
Miniature, midget, and dwarf vegetables are good selections for container growing. True dwarf varieties at full maturity have edible parts that are smaller in size than ordinary vegetable varieties and cultivars. Miniatures, midgets, and dwarfs differ from vegetables that are sold as “baby” vegetables–those are generally full-sized cultivars picked before maturity. Baby corn, for example, is most often ordinary corn harvested early just as the silk emerges from the husks.
Dwarf and miniatures require little above-soil growing space and are well suited for containers. But because the plants and fruits are smaller, these crops can not be expected to perform the kitchen duties or full-sized varieties. Consider dwarfs and midgets for side dishes or stir-fries.
As for growing miniature vegetables, apart from spacing and often early harvest, normal growing practices apply. Miniature vegetables have the same soil, water, nutrient, and light requirements as ordinary varieties.
Miniature vegetable variety | Days to harvest | Description | BEANS 5-gallon container, 10″ apart Dwarf Bees 80 18- to 24-inch runner Thorogreen 68 18-inch tall Lima
BEETS Two to 3 inches apart Burpee’s Gold Beet 55 1-inch diameter
5-gallon container, 3 plants per 54 Golf-ball size Spinel 52 1½-inch round Chioggia 55 Italian heirloom
CABBAGE 5-gallon container per plant Baby Head 72 2½-inch heads Modern Dwarf 65 4-inch heads
CANTALOUPE Gladiator Early Sugar Midget 60 Medium vine Midget Muskmelon 60 3-foot vines Minnesota Midget 63 4-inch melons Short ‘n Sweet 62 Bushy
CARROTS One to 2 inches apart Bunny Bite 65 1½ inch root Little Finger 65 Cylindrical Short ‘n Sweet 68 4-inch roots taper Thumbelina 60 Bite-size Tiny Sweet 65 3-inch roots
CORN 5-gallon container, 15″ apart Baby Asian 65 4-5 inches ears Faribo Golden Midget 60 30-inch plants Golden Midget 60 2- to 3-foot stalks Golden Miniature 54 5-inch ears
CUCUMBER 5 gallon container, 15″ apart Baby Cucumber 52 Bushy vine, early Bush Whopper 55 No runners Little Minnie 52 Bushes to 2 feet Midget 50 2-foot vines, early Patio Pik 55 Slicer for baskets Pot Luck 56 18- to 24-inch plant
EGGPLANT 6- to 8-inch-long fruit Early Black Egg 65 5-inch fruit, tender Easter Egg 65 2-3 inches long Little Fingers 68 Bush, the earliest fruit Morden Midget 65
5-gallon container per plant Nagaoka New Kissin 65 4-inch fruit, early Ornamental White 60 Early, 2-inch fruits Purple Pickling 70 Tiny eggplants Slim Jim 65 Pickling, very small
LETTUCE Four to 10 inches apart Midget 55 Buttercrunch Sweet Midget Cos 60 5 inches tall, upright Tom Thumb 65 Tennis-ball size, Buttercrunch
ONIONS Two to three inches apart Barletta 70 Small, round pickling Quicksilver 70 Small pearl Silver Queen 70 Small pearl
PEAS Two inches apart American Wonder 61 12-inch plants, early Greater Progress 62 18-inch vine
POTATOES Six to 8 inches apart Ladyfinger 80 4- to 5-inches long
PUMPKINS Pick golf-ball-sized, compact growth Jack-Be-Little 90 3 inches across Mini-Jack 90 3- to 4-inch fruit Wee-B-Little 85 2- to 4-inch fruit SQUASH-SUMMER Twelve to 20 inches apart Benning’s Green Tint 50 Scallop squash Cousa 50 Lebanese, 4 inches long
SQUASH-WINTER Twelve to 20 inches apart Jersey Golden Acorn 50
5-gallon container per plant TOMATOES 5-gallon container, 12″ apart Droplet 65 Determinate, abundant Early Salad 45 6- to 8-inches Patio 70 15- to 30-inches, early Pixie 50 24-inch vine Presto 60 Long season, early Pretty Patio 70 30 inches tall, abundant Red Cushion 65 18 inches high, cherry Salad Top 50 18 inches high Small Fry 60 Heavy cropper, early Stoke’s Alaska 55 18-inch bush, early Tiny Tim 50 15-inch vine, early Toy Boy 60 2 feet tall, early Tumblin’ Tom 55 20- to 24-inch vine
WATERMELON 5 gallon container, 12″ apart Burpee Sugar Bush 80 6-8 pounds Family Fun 88 Slightly oblong Golden Midget 65 8 inches round Lollipop 70 3-5 pounds Market Midget 69 3-5 pounds, sweet New Hampshire Midget 68 7 inches in diameter, short season Petite Sweet 65 8 pounds, extra sugar Sugar Baby 80 8 inches in diameter, sweet Sugar Ball 65 12-15 pounds, multi-fruit Sugar Doll 72 8-10 pounds, sweet Sugar Lumps 78 8-9 inches in diameter Yellow Doll 68 3-5 pounds You Sweet Thing 70 12-13 pounds, round, striped
Spacing crops in containers
Giving a vegetable plant the space it needs to mature is essential. Proper spacing ensures that roots do not compete for moisture and nutrients and that above-ground growth is not crowded and has needed exposure to light and good air circulation (essential for preventing disease).
Leafy and root crops can be started in containers by spreading seed but once plants have grown to an inch or two tall (2.5-5 cm) they should be thinned. Fruiting crops—such as tomatoes and peppers—are best started in small 3 or 4-inch (7-10 cm) pots and later transplanted to larger containers.
Suggested minimum space between plants growing to maturity in the container:
- Artichokes: Plant singly; 10 gallons (38L) soil per plant
- Beans: 3-9 inches (7.5-23 cm) apart
- Beets: 2-3 inches (5-23 cm) apart
- Broccoli: 10 inches (25 cm) apart; 5 gallons (19L) of soil per plant
- Brussels sprouts: 10 inches (25 cm) apart; 5 gallons (19L) of soil per plant
- Cabbage: 10 inches (25 cm) apart; 5 gallons (19L) of soil per plant
- Carrots: 1-2 inches (2.5-5 cm) apart; container 6 to 8 inches (15-20 cm) deep
- Cauliflower: 12 inches (30 cm) apart; 5 gallons (19L) of soil per plant
- Eggplant: 15 inches (38 cm) apart; 5 gallons (19L) of soil per plant
- Kale: Thin to 16 inches (41 cm) apart
- Lettuce: 4-10 (10-25 cm) inches apart
- Melons: 15 inches apart; 5 gallon (19L) soil per plant
- Mustard greens: Thin to 4 inches (10 cm) apart
- Okra: 20 inches apart; 5-10 gallons (19-38L) soil per plant
- Onions: 2-3 inches (5-7.6 cm) apart
- Peas: 2 inches (5 cm) apart
- Peppers: 8 inches (20 cm) apart; 2½ gallon (9.4L) soil per plant
- Potatoes: 6 inches (15 cm) apart
- Radishes: 1 inch (2.5 cm) apart
- Rhubarb: 12 inches (30 cm) apart; 5 gallon (19L) soil per plant
- Rutabagas: 2 inches (5 cm) apart
- Spinach: Thin to 5 inches (13 cm) apart
- Squash: 12-20 inches apart; 5 gallons (19L) of soil per plant
- Swiss chard: Thin to 8 inches (20 cm) apart
- Tomatoes: ½-5 gallon (2-19L)soil per plant depending on the variety
- Turnips: 6 inches (15 cm) apart
When to plant vegetables in containers
Success in growing vegetables is all about timing—in the garden or in containers.
The temperature has much to do with success growing in containers. Root vegetables are cool-season crops. Leaf and stem crops prefer cool weather. Warm temperatures—and longer days—are needed for fruiting vegetables to grow and mature.
Knowing the average last frost date in spring and the average first frost date in fall will help you plan when to sow seed or set out starts or seedlings—those dates help define the cool-weather crop season and the warm-weather crop season. Mark your calendar with the frost dates, then schedule your planting and harvest. Each crop may have a different start and end date, but a simple calendar will help you keep the garden running smoothly—planting and harvesting.
To make sure you have plenty of time for fruiting crops such as tomatoes, peppers, eggplant, and melons to ripen, you may want to jump-start the season by starting seeds indoors before the last frost.
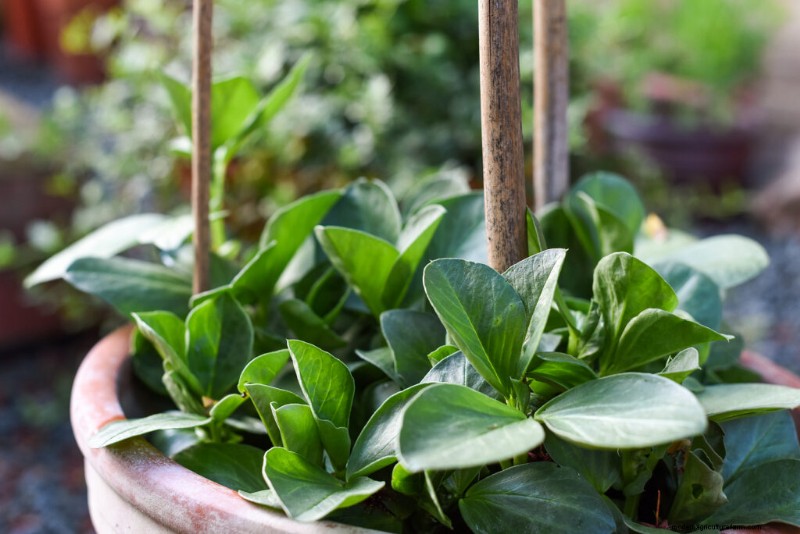
Lima beans growing in a pot
Container planting and harvest times
Here are suggested seed sowing and harvest times for crops you can grow in containers on a patio, balcony, or rooftop.
- Asian Greens: Plants prefer to grow in cool weather; sow seed in early spring and again in late summer. Some can grow inside during winter under lights or in a windowsill; keep temperatures below 70°F (21°C). Most Asian vegetables require 30 to 50 days to reach harvest—depending on the variety.
- Asparagus: Start with one-year-old plants from a nursery (sold as roots in late winter). Plant roots as soon as the danger of frost is past. Harvest comes in the second year after planting; the plant can remain productive for 20 years.
- Beets: From seed, the crop is ready in 8 to 10 weeks; time sowing so that harvest is complete before or well after the summer heat.
- Beans: Sow seeds in late spring and early summer; beans are cold-sensitive and should not be planted until after the last expected frost. Beans are ready in 60 to 70 days.
- Broccoli: Grow broccoli from seedlings. In cold-winter regions, starts can go into the garden two weeks before the last expected frost. Put in a second planting in midsummer for fall harvest. In mild-winter regions, set out starts from early fall through late winter. Time planting so that the crop matures before it becomes really hot. Broccoli is ready to harvest in 8 to 10 weeks.
- Brussels sprouts: Start from seedlings. Brussels sprouts require four to five months of cool weather to mature or a summer temperature of 65°F (18°C) or less. In hot summer regions start in early summer to mature in cool fall weather. Brussels sprouts are ready for harvest in 2 to 3 months.
- Cabbage: Late winter and early spring plantings should be timed to reach maturity before the arrival of hot summer days. Start crops for fall and winter harvest in mid-summer. Cabbage is ready for harvest in 60 to 110 days depending upon the variety.
- Carrots: Start in spring about the time of the last frost and continue until 60 days before the first frost in fall; with ample moisture, they can be grown in the summer heat. Provide shade where exceptionally hot. Carrots mature in 8 to 12 weeks depending on the variety.
- Cauliflower: Bring cauliflower to harvest in cool weather. From seed to harvest allow 12 weeks; from starts to harvest allow six to eight weeks. In cool spring and early summer regions, start plants in late winter or early spring. In warm spring and summer regions, start from seedlings in mid-summer for a fall harvest.
- Celery: Seeds are very slow to germinate so it’s easier to start with seedlings from the garden center. In mild-winter regions, grow celery for winter harvest. In warm-summer regions, plant celery in late summer for fall harvest. Celery is ready for cutting 16 to 18 weeks after sowing.
- Collards: Sow seed in early spring and summer. From seed to harvest allow eight or nine weeks.
- Corn: Sow seed in late spring after frost danger is past or set out starts two weeks after the last frost; in mild winter regions sow in late summer for a fall crop. Corn is usually ready 65 to 80 days after sowing.
- Cucumbers: Sow after temperatures rise to a constant 60°F (15°C) Make a second sowing one month later. Cucumbers are ready to harvest 50 to 60 days after sowing.
- Eggplant: Start with young plants from a nursery or by seed sown indoors at least two months before you plan to transfer them to outdoor containers. Eggplants are ready for harvest 60 to 75 days after sowing—if days and night temperatures stay consistently warm, 70°F (21°C).
- Garlic: Sow cloves in the fall to harvest large bulbs the following summer. In cold-winter regions protect the crop from freezing by covering and insulating the container.
- Horseradish: Start with root cuttings from established plants after the danger of frost has passed. Horseradish is a perennial; protect the container from freezing in winter.
- Jicama: Start seeds indoors for three months before setting it out in a container after the danger of frost has passed. Jicama requires three months of warm temperatures to reach harvest.
- Kale: If summers are cool with an average daytime temperature of 75°F (24°C) or less sow in spring, otherwise sow in midsummer to grow in the cool of fall. Frost improves the flavor. Kale is ready for harvest in 55 days.
- Leeks: Sow indoors at least two months before the last frost. Starts that are 8 inches/ 20 cm tall can be set out in containers from early to mid-summer and can grow for up to 3 months.
- Lettuce: Sow seed in succession from early spring to fall; seed germinates rapidly but starts can be planted where time is short. Allow 50 to 70 days from seed sowing to harvest.
- Melons: Start seed indoors for 4 to 6 weeks before setting them out in a container. Seed can be planted outdoors after the weather warms to 60°F (15°C). Cantaloupes, honeydews, and watermelons require at least 70 days to come to harvest.
- Okra: Okra loves warm weather; sow seed after nighttime temperatures average 65°F (18°C). Allow 55 days to harvest.
- Onions: Plant onion sets or seeds in early spring and make successive sowing. Grow for stems in cool weather—below 70°F (21°C)–for bulbs in warm weather. Bulb onions are ready to harvest in 100 to 110 days; shallots are ready to harvest in 60 to 70 days.
- Peas: Start seed indoors or sow outdoors three weeks before the last expected frost. Fall sowing is recommended for areas with mild winters. Peas are ready for harvest in 55 to 70 days.
- Peppers: Sow seed indoors eight weeks before you plan to set plants out; set out transplants after average temperatures reach 60°F (15°C). Sweet peppers are ready for harvest in 70 days; hot peppers require 60 to 100 days depending on the variety.
- Potatoes: Sow seed potatoes in early spring; potatoes are cold tolerant so you can plant them before frost has passed. In mild-winter areas plant potatoes in mid-summer for a winter harvest. Potatoes are ready between 75 and 130 days to harvest.
- Pumpkins: Sow seeds in the container after the danger of frost has passed or set out starts two or three weeks after the last frost. Most varieties require 100 days or more from sowing to harvest.
- Radishes: Sow radishes indoors anytime during the year; outdoors avoid growing in midsummer and sow the last outdoor crop three to four weeks before the last killing frost. Harvest in 25 to 50 days depending on variety.
- Rutabaga: Crop will mature from seed in three months; time sowing so that harvest comes before or after the summer heat.
- Spinach: Sow seed in early spring and early fall for windowsill and outdoor containers. Make successive plantings ten days apart. Temperatures in the 80°sF (26°C) will cause the crop to bolt. Spinach requires 45 to 50 days from sowing to harvest.
- Squash: Sow seed indoors three to four weeks before the last expected frost; set plants out two weeks after all danger of frost has passed. In warm-winter areas start seed in late summer or set out transplants for fall harvest. Zucchini and other summer squashes require 40 to 45 days to reach harvest from sowing; winter squashes require 70 to 100 days depending on the variety.
- Sweet Potatoes: Start from slips outdoors after all danger of frost has passed. The crop requires 100 to 120 days to reach harvest.
- Swiss Chard: Sow in containers year round except where winters are harsh, then sow in late spring. From seed to harvest allow 55 days.
- Tomatillo: Sow seeds indoors a month before the last expected frost. Set out plants two weeks after all danger of frost has passed. From sowing to harvest allow 85 days.
- Tomatoes: Transplant starts to outdoor containers about two weeks after the last frost. Start seed indoors 8 weeks before you plan to transplant to containers outdoors. Tomatoes require 55 to 100 days to reach harvest depending on the variety.
- Turnips: Crop will mature from seed in two months; time sowing to mature crop before or after the summer heat.
Water, weeding, and care
Container plants almost never need weeding, but you will need to water them more frequently. Container soil should be moist to the touch, but never soggy: too much water rots roots. Water immediately after planting to wash potting mix from the foliage, after that, use a watering can with a fine-rose nozzle to water so as not to disturb the planting mix. (If watering indoors, use a kitchen measuring cup.) Another technique is to water from below, by placing the pot in a watering tray and allowing the water to wick up into the pot for an hour or two. It’s best to water early or late in the day so that the rays of the sun do not damage wet leaves. In warm weather be sure to check your containers every day to make sure they are not dry. Water whenever the soil is dry to a depth of 1 inch. Don’t let containers dry out; that will interrupt quick growth which is essential to container vegetable gardening and can cause plants to drop blossoms and fruits.
Whenever you water look for weeds and remove them and trim away any dead leaves or debris and check for insect pests. Most insect pests can be stopped early with a spray of insecticidal soap–a light squeeze of dish soap in a spray bottle. Twice during the growing season give your container vegetables a feeding of compost tea; this should be enough to replenish the nutrients they draw from the soil. At the start of the next season, it’s best to begin again with fresh, nutrient-rich soil.
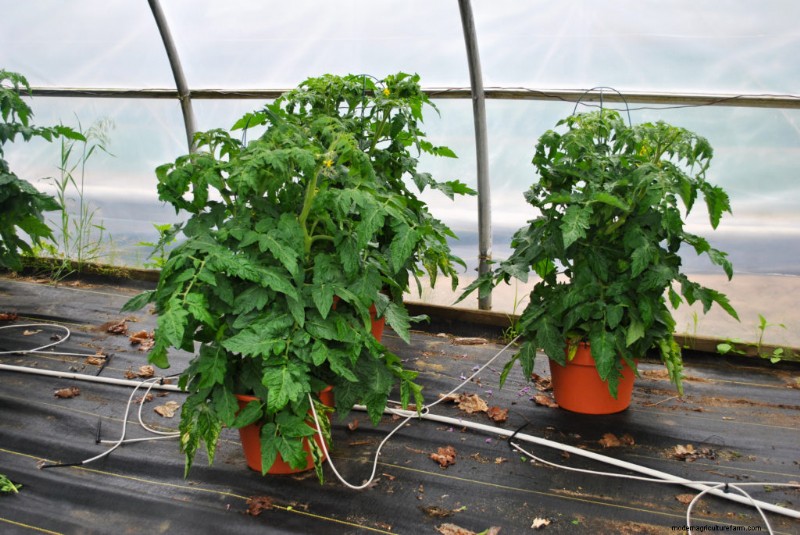
Bush tomatoes in large pots
Care and feeding container vegetable garden crops
Vegetables growing in containers on patios, balconies, or rooftops require special care when it comes to watering and feeding.
Containers have a limited capacity for storing essential nutrients and moisture that ensure plant growth. The gardener must closely monitor container crops to be sure they are growing uninterrupted which, in turn, leads to the best yield and flavor.
Almost all growing crops demand even moisture—that means never letting the soil go completely dry and never overwatering leaving the potting mix soggy. A compost-rich potting mix may supply nearly all the nutrients a crop will need over the length of a season—but feeding with an organic fertilizer may be necessary where containers are small or multiple plants are growing (nutrients are essential).
Use a moisture meter to monitor watering if you have any doubts about how wet or dry your containers are. All garden centers and nurseries will have both dry and liquid organic fertilizers. Ask which fertilizer they recommend and then follow the label directions carefully; it’s always safer to under-fertilize than over-fertilize.
Here are care and feeding suggestions for vegetable growing in containers on a patio, balcony, or rooftop.
- Asparagus: Water every five to seven days during the summer and feed twice a year (early spring and late summer) with a complete liquid fertilizer diluted to half strength. When the leaves begin to brown in autumn cut stems to soil level.
- Beets: Keep the soil just moist throughout the growing season (never over water). Thin seedlings when they are 6 inches tall to stand 3 to 4 inches apart. After thinning, feed once with a complete liquid fertilizer diluted to half strength. Don’t let the soil crust–gently cultivate with a trowel or hand cultivator.
- Beans: Keep the soil just moist as plants develop. Later water deeply. Once plants are a foot tall (30 cm) high, thin to strongest plants and feed keepers with a complete liquid fertilizer diluted to half strength. Feed a second time when pods begin to form.
- Broccoli: Keep soil evenly moist. Feed with a complete fertilizer at full strength twice during the growing season—first when plants are about 8 inches tall and again before heads begin to form. Broccoli is heat sensitive and will bolt and flower when temperatures get into the high 70°Fs (21°C).
- Brussels sprouts: Keep the soil evenly moist water; don’t let it dry out. Feed when sprouts are beginning to form with a complete liquid fertilizer at half strength. As the sprouts begin to cluster, twist off the leaves beneath to transfer growing energy to form more sprouts.
- Cabbage: Keep the soil evenly moist; it must not dry out. Once transplants are established, feed every three weeks until heads begin to form; use high nitrogen, high potassium fertilizer diluted to half strength. Keep soil mounded around the base of the plant to encourage new root development; this will stabilize the plant and hasten maturity.
- Carrots: Keep the soil just moist until harvest. Thin seedlings as they grow to 2 inches between the strongest plants. Feed after the final thinning with a complete liquid fertilizer diluted to half strength; feed again two to three weeks before harvest.
- Cauliflower: Keep the soil evenly moist. The most common problem encountered when growing cauliflower is its failure to set heads. This can be caused by uneven watering or the soil going dry during a heat wave. Feed plants when well-established with a complete fertilizer diluted to half strength and again as curds form. When a head forms, tie the outer leaves up over the head with twine. This will protect the head from the sun and help the curd to blanch.
- Celery: Celery is a bog plant that requires ample, consistent water to thrive. Feed with complete fertilizer diluted to half strength every two weeks. Keep soil mounded up around the base of each plant to stabilize upright growth. Blanch celery quickly by covering the stalks (leaving the top leaves exposed) with a paper bag or opaque plastic seven to ten days before harvest.
- Collards: Keep the soil evenly moist. Mist leaves on hot, dry days. Feed with high nitrogen, and high potassium fertilizer at full strength twice during the growing season.
- Corn: Corn requires eight hours of sun each day to produce the best crop. If full sun is an issue, look for a hybrid suited to your region. Thin plants to 12 inches (30 cm) apart as they mature. Keep the soil evenly moist; don’t let it dry out especially when the weather is hot and dry. Feed with a 5-10-10 fertilizer at full strength every three weeks.
- Cucumbers: Keep the soil evenly moist. Keep the potting mix warm; use black plastic mulch until the weather heats up then switch to aluminum foil; this reflects heat and light under the foliage which discourages aphids. Feed with a high phosphorus fertilizer diluted to half strength when the plant begins to flower and then every other week until harvest.
- Eggplant: Keep the soil evenly moist throughout the growing season; do not let the soil dry out. Feed monthly with a complete fertilizer diluted to half strength. Keep plants in a warm, sunny location. Protect plants on cool nights by covering them with a light plant blanket; cool weather stunts growth and reduces yield.
- Garlic: Keep the soil just moist—not wet. As plants mature make sure containers are in a warm, sunny location.
- Horseradish: Keep the soil mix evenly moist. Feed once during the season with a complete fertilizer at full strength.
- Jicama: Keep the plant in a sunny location for at least six hours each day. Keep the soil evenly moist–never soggy. Feed with a 10-10-10 liquid fertilizer at full strength once during the growing season.
- Kale: Keep the soil just moist. Thin plant to 8 inches (20 cm) apart. Feed with high nitrogen, and high potassium fertilizer at full strength twice during the growing season.
- Leeks: Keep the soil evenly moist–never soggy, which can cause rot. Cool weather will not hurt plants. Blanch leeks by setting a section of 2-inch-diameter opaque plastic tubing or pipe over each one when the stems begin to thicken (mounding with soil is not practical in containers).
- Lettuce: Keep the soil evenly moist but not wet until heads form—too much water can cause rot or head varieties to crack. Feed lightly every two weeks with a complete liquid fertilizer diluted to half-strength. Hot weather can cause non-bolt-resistant varieties to flower. Protect plants from the hot sun with shade cloth.
- Melons: Keep the soil evenly moist; do not let it dry out but be careful not to overwater; overwatering can cause fruit to crack and may reduce sugar content. Keep foliage dry to avoid fungal diseases. Add slow-release 10-10-10 fertilizer into the soil after vines flower; side dress with water-soluble fertilizer a couple of weeks before the first harvest. Melons thrive in warm temperatures. If the weather cools or in short-season regions keep the soil mix warm by covering it with black plastic and positioning containers in direct sun all day. Allow vines to trail or train vines to a trellis if the container is heavy and will not tip. Support trellised melons with netting.
- Okra: Okra grows best in warm weather; sow seed after nighttime temperatures average 65°F (18°C). Keep the soil just moist—never wet.
- Onions: Keep the soil evenly moist throughout the growing season to ensure good bulb development—but don’t overwater which can cause rot. Onions are heavy feeders and should be given a 5-10-10 liquid fertilizer at full strength twice a month.
- Peas: Keep the soil barely moist. Thin seedlings to 3 inches apart and train climbing types on string netting or wooden trellises when tendrils appear. Feed twice during the growing season with a low nitrogen 5-10-10 liquid fertilizer diluted to half strength (too much nitrogen will stimulate leafy growth at the expense of the pods).
- Peppers: Keep the soil evenly moist but not wet throughout the season and particularly during fruit development. Feed with a complete fertilizer diluted to half strength when plants are well established and once more just before blossoms open. Peppers grow best when night temperatures do not dip below 68°F (20°C) at night and stay between 75-80°F (24-26°C) during the day. Use a floating row cover or shade cloth to protect the fruit from sunscald if the weather turns hot (over 90°F/ 32°C).
- Potatoes: Grow potatoes in a sunny location. Keep the soil evenly moist; drought and drench cycles create deformed tubers.
- Pumpkins: Keep the soil evenly moist and do not let it dry out for best fruit development. Avoid wetting leaves which can lead to fungal diseases. Feed after blooming with a 10-10-10 fertilizer at full strength.
- Radishes: Keep the soil evenly; do not let it dry out—but don’t let it get soggy. Thin to strongest seedlings, 3 inches apart. Feed with a 10-10-10 liquid fertilizer, diluted to half strength. One feeding per crop is all that is needed.
- Rutabaga: Keep soil evenly moist throughout the growing season. Thin established seedlings 6 to 8 inches (15-20 cm) apart. Feed one week after thinning and again three weeks after thinning—with a complete liquid fertilizer diluted to half strength.
- Spinach: Keep soil evenly moist throughout the growing season. Once plants are well-established begin feeding with a high nitrogen fertilizer diluted to half strength every two weeks. When plants are 3 to 4 inches (7-10 cm) tall, and thin so the remaining seedlings are 6 inches (15 cm) apart.
- Squash: Keep potting mix evenly moist; keep water off foliage that is susceptible to mildew. Grow squash in a bright sunny place for the best yield. Place black plastic sheeting around the base of plants early in the season to conserve moisture and warm plants; later use aluminum foil to conserve moisture and repel insects with bright reflected light under leaves. Feed with a 10-10-10 fertilizer after fruit sets.
- Sweet Potatoes: Once transplants are established, keep the potting mix just moist—never wet. A month after setting in slips, sprinkle a 10-10-10 slow-release fertilizer into the soil avoiding contact with the stems.
- Swiss Chard: Keep the soil evenly moist throughout the growing season; too little water will cause the leaves to be stiff and coarse. Thin seedlings when 2 to 3 inches (5-7 cm) tall to 6 inches (15 cm) apart. Feed with a complete liquid fertilizer every two weeks once plants are established.
- Tomatillo: Be sure plants get a full day of direct sun. Keep the potting mix just moist throughout the growing season.
- Tomatoes: Keep the soil just moist throughout the growing season; do not let it go dry out and do not overwater (a dry-wet cycle can cause cracking or blossom-end rot). Feed with low nitrogen, high phosphorus food once a month while fruits are developing. Just before harvest stop feeding. Plants sheltered from the wind should get a gentle shake during flowering (this will help ensure pollen drop from the anther onto the stigma—the tomato has a complete flower that self-pollinates).
- Turnips: Keep soil evenly moist throughout the growing season. Thin established seedlings 6 to 8 inches (15-20 cm) apart. Feed one week after thinning and again three weeks after thinning—with a complete liquid fertilizer diluted to half strength.
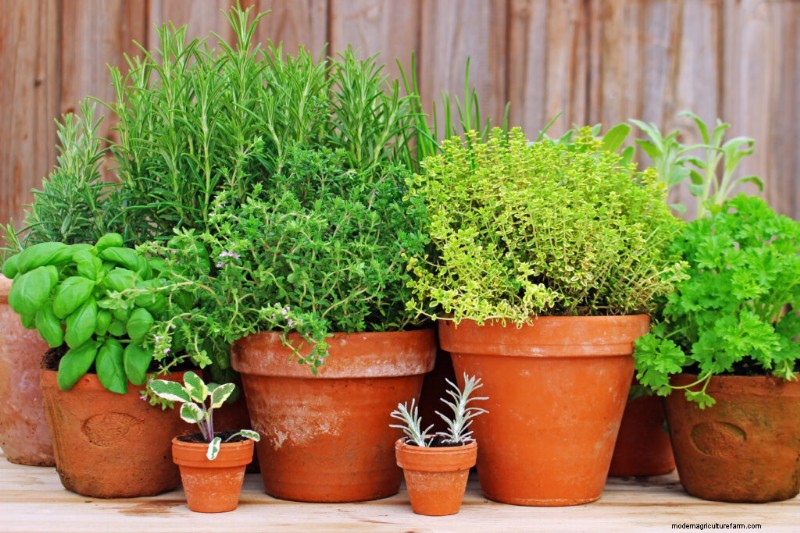
Herbs growing in clay pots
Water-wise crops for containers
Crops that are relatively drought tolerant are best for containers or gardens where water is not easily accessible. Water-wise crops are a good choice for balconies, rooftops, and patios.
All crops need water to grow—especially when first planted and until they are well-established. The best course is to keep the soil just moist—not too wet and not dry whenever possible.
Water pots less than 8 inches (20 cm) in diameter from above; use a 1-quart kitchen measuring cup. Large pots can be watered with a plastic pail, watering can, or a gentle stream from a hose.
Let the soil in a pot or container dry out to 1 inch (2.5 cm) deep before watering again. Infrequent watering is better than watering too often but never let the soil in a container go completely dry.
If you have a large number of pots, a drip irrigation system that hooks up to a faucet or spigot may be the most efficient course.
Water-wise crops include:
- Artichokes
- Beets
- Carrots
- Chard
- Garlic
- Herbs—bay, lemon verbena, oregano, rosemary, sage, thyme
- Kale
- Peas
- Scallions
- Spinach
Where water is scarce or not easily accessible, avoid these very thirsty crops: potatoes, strawberries, tomatoes, eggplants, peppers, cucumbers, and zucchini.
Planting combinations
You don’t have to grow just one vegetable in a container. Edible flowers such as pot marigolds and violas can be grown with lettuce. Grow leaf lettuce with parsley, chives, and coriander. Lettuce, onions, beets, and garlic can be grown in a large container with broad beans. Small-fruiting peppers such as ‘Tabasco’ or ‘Serrano’ will make a colorful patio container. Grow tomatoes and basil or thyme together. Ruby chard in its own pot is a colorful accent for any deck.
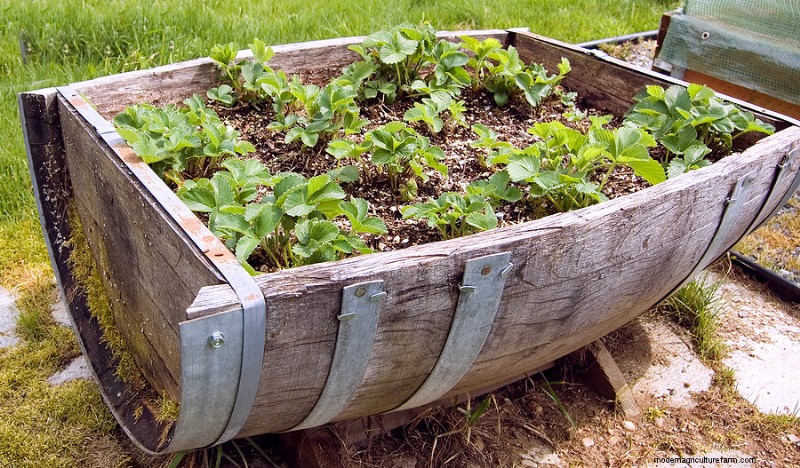
Growing strawberries in a half barrel
Keep your container garden growing
For an extended harvest, make small sowings of different vegetables every three to four weeks during the growing season. Leafy crops can be harvested cut and come again every couple of weeks. To extend the tomato harvest plant two patio varieties a month apart. When the weather turns cold, your container crops can be moved to a warmer location or you can use large clear plastic bags draped over wire frames to form mini-greenhouses that will keep plants growing several weeks after the first frost in autumn. Most vegetables will not grow in the house over the winter; they require a special combination of heat, sunshine, and humidity that is best found in a greenhouse or cold frame. But herbs can be grown indoors over the winter. Expose herbs to gradually warmer temperatures on a porch or in the garage before bringing them into the house for the winter. Herbs can be placed in a sunny window to be enjoyed almost indefinitely.
Also of interest:
Windowsill Gardening
Garden Planning Books at Amazon:
- Vegetable Garden Almanac & Planner
- Kitchen Garden Grower’s Guide Vegetable Encyclopedia
- Vegetable Garden Grower’s Guide
- Tomato Grower’s Answer Book


