Welcome to Modern Agriculture!

Weeds quietly steal hours from every gardening season. You pull them on Saturday, and a fresh crop is up by Tuesday looking smug.
A thoughtful mulch routine flips that math. Most weed seeds need light to germinate, so a proper layer keeps them in the dark and saves you the bending and yanking. The University of California IPM program notes that organic mulch also feeds soil and holds moisture as it breaks down.
The 18 mulching secrets below pull from extension service guidance, arborist warnings, and the small habits experienced gardeners share over the fence. None of them require fancy tools, and most cost nothing extra.
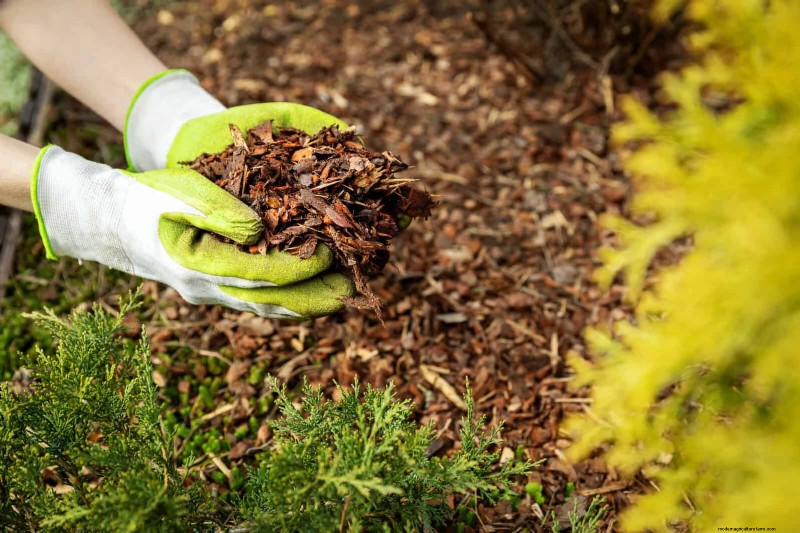
Most home gardens do best with a mulch layer between two and three inches deep. That depth blocks light, traps moisture, and still lets oxygen reach the roots.
Going thicker sounds like more protection, but it backfires. The University of California IPM program warns that mulches deeper than four inches can suffocate roots and increase disease.
Trees and shrubs handle three to four inches well. Vegetable gardens prefer the lighter end, around one to two inches, so seedlings can breathe.
 DepositPhotos.com
Mulch is a barrier, not a force field. Bury an established weed and it will push right back through the layer above, with a head start on the season.
Take 20 minutes to clear the bed before you spread anything. Get the taproots, not just the green tops, since dandelions and thistles regrow quickly. The cleaner your starting point, the longer your mulch holds the line.
We'll email it to you so you can read it later!
By saving, you agree to receive occasional emails. Unsubscribe anytime.
A clean edge is what separates a maintained garden from a so-so one.
Cut a small lip with a half-moon edger or a sharp spade, two to three inches deep. The trench catches mulch that might otherwise wander into the lawn, and it discourages grass from creeping in sideways. That sideways creep is one of the sneakier weed sources in mulched beds.
If you do not own one yet, a simple manual tool like the BARAYSTUS Half Moon Lawn Edger handles small beds without any motor or fuel. (Amazon)
Landscape fabric sounds like a shortcut, and it works for about a year. After that, soil and organic matter settle on top, weed seeds drift in, and they happily root in the thin compost layer that builds up.
The fabric also blocks earthworms and slows the natural exchange between mulch and soil. Penn State Extension and Illinois Extension have both written about how often homeowners regret installing it.
Save your money and use the next tip instead.
Plain brown cardboard or unprinted newspaper makes a smarter underlayer than fabric. It blocks light long enough to smother existing weeds, then breaks down within a season.
Soak the sheets, lay them flat, and overlap the seams by a few inches. Top with two to three inches of your chosen mulch. Earthworms and microbes can still pass through as the paper decomposes.
What happens when mulch piles up against a stem? The constant moisture invites rot, fungus, and the kind of pests that nibble bark in winter.
Leave a clear ring of an inch or two around perennials and small shrubs. Around tree trunks, leave a bigger gap, closer to three or four inches.
Think of the shape as a doughnut, not a cone. That mental picture alone fixes most mulch placement issues.
Mounding mulch high against a trunk is one of the most common landscape mistakes. The publication Birds and Blooms calls it volcano mulching, and certified arborists have been advising against it for decades.
The piled material softens bark, encourages secondary roots that circle the trunk, and shelters voles that chew on bark in winter. Spread the same volume of mulch out into a wide flat ring instead, and consider some of the natural pest control methods that quietly keep rodents in check.
Did You Know? A study summarized by the International Society of Arboriculture found that trees with mulch volcanoes can develop girdling roots within five to seven years, sometimes leading to slow decline well before the homeowner notices anything is wrong.
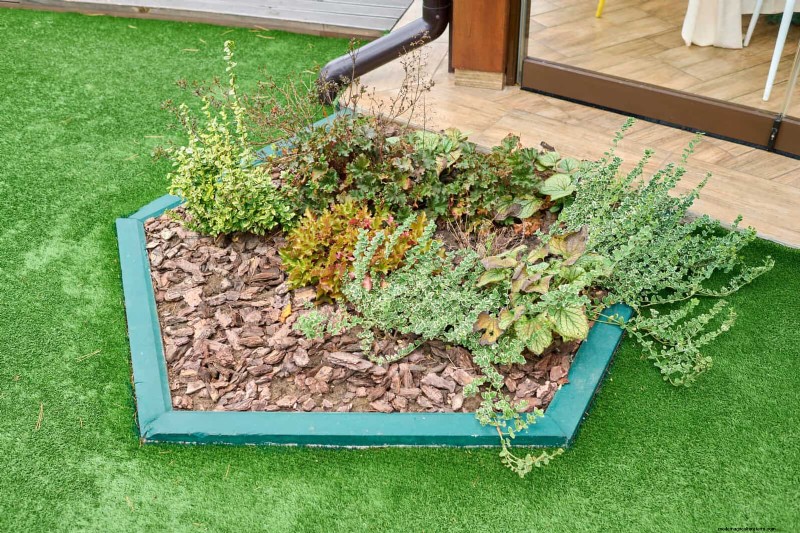
Coarse mulch lasts longer and packs less tightly. That looser structure means better airflow to the soil and a steadier moisture level below.
Arborist wood chips, shredded hardwood, and chunky pine bark all fall into this group. Fine mulches like sawdust mat down quickly after heavy rain and break down faster, so you replace them more often.
 DepositPhotos.com
Fresh wood chips look beautiful, but they can briefly tie up nitrogen as they begin to decompose. Plants near the surface sometimes look pale for a few weeks until the soil rebalances.
Aged chips skip that issue. Tree services often deliver aged loads at no charge if you ask. Bonus: they smell more like a forest floor.
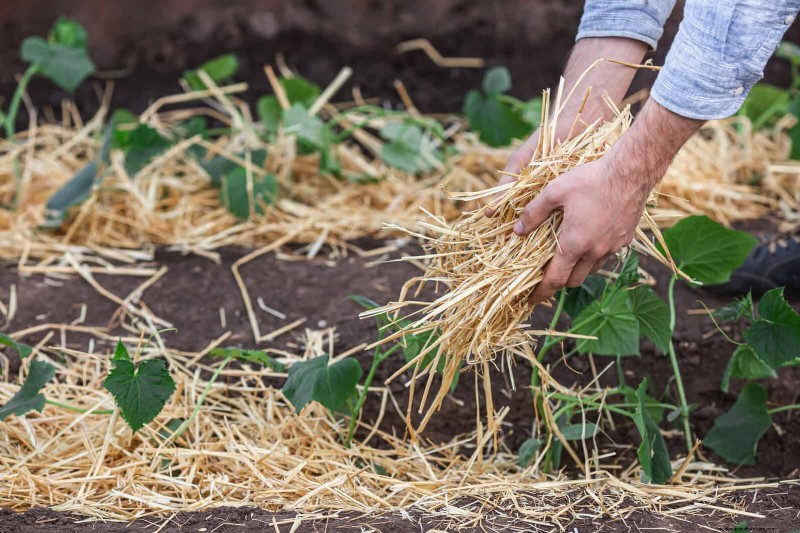
Hay carries a hidden tax in the form of grass and weed seeds. Straw is harvested after the grain is removed, so it holds far fewer surprises.
A two-inch layer between vegetable rows keeps soil from splashing onto leaves, which alone reduces some common diseases. Top up the layer mid-season as it breaks down.
 DepositPhotos.com
Spreading mulch over dry soil seals in the dryness.
Give the bed a deep soak the day before. The next rain or irrigation will reach roots that are already in moist soil, and the mulch will continue holding moisture for weeks.
This single habit makes a real difference during a dry summer. It is the kind of small step that experienced gardeners rarely skip.
Mulching too early in spring keeps the soil cold and slows growth. Most extension services recommend waiting until the soil hits about sixty degrees Fahrenheit, usually mid to late spring.
Wait until the danger of hard frost has passed, then apply. The seasonal rains will help the layer settle, and you get the longest stretch of weed suppression heading into summer.
See more: 15 Seasonal Garden Maintenance Mistakes That Set You Back Every Year
Picture a bed in late October, with leaves drifting across thinning mulch.
A second light application before the first hard frost protects roots from heaving as the ground freezes and thaws. It also keeps cold-weather weeds in the dark during mild winter spells.
You usually only need an extra inch on top of what is already there. Skip the top-up if your existing layer still measures three inches or more.
Acid-loving plants like blueberries, azaleas, and rhododendrons thrive under pine needles and pine bark. The slow acidic breakdown supports their preferred soil chemistry.
Vegetables and most annuals prefer straw or shredded leaves, which break down quickly and feed the soil. Trees and shrubs do best with arborist chips or shredded hardwood.
Picking the right material for the right bed quietly amplifies every other tip on this list.
A thin half-inch of compost between soil and mulch acts as slow-release fuel. It feeds plants without disturbing the weed-blocking layer above.
Spread the compost on weeded soil first, then top with your two to three inches of mulch. Microbes pull nutrients down through the layers naturally, and you will notice the difference in plant vigor within a single growing season.
If you are not sure what your soil actually needs, take a look at our guide to reading your soil before reaching for fertilizer.
Even good mulch will compact over time, especially in shady or wet beds. Compacted mulch sheds water instead of letting it pass through.
A quick fluff with a leaf rake breaks up the surface and restores airflow. Do it once in late spring and once again in late summer. The whole process takes about ten minutes per bed.
An adjustable head makes the work faster around perennials. The TABOR TOOLS Adjustable Metal Rake is a popular pick for tight spaces between plants. (Amazon)
Shredded leaves are arguably the most underrated mulch on this list. They are also free.
Run a mower over a pile a few times, then spread two inches around perennials and shrubs. Oak, maple, and beech all work well.
The leaves slowly turn into rich leaf mold, which is excellent soil food. Hold back any whole leaves that mat into a wet seal, since they can block water flow.
A mulch layer that touches wood siding or a wood fence acts as a moisture bridge. That can lead to wood rot and provide cover for termites in regions where they are active.
Leave a gravel border or a few inches of bare soil between the mulch and any wood structure. Six inches of clear space is the common recommendation. The bed still looks tidy, and the structure stays dry.
Quick Mulch Refresh Checklist