
Welcome to Modern Agriculture!

The following information is all about Silkworm Rearing.
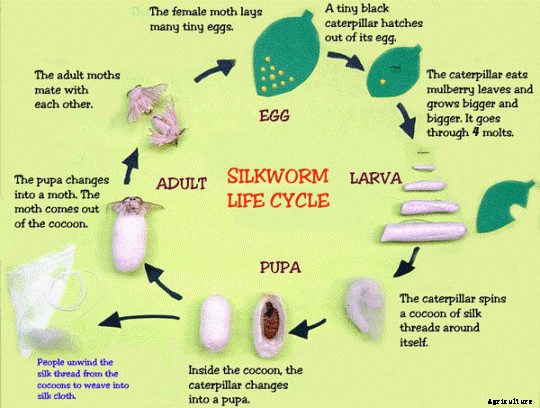
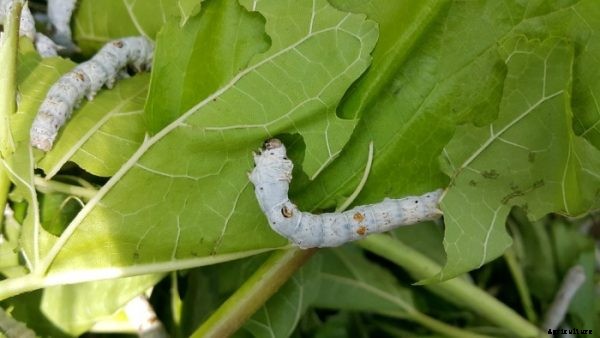
What is silkworm rearing? well, it is part of sericulture in which worms are raised for the production of raw silk. When it comes to the definition of the silkworm, it is the larva or caterpillar of the “Bombyx mori” moth. Silk worms are native to chine and they feed on mulberry leaves. For commercial silkworm farming, you should also consider growing a mulberry crop. Usually, a female silkworm lays about 500 to 600 eggs on mulberry leaves before it dies ( As these silkworms won’t eat anything after egg laying which results in silkworms death). These silkworm eggs are hatched into larva in cool and favorable conditions. In the following sections, let us discuss more silkworm rearing process.
रेशमी का कीड़ा : Hindi.
పట్టునూలు పురుగు : Telugu.
பட்டுப்புழு : Tamil.
പട്ടുവം : Malayalam.
ರೇಷ್ಮೆ ಹುಳು : Kannada.
रेशीम किड : Marathi.
ਰੇਸ਼ਮ ਕੀੜੇ : Punjabi.
રેશક વોર્મ : Gujarati.
রেশমগুটি : Bengali.
ریشم کے کیڑوں : Urdu.
What is Chawki rearing? well, generally the silkworms pass through 5 developing phases (Instars) from their hatching to the full-developed stage. In this process, the silkworms up to the second stage (stage 2) are called Chawki or young age worms. The young worms or Chawki requires special care and attention as they are very much prone to infections and vulnerable to unfavorable climatic conditions. This is the reason why most people rear the Chawki in separate Chawki rearing centers under a controlled environment (conditions). The rearing practices of young worms (Chawki) are completely different from late age rearing worms.
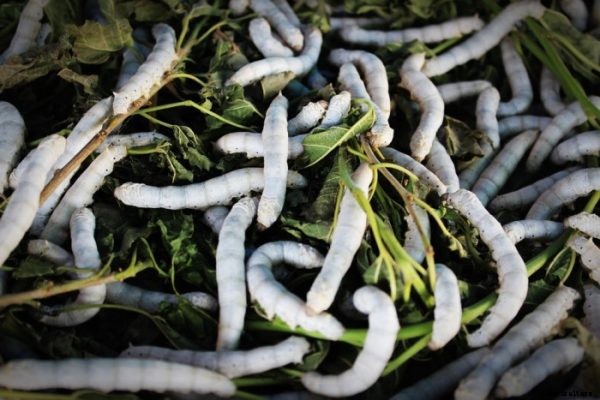
What is late age rearing? well, as we have already mentioned above that the lifecycle of silkworms till the second stage is known as “Chawki”. From third stage development (from 3rd instars), worms are being known as late age rearing. The late age rearing worms engage in heavy feed consumption. However, late age rearing of worms requires different practices.
Read: Sericulture Training in India.
The silkworm rearing house must have a controlled environment for rearing Chawki and Late age silkworms. The conditions like temperature and relative humidity (RH) should be maintained 24°C to 27°C and 75% to 85% respectively. It is mandatory to provide a rearing house with appropriate cooling through proper selection of wall material, roof fabrication, building direction (orientation), method of build construction, design of rearing house, etc. You must also ensure sufficient space for mulberry leaf preservation, Chawki rearing, late age rearing, and molting. The rearing house should be designed in such a way that it can be cleaned and disinfected with ease. When it comes to the size of the rearing house, generally it depends upon number (quantum) and method of rearing. Usually, a floor area of 400 to 500 square feet can provide rearing space for 100 to 110 dfls (dfl: Disease Free Layings; 1 dfl = 500 larvae).
The late age silkworm rearing house must have good cross-ventilation to bring down the house temperature and for removal of vapors and unfavorable or harmful gases generated from large quantities of silkworms excreta.
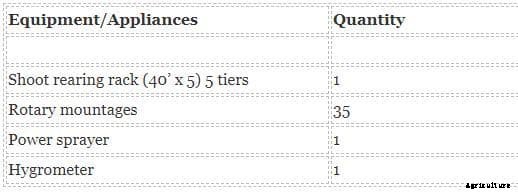
The rearing equipment/appliances required for 100 dfls (1 dfl = 500 larvae, so 100 x 500 = 50,000 larvae) is as follows (in Table ):
The rearing house and appliances/equipment should be disinfected thoroughly after the completion of the previous crop and just two days before the next crop respectively. The first disinfection should be carried out once with 5% bleaching powder, this should be done as soon as the previous crop is completed. The next disinfection should be carried out with 2.5% Chlorine dioxide solution two days after the next crop.
The following table is a disinfection schedule of rearing house and appliances.
Day Order of work Work details After the completion of previous crop rearing 1 This should involve the collection and burning of diseased larvae and melted, and flimsy cocoons. 2 Flaming the floss of rotary mountange and disinfection by fumigation should be carried out. 3 First disinfection of rearing house and appliances should be carried out. 5 days before brushing 4 Cleaning and washing of appliances should be carried out. 5 Sun drying of appliances should be done. 4 days before brushing 6 Disinfection of rearing with 0.3% slaked lime (optional) should be carried out. 3 days before brushing 7 Second disinfection of rearing house and appliances should be done. 2 days before brushing 8 Dusting disinfectant in front of rearing house and to the passage should be carried out. 9 Opening the windows of rearing house for ventilation should be carried out. 1 day before brushing 10 Preparation for brushing should be done.In the shoot rearing method, the final three stages of rearing will be carried out by providing mulberry shoots instead of individual mulberry leaves. This method of rearing is recommended since it saves about 40 to 45% of rearing labor. The other benefits of this method include:
Read: Sericulture Subsidy and Loan in India.
The following are silkworm body and rearing bed/seat disinfectants used in preventing any silkworm diseases.
You should take the powder in a thin cloth and dust over the silkworms @ 5 grams per square feet area after every moult. Subsequently, once on the fourth day of final instar after bed cleaning. See the below table for schedule and quantity to be dusted for 100 dfls.

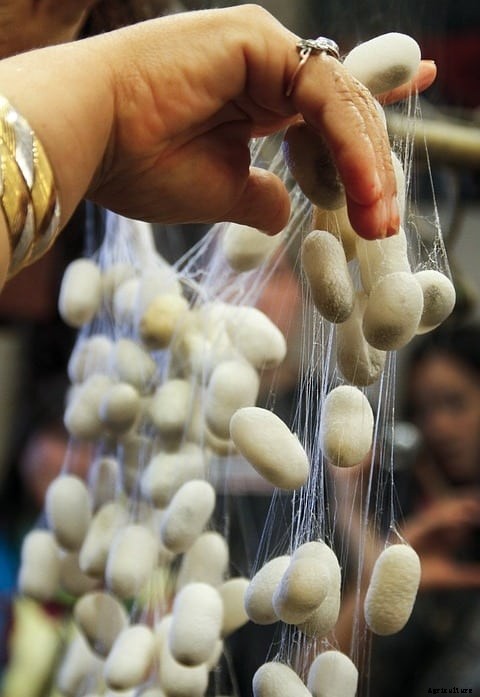
To yield quality cocoons, mounting the larvae of the silkworm at a suitable time and good quality mountages are very important tasks. Generally, In the 5th instars on 7th-day silkworms enter into maturation and stop feeding, and start to search place to build the cocoons. Those larvae should be collected immediately and mounted on to the mountages. It is essential that the number of larvae on mountages must not exceed the capacity of each mountage. When the larvae are in the spinning stage, ensure the room temperature of 24°C and 65 to 70 % of RH (Relative humidity) along with good aeration. You should provide rotary mountages for the production of good quality cocoons. About 35 sets of rotary mountages should be required for mounting silkworms of 100 dfls.
Usually, cocoons are harvested on the sixth day. You should remove defective cocoons and sort out the cocoons, grade the cocoons according to the quality. Delaying harvest of cocoons by 1 day in winter is advised.
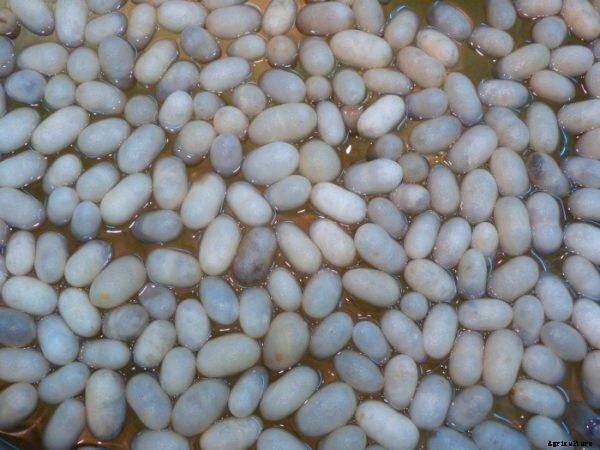
The yield of cocoons depends upon the rearing practices of silkworms. On an average one can obtain a yield of 65 to 70 Kg cocoons from 100 dfls. About 800 to 900 Kg cocoons can be harvested from 1 acre of mulberry orchard per year.
It is recommended to transport the cocoons during the morning or late evening cooler hours (market on the seventh day). Cocoons should be loosely packed in 35 to 40 kg capacity nylon netted bags. Make sure the transport vehicle has shelves/partitions to avoid any pressings of cocoons.


