Welcome to Modern Agriculture!

If you are looking to grow a lush and fruitful vegetable garden, composting is one of the best things you can do for your plants. Learn how to make compost for your vegetable garden with our easy-to-follow guide.
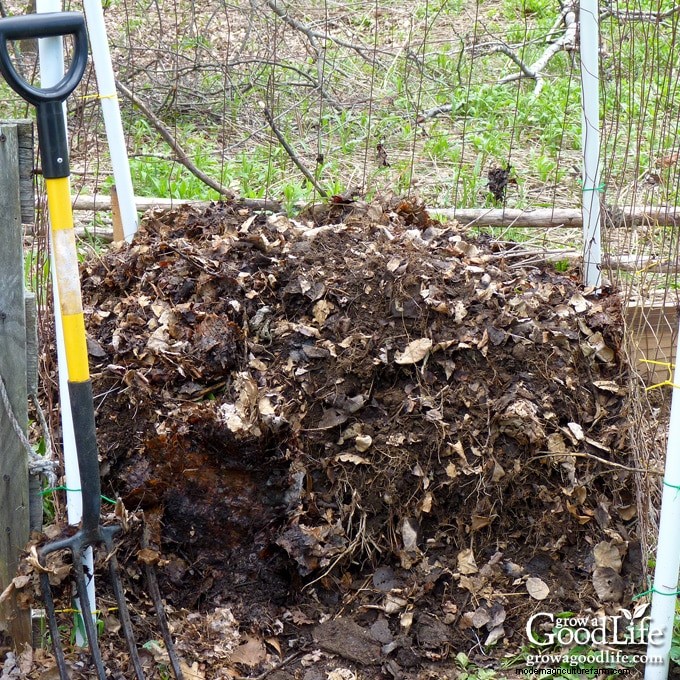
Okay, let’s get real for a second. If you are a backyard gardener and you’re not composting, you’re missing out on some seriously awesome benefits. Composting is basically like making your own plant superfood, and your veggie garden will thank you for it.
By far, compost is the best source of organic matter to improve and nourish your garden soil. While you can purchase finished compost in bulk from your garden center, the best compost for your garden is one that you make yourself. I can’t tell you the number of times I purchased bags of compost and found large pieces of wood, screws, and even bits of plastic or other non-compostable materials. When you make your own, you’ll know exactly what goes into it.
Composting is actually quite easy, and it’s important to remember that it’s a natural process that occurs with or without our intervention. You don’t have to worry about getting everything just right or having the perfect compost pile. Even if you’re not able to tend to your pile regularly, it will still break down over time and eventually become usable compost. So don’t be intimidated by the idea of composting – it’s an easy process that anyone can do!
But getting started with composting can be overwhelming. With so many different types of composting and methods for building and maintaining a compost pile, it’s hard to know where to begin.
In this article, we’ll guide you through the process of making compost for your vegetable garden, from understanding how composting works to choosing a location for your compost pile, troubleshooting common problems, and using your finished compost in your garden. So grab a shovel, and let’s get started!
Compost is a dark, crumbly, and nutrient-rich soil amendment that is made by breaking down organic materials such as food scraps, yard waste, and other plant-based materials.
It is a natural process that happens when microorganisms such as bacteria, fungi, and earthworms break down the organic material, converting it into a rich soil-like substance that can be used to nourish plants. The process requires four main ingredients: browns, greens, water, and air.
Compost is a natural result of combining and breaking down these components into a nutrient-rich soil amendment.
So, while we understand that composting is awesome for your veggie garden, let’s dive deeper into the benefits. Here are just a few reasons why you should start composting at home:
Overall, composting is a win-win for your veggie garden. By composting at home, you can reap all these benefits and help reduce food waste while contributing to a healthier environment. In addition, it’s easy to do.
Of course, there are many different methods and techniques you can use, depending on your space, materials, and personal preferences. But don’t worry, we’ll cover some of those in the next section.
There are several different types of composting methods, each with its own benefits and drawbacks. Here’s a quick rundown of some of the most common types of composting:
Hot composting is a method that requires more management and can produce compost faster by generating heat through the activity of microorganisms in the compost pile. It involves actively managing your compost pile to speed up the decomposition process.
To begin hot composting, you’ll need to create a pile that’s at least 3 feet tall and 3 feet wide, containing a layered mix of brown and green materials. Then adapt the moisture as needed to provide an optimal environment for the microorganisms to thrive. Additionally, you’ll need to regularly turn the pile to aerate and monitor its temperature to ensure it stays between 130 to 140˚F.
Hot composting is the fastest way to produce compost because the high temperature accelerates the decomposition process. The heat also helps to kill weed seeds and pathogens that may be present in the compost, making it safer to use in your garden.
Cold composting, also known as passive composting, is a slower process that only needs a little of your attention. Cold composting involves adding organic material to a compost bin or pile and letting it break down naturally over time. Unlike hot composting, turning it on a frequent schedule or monitoring the temperature is unnecessary.
However, you should occasionally monitor the pile to check the temperature and moisture level and turn it to provide air to the microorganisms. The process can take anywhere from 6 months to a year or more, depending on the materials used and the climate.
Cold composting takes longer to produce compost than hot composting, but it requires less effort and attention. It is a good option for gardeners who don’t generate a lot of organic waste or who are not in a hurry to produce compost.
Vermicomposting, also called worm composting, is a method that uses worms to break down organic materials into compost. You’ll need a worm bin and red wiggler worms to do this. You’ll then add your food scraps and other organic materials to the bin and let the worms do their thing. Vermicomposting can produce compost in as little as a few months and is a great option for apartment dwellers or those with limited space.
Trench composting is a method that involves digging a trench in your garden bed, filling it with organic materials, and then covering it with soil. As the materials decompose, they release nutrients into the ground, which can help to fertilize your plants. Trench composting can take anywhere from a few months to a year or more, depending on the materials used.
Sheet composting, also known as lasagna gardening, is a method that involves layering organic materials directly onto your garden bed. To do this, you’ll start by creating a layer of brown materials, followed by a layer of green materials, and then a layer of soil. After that, you’ll continue layering until you’ve created a compost “lasagna” that’s several inches thick. Sheet composting can take anywhere from a few months to a year or more to produce compost.
Each of these composting methods has its own advantages and disadvantages, so it’s important to choose the one that works best for you and your garden. Experiment with different ways and see what works best for your space, materials, and lifestyle.
Now that you know the benefits of composting and the different methods, it’s time to start with your own compost pile. Here are the steps to setting up your first compost pile:
When choosing a location for your compost pile, look for a spot that’s convenient to access both from your kitchen and garden but also out of the way enough that it won’t be an eyesore. You’ll also want to make sure that the location has good drainage and is protected from excessive sunlight and wind.
While you don’t necessarily need a container to compost, it can help to keep your pile enclosed and organized. You are aiming for an area that is about 3 x 3 feet. Some container options include a simple pile, a compost bin, or a tumbler.
My compost bin is made out of recycled pallets, fencing, and poles. It is divided into three sections, one for gathering material, one for actively composting, and one to store finished compost ready for use.
Consider the amount of space you have and the amount of compost you want to produce when choosing your container.
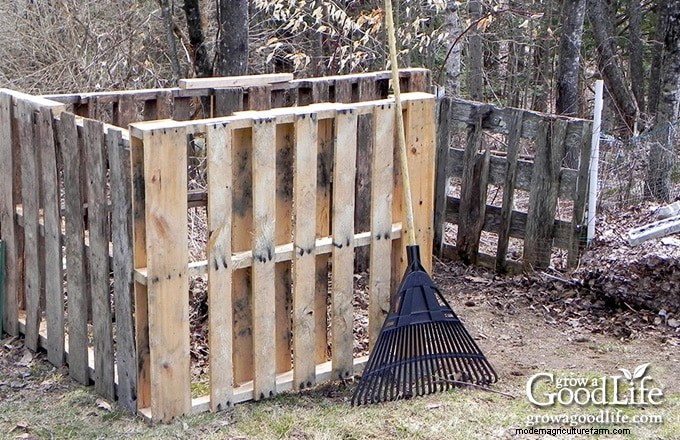 A rustic compost bin made of recycled pallets and fencing.
Collect a mix of brown and green materials. Brown materials include things like leaves, straw, and shredded paper, while green materials include things like food scraps, grass clippings, and coffee grounds. You’ll also want to add some soil, finished compost, or compost starter to help kick-start the decomposition process. Aim for a mix of 2 parts brown to 1 part green.
Here’s a list of suggested compostable items:
Carbon Sources (Browns):
Nitrogen Sources (Greens):
Items not to compost:
Start by creating a layer of brown materials such as wood chips, dry leaves, straw, or shredded newspaper, followed by a layer of green materials like kitchen scraps and fresh grass clippings.
Add a few shovelfuls of soil or finished compost with each layer to supply established organisms. Water each layer as you build it so the material is moist, not soaking wet. Repeat this layering process until the pile is at least 3 feet tall.
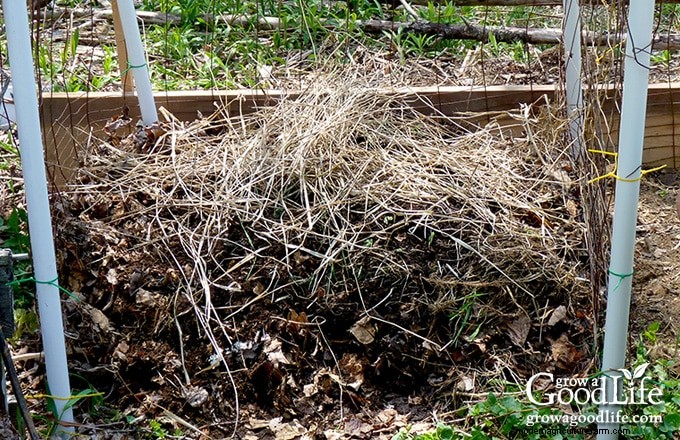
Composting is an ongoing process requiring occasional maintenance to ensure your compost breaks down effectively. Here are some tips for maintaining your compost heap:
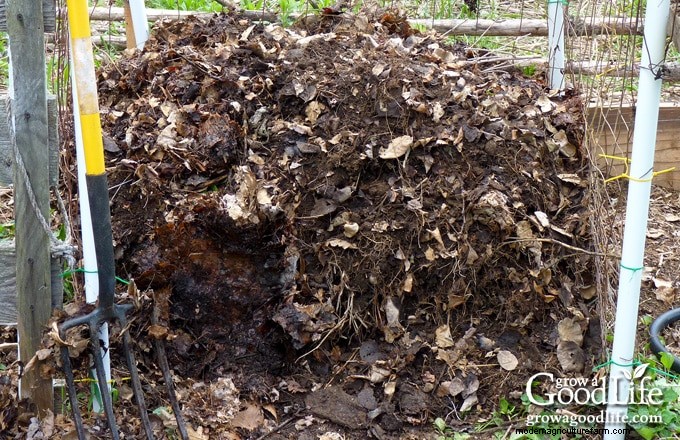 Compost bin after turning.
Once your compost is ready, it’s time to use it in your veggie garden! Spread a layer of compost over your garden soil, and mix it in well. Your plants will thank you for the nutrient-rich boost.
While composting is a straightforward process, a few common issues can arise. Here’s what you need to know to troubleshoot them:
By understanding and addressing these common composting problems, you can keep your compost pile healthy and thriving and produce nutrient-rich compost for your vegetable garden.
When we talk about feeding garden soil, you will often hear the term “finished compost,” as in, “Work two inches of finished compost into the top layer of the soil.” How can you tell when the compost is finished?
Depending on your composting method, your compost may take anywhere from a few months to a year to break down fully.
Compost is ready to use when it has broken down into a rich, loamy dark brown humus with a pleasant, earthy smell. Some materials, such as sticks, thick stalks, or large pieces of eggshells, may not compost as quickly as other materials, but as long as the majority of the compost looks like soil, it is ready to use. You can sift the large chucks out using 1/4-inch hardware cloth. I tend to pile it on the garden beds as is and cover it with mulch. It will break down naturally over time.
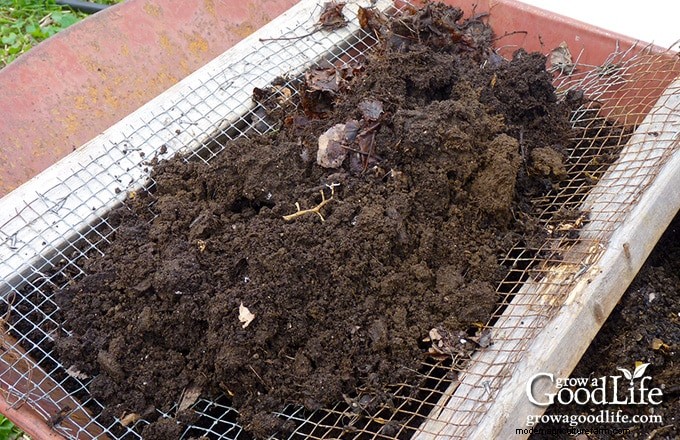 Screening finished compost into a wheelbarrow.
Once your compost has broken down into a dark, crumbly material, it’s time to use it in your vegetable garden.
To harvest your compost, use a pitchfork or shovel to remove the finished material from the bottom of the pile. As you remove the finished compost, set aside any larger pieces that haven’t broken down fully and return them to the pile.
Mix your finished compost into the soil in your vegetable garden. Aim for a 2 to 3-inch layer of compost on top of your soil and work it in using a garden fork or hoe. Here are some additional ways you can use your finished compost:
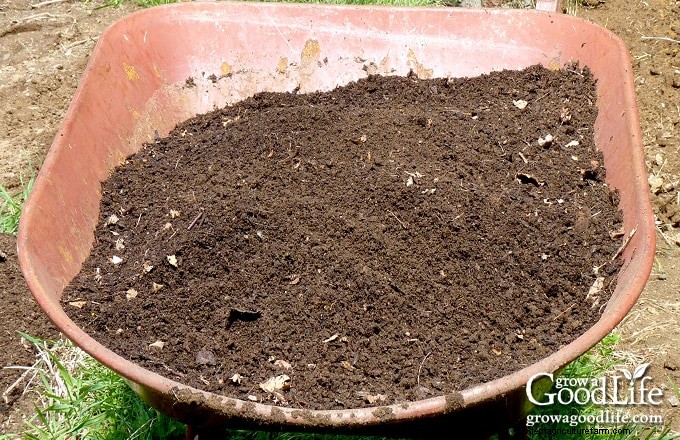
Remember, using compost is a natural and sustainable way to improve the health of your garden. And the best part is that you can make your own compost at home using kitchen scraps, yard waste, and other organic materials.
Composting is a simple way to create nutrient-rich soil for your vegetable garden while reducing waste and supporting a healthy ecosystem. By following the tips and techniques outlined in this article, you can start your own compost pile at home and watch your garden thrive.
To recap, we covered the importance of composting for your vegetable garden, the different methods of composting, how to build and maintain your compost pile, using your finished compost, and how to troubleshoot common composting problems.
We encourage you to take the first step towards composting and experiment with building your own compost pile. It may take some time and effort, but the results will be well worth it. Not only will you be doing your part for the environment, but you’ll also be producing nutrient-rich compost to help your vegetable garden grow and flourish.
Remember, composting is a natural process that happens with or without our help. So don’t stress too much about getting everything exactly right or having the perfect compost pile. Even if you don’t tend to your compost pile regularly, it will still break down over time and eventually turn into usable compost.
The key is to get started and experiment with what works best for you and your garden. Over time, you’ll learn what materials to add, how often to turn your pile, and how to maintain the right balance of moisture and temperature. Don’t be afraid to make mistakes or try new things – composting is all about trial and error!
So don’t let the fear of doing it wrong hold you back from starting your own compost pile. Instead, embrace the process and enjoy the rewards of creating nutrient-rich soil for your vegetable garden while reducing waste and supporting a healthy ecosystem.
—
Creating a thriving garden ecosystem is key to growing a healthy and flavorful vegetable garden. Cover crops, green manures, compost, and mulch are among the most effective ways to build and nourish your soil naturally without resorting to synthetic fertilizers and pesticides.
Combining these techniques can help you create a healthy and fertile environment for your backyard vegetable garden. Check out our 7 Simple Techniques to Improve Garden Soil article to learn more about improving your garden soil.
Happy Gardening!