Welcome to Modern Agriculture!

Are you interested in growing squash in your backyard vegetable garden? Our guide provides valuable insights on cultivating summer and winter squash plants, including planting, caring, and harvesting tips.
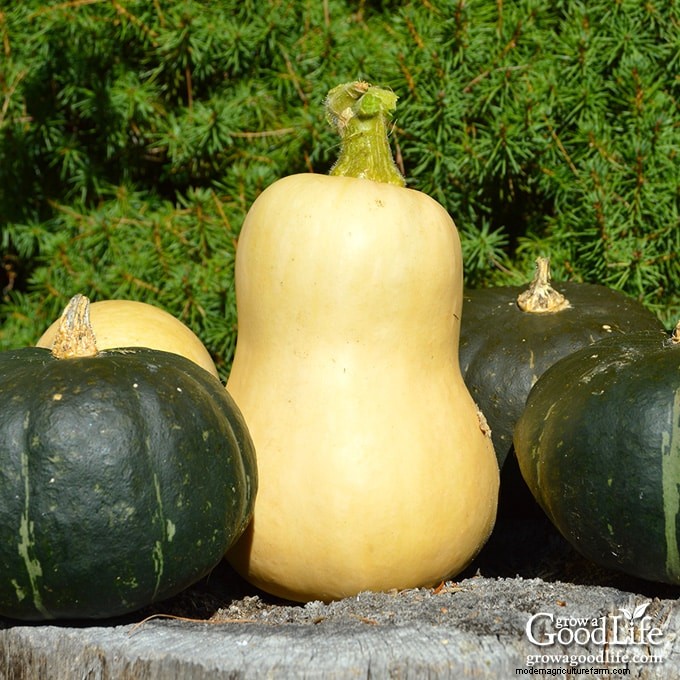
Squash plants make an excellent addition to any vegetable garden. They are easy to grow and offer a wide variety of shapes, sizes, and colors.
Whether it’s summer squash varieties or hearty winter squash options, these plants are a treasure trove of culinary possibilities. From sautéing and grilling to baking and roasting, squash can be transformed into delectable dishes that please every palate.
This comprehensive guide covers everything from selecting the ideal squash varieties to sowing the seeds and nurturing the plants throughout their growth. You’ll also learn how to tell when squash is ready to harvest and ways to preserve your bounty.
With our tips, step-by-step planting, and care instructions, you’ll gain the knowledge and confidence to grow your own squash. So get ready to learn all about growing squash plants and reap the rewards of your homegrown harvest!
Originating from the ancient civilizations of the Americas, squash (Cucurbita spp) has a rich history dating back as far as 10,000 years ago. Numerous cultivars have evolved, showcasing diversity in size, shape, color, texture, and flavor. This diverse plant family includes both summer squash and winter squash, each with distinct characteristics and culinary uses.
While both winter squash and summer squash belong to the same squash family, they differ in terms of their growth habits, harvesting times, and culinary uses.
Summer squash comes in various types and is known for its tender texture, mild flavors, and vibrant colors. The squash is harvested when it’s young and immature before the rind hardens, which makes the skin edible. This also means that summer squash can be cooked quickly and is perfect for sautés, stir-fries, grilling, and even raw and fresh salads. Common types of summer squash include:
Each of these summer squash varieties brings its own characteristics to the table, allowing for a range of culinary creations and delightful flavors in seasonal cooking.
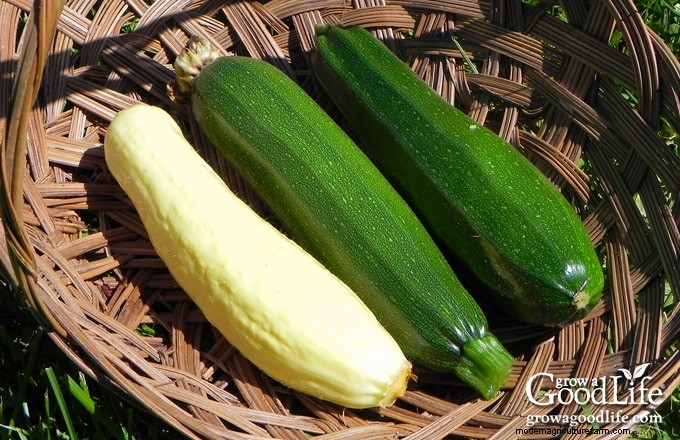 Yellow straightneck and zucchini summer squash
In contrast, winter squash is harvested later in the growing season once the fruits have fully matured and their rinds have hardened. These squash varieties have a denser texture, richer flavors, and often have a longer storage life. Winter squash is well-suited for roasting, baking, soups, stews, and other hearty preparations. Some popular varieties of winter squash include:
Each of these winter squash varieties offers unique flavors, textures, and culinary possibilities, making them a delicious addition to fall and winter meals.
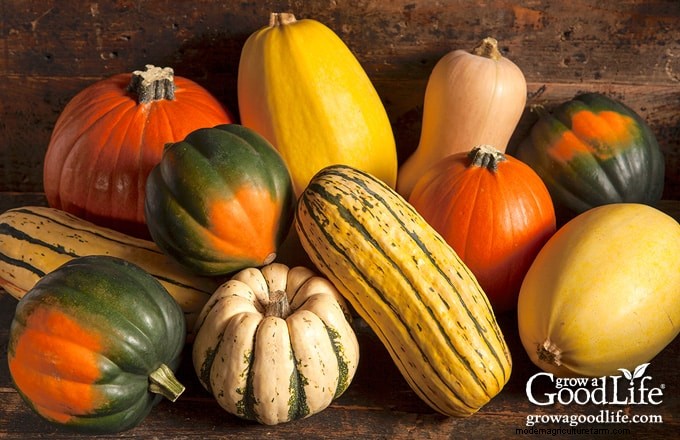 Pumpkin, spaghetti squash, butternut, acorn, delicata, and carnival squash
Now, let’s delve deeper into growing summer squash and winter squash, exploring the distinct characteristics and cultivation techniques for each type.
In this section, we will explore the essential aspects of growing squash, from understanding how squash plants grow to knowing the optimal timing for planting. We’ll also explore the techniques for starting squash from seeds indoors and direct sowing seeds in the garden, along with the vital care practices needed to nurture healthy and productive plants.
By the end of this section, you’ll have the knowledge and confidence to cultivate flourishing squash plants and enjoy a plentiful harvest of this versatile and delicious vegetable.
Now, let’s begin by understanding how squash plants grow and thrive, followed by important considerations for the timing of planting, starting squash from seeds, and caring for your plants throughout their growth journey.
Regardless of whether they belong to the winter or summer varieties, squash plants share a similar growth pattern. Understanding how these plants develop and thrive will help you provide the necessary care and support for optimal growth.
Winter squash plants are characterized by their vining growth habit. They produce long, sprawling vines that can span several feet in length. These vines tend to spread along the ground, taking up a significant amount of space in the garden.
As the vines grow, they produce large, lobed leaves that help capture sunlight for photosynthesis. The leaves are vital for the plant’s energy production and play a crucial role in the development of fruits.
Along the length of the vines, you’ll notice nodes, which are points where lateral branches, called runners, emerge. These runners give rise to additional leaves and flowers that develop into fruits.
During the growth of winter squash plants, their large, bright yellow flowers attract pollinators like bees, which are crucial for fruit development. After pollination, the flowers wilt, and the fruit begins to form. Over time, the fruit grows larger, and the skin hardens as it matures, forming a protective shell that makes squash ideal for long-term storage.
Providing support, such as trellises or sturdy fences, can help lift the vines off the ground, minimize space requirements, and promote better airflow around the plants, reducing disease risk.
Unlike winter squash, most summer squash varieties exhibit a bush-type growth habit. These plants form compact, bushy structures with a more upright growth pattern. As a result, they tend to occupy less space in the garden than vining winter squash.
Summer squash plants produce a cluster of large leaves that radiate from a central stem. The leaves contribute to the plant’s photosynthesis and provide shade to the developing fruits, protecting them from excessive sunlight.
Similar to winter squash, summer squash plants also produce bright yellow flowers that form directly on the central stem. Once the flowers are pollinated, the fruit develops rather quickly. Then, summer squash is harvested when young and tender before their rinds become tough and hard.
Due to their compact nature, bush-type summer squash plants are an excellent choice for smaller gardens or container gardening, as they take up less space and are more manageable in terms of maintenance. However, if you are growing summer squash in raised beds, they may benefit from additional support to help keep them upright so the plants don’t flop out of the beds into the garden paths. Learn How to Grow Summer Squash Vertically.
Understanding the growth habits of both winter squash’s vining nature and summer squash’s bush type structure will help you plan your garden layout, provide appropriate support, and ensure optimal conditions for the growth and development of your squash plants.
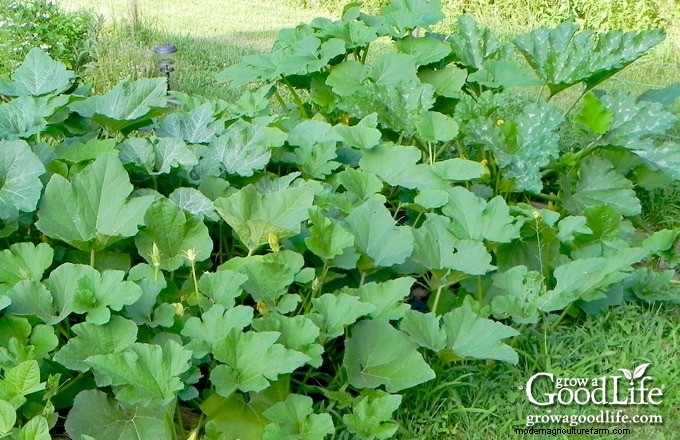
Choosing the right time to grow squash is crucial for ensuring successful germination, growth, and a bountiful harvest. Squash plants thrive in warm weather, so it’s essential to consider both the temperature and the frost-free period in your region when deciding when to plant.
Squash plants are sensitive to frost, and exposure to freezing temperatures can damage or kill them. Therefore, it’s essential to know your area’s average first frost date and plan accordingly. Learn how to make a planting calendar in this article: How to Make a Seed Starting Schedule.
If the first frost is expected before your squash plants reach maturity, consider using protective measures like row covers or harvesting the fruits early.
By selecting the appropriate timing for planting squash, you can optimize growing conditions and increase the chances of a successful and productive harvest. Consider the local climate, average frost dates, and the specific maturation times of your squash varieties.
Selecting the right growing location will ensure the success of your squash plants. Here are some key considerations:
Before planting squash, prepare the garden bed by clearing the area of weeds, rocks, and debris. Then plot out your hills using the recommended spacing for the squash variety you are growing. Typically, 2 to 3 feet for summer squash, about 4 to 6 feet between each mound to provide plenty of space for the vigorous vines.
To prepare your hills, dig a hole about 8 inches deep and fill it with aged compost and a slow-release organic fertilizer. Mix well with the native soil and create a mound approximately 6 inches high and 2 feet in diameter. Each hill can accommodate up to 3 plants. Following these steps will help establish a fertile and suitable garden bed for your squash plants.
To give your squash plants a head start, you can begin by starting the seeds indoors about 4 weeks before the last frost date. You can learn more about how to sow seeds indoors here: 10 Tips for Growing Seedlings Indoors.
Use soil blocks or larger containers that are at least 4 inches wide with drainage holes. Fill the containers with moistened potting mix, make 1/2-inch-deep holes, and add 1 or 2 seeds. Cover with soil, mist, and place under a humidity dome in a warm spot or on a seedling heat mat. Once sprouted, transfer the seedlings to grow lights.
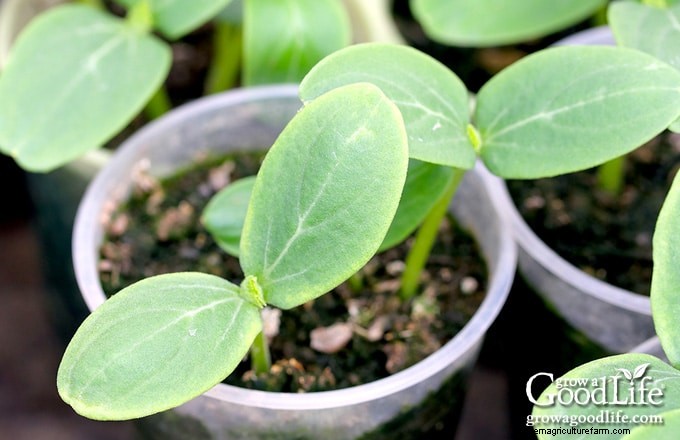
When the soil has warmed and the threat of frost has passed, it’s time to transplant your squash seedlings into the garden. Whether you purchased transplants or started them indoors, it’s important to harden off your plants before transplanting.
Hardening off involves gradually acclimating your young seedlings to the outdoor conditions. Over a two-week period, expose the transplants to a few hours of sunlight each day, gradually increasing the duration until they can tolerate being permanently outdoors. Learn How to Harden Off Seedlings with this tutorial.
Prepare your garden beds in advance. If the soil is dry, water the bed thoroughly the day before transplanting. Choose a cloudy day with calm winds for the transplanting process. Late afternoon or evening is an ideal time, allowing the plants to adjust without the intense sunlight.
Dig planting holes to match the depth of the container. Carefully remove the seedlings from their pots, preserving the soil around the roots. Nestle them into the holes and fill with soil. Lightly compact the soil around the plants to ensure good root-to-soil contact. Give them a generous watering and maintain consistent soil moisture until the plants become established.
Squash seeds require soil temperatures between 60˚F and 95˚F for germination, with sprouting typically occurring within 5 to 10 days. Germination may take longer in cooler temperatures. Wait until approximately 2 weeks after your last frost when the soil has warmed up to around 60˚F.
Prepare your mounds ahead of time as described above, then smooth the top of the hill and shape it into a slightly concave or shallow depression. This will help retain water and prevent runoff, allowing it to soak into the soil where the roots can access it. Direct sow seed into the ground, burying them about 2 inches deep. Aim to plant around 5 seeds per hill to ensure a good chance of germination. Water well and keep evenly moist until the plants become established.
Once the seedlings reach a height of 3 inches, it’s time to thin them out. Carefully snip away the excess seedlings using scissors at the soil level, ensuring you don’t damage the remaining plants. Ideally, thin down to 3 seedlings per hill, allowing enough space for healthy growth.
To ensure the health and productivity of your squash, provide the plants with the following care throughout the growing season:
Squash plants can be susceptible to various pests and diseases that can impact their health and productivity. Here are some common issues to be aware of and some organic ways to deal with them:
Remember to regularly inspect your squash plants for signs of pests or diseases and take appropriate action promptly to prevent further damage. Maintaining good air circulation and implementing preventive measures can help protect your squash plants from these common pests and diseases.
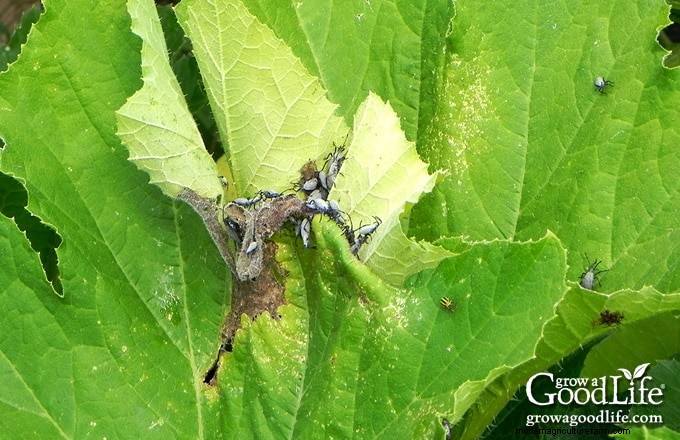 Squash bugs and a cucumber beetle on squash foliage
Harvesting your squash at the right time is crucial to enjoy the best flavor and texture. In this section, we’ll guide you through the process of harvesting both summer and winter squash, providing you with essential tips to ensure you pick your squash at the peak of ripeness. So let’s dive in and learn how to harvest your squash for a bountiful and delicious harvest.
Winter squash requires a long growing season, with the seeds planted in spring and the fruit maturing all summer. Here are key indicators to determine when your winter squash is ready to harvest:
To harvest winter squash, use a sharp knife or pruners to cut the fruit from the vine, leaving about 2 inches of stem attached. Be careful not to damage the squash during the process. Avoid twisting or pulling the squash, as it may separate from the stem and impact its storage life.
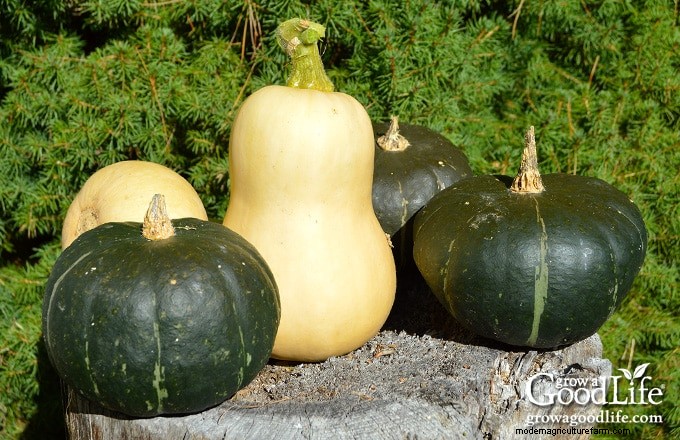 Butternut and buttercup squash
Summer squash is harvested young, usually 6 to 8 inches in length. The skin should be tender and easily pierced with a fingernail.
To harvest, use a sharp knife or pruning shears, and cut the squash from the vine, leaving a short stem attached. Harvest summer squash frequently to encourage continuous production. Regularly picking the squash also prevents them from becoming overripe and tough.
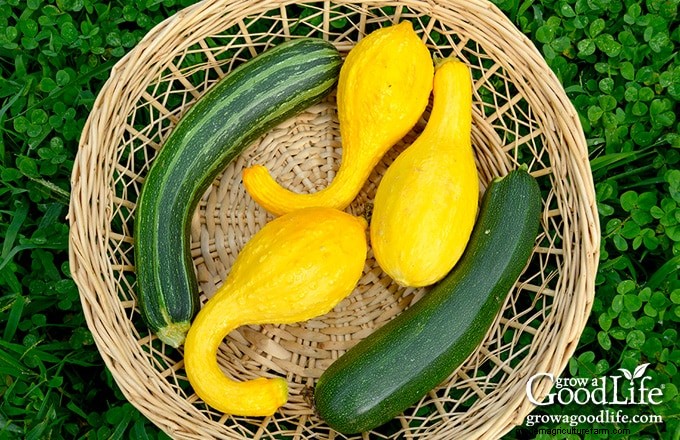 Zucchini and crookneck squash
Preserving your squash harvest allows you to enjoy it long after the growing season has ended. Whether you have an abundance of summer squash or a bountiful harvest of winter squash, there are several effective ways to preserve this versatile vegetable. From freezing to dehydrating and pickling, each method offers unique benefits and allows you to savor the taste of squash throughout the year.
Preserving winter squash and pumpkins is simple and convenient when using proper storage techniques. When stored correctly in a cool location, squash can keep for months, ensuring a plentiful supply for all your favorite recipes during the winter.
Check out our comprehensive article to learn How to Harvest, Cure, and Store Winter Squash.
Make squash puree to use in various recipes. Cook the squash until tender, and then remove the skin and seeds. Mash or blend the flesh into a smooth consistency. Allow the puree to cool before portioning it into freezer-safe containers or ice cube trays for convenient portioning. Frozen squash puree can be stored for several months and used in soups, pumpkin pies, and other baked goods. See How to Make Pumpkin Puree (You can use any variety of winter squash).
Freezing is a convenient method to preserve summer squash and zucchini. Check out our 5 Ways to Freeze Summer Squash article and learn different ways you can preserve summer squash in the freezer, including freezing slices that are perfect for sautés, soups, and casseroles, as well as shredded zucchini that can be used in frittatas, quiches, and baked goods like zucchini bread and muffins.
You can also try blanching and freezing zucchini halves, which are great for stuffing and baking, or keep zucchini purée in the freezer to add to smoothies, soups, sauces, and baked goods.
Dehydrating squash removes moisture, extending its shelf life. Both summer squash and winter squash can be preserved by dehydrating and storing in air tight containers. Rehydrate the squash by soaking it in boiling water or adding it directly to soups or stews.
Pickling summer squash offers a tangy and flavorful preservation method. Choose smaller, firm varieties like zucchini or yellow summer squash for pickling, and check out these canning recipes:
Whether you choose to cultivate the vibrant and versatile summer squash or the hearty and flavorful winter squash, I hope this guide has provided you with valuable insights on how to grow, care for, and preserve these delicious vegetables.
If you’re interested in expanding your squash gardening repertoire, consider these related articles:
With these additional resources, you’ll be equipped with even more expertise to further enhance your squash gardening endeavors. Happy Gardening!