Welcome to Modern Agriculture!

If you spend enough time researching aquaponics, you’ll quickly notice a trend: shiny, lightweight grow media like clay pebbles often steal the spotlight. They look clean, modern, and “high-tech.” But here’s the truth that experienced growers learn sooner or later:
Gravel still works, and it works really well.
In fact, some of the most stable, productive aquaponics systems around the world rely on simple gravel as their primary grow media. It may not be flashy, but it’s dependable, affordable, and incredibly effective when used correctly.
At its core, aquaponics is a balance between fish, plants, and beneficial bacteria. Your grow media plays a huge role in that balance. It’s not just there to hold your plants upright, it’s also where good bacteria live, where waste gets filtered, and where your system quietly stays in sync.
That’s where gravel shines.
It provides:
But like anything in aquaponics, not all gravel is created equal. The wrong type can cause pH problems, clog your system, or slow down plant growth. The right type? It can make your system easier to manage and far more productive.
In this blog, I’ll walk you through everything you need to know, from choosing the right gravel to setting it up properly and avoiding the most common mistakes. Whether you’re just starting out or improving an existing system, this will help you get it right the first time.
At its simplest, gravel in aquaponics is a type of grow media, the material that fills your grow bed and supports your plants. But in a well-functioning system, gravel does much more than just “hold things in place.”
Think of it as the foundation of your entire ecosystem.
Gravel acts as:
This combination is what makes gravel such a powerful and often underrated choice.
Not all gravel is suitable for aquaponics, so it’s important to know what you’re working with. The most commonly used types include:
Each type can work well, as long as it’s chemically safe and properly sized
For most aquaponics systems, the sweet spot is:
10–20 mm (about ½ to ¾ inch)
Why this range works:
Too small? You’ll end up with poor drainage and root suffocation.
Too large? Plants won’t anchor well, and bacteria surface area decreases.
Here’s a quick, honest comparison:
There’s no “one-size-fits-all” answer, but gravel often wins for budget-friendly, reliable systems, especially if you’re just getting started.
Gravel is not just filler, it’s an active part of your system’s health. When chosen and used correctly, it can support strong plant growth, stable water conditions, and a low-maintenance setup.
And the best part?
It’s one of the most accessible materials you can find almost anywhere.
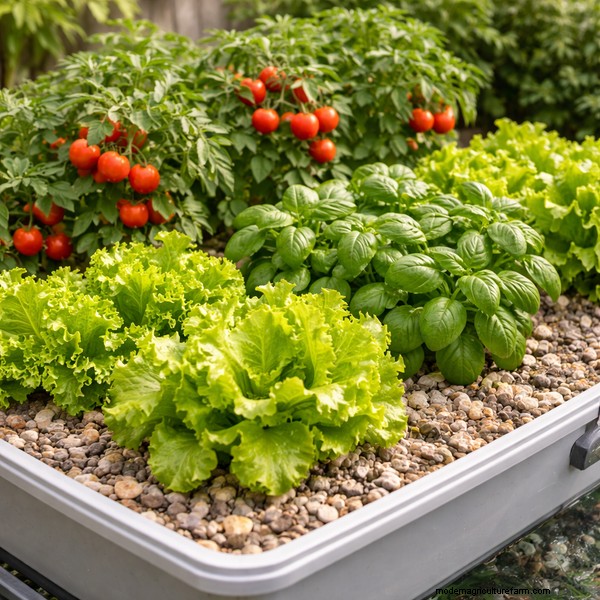
If gravel has been around this long in aquaponics, it’s not by accident. It continues to be a go-to choice for beginners and experienced growers alike because it delivers where it matters most: stability, simplicity, and results.
Let’s break down why gravel still earns its place in so many systems.
One of gravel’s biggest strengths is something you don’t even see happening.
Every piece of gravel becomes a home for beneficial bacteria, the microorganisms responsible for converting harmful fish waste (ammonia) into nutrients plants can absorb.
Because gravel provides a large surface area, it helps:
In many systems, your gravel bed doubles as your main biofilter, which simplifies your setup.
Let’s be honest, cost matters, especially when you’re starting out or scaling up.
Gravel is:
This makes it one of the most practical choices if you want to build a system that’s both effective and affordable.
If you plan to grow more than just leafy greens, this is where gravel really shines.
Unlike lightweight media, gravel:
This added stability becomes more important as your plants mature and start producing fruit.
Some grow media can float when water floods the bed, especially in new systems.
Gravel stays put.
That means:
It’s a small detail, but it makes your system feel much more stable and predictable.
Once you set up a gravel bed properly, you’re not replacing it anytime soon.
Gravel:
This durability adds long-term value, especially compared to media that degrade or need frequent replacement.
Gravel systems are often recommended for beginners and for good reason.
They’re:
If you’re still learning how aquaponics works, gravel gives you a more forgiving starting point.
Gravel is reliable, but it’s not perfect.
Let’s go through the key drawbacks so you can avoid problems before they start.
This is the first thing most beginners underestimate.
Once your grow bed is filled with gravel and water, it becomes extremely heavy. That affects:
If you’re building indoors or on a raised platform, this is something you absolutely need to plan for early.
Gravel allows good water flow, but only if it’s the right size and properly maintained.
Over time:
This can lead to:
The good news? This is manageable with proper system design and routine care (we’ll cover that later).
Here’s one mistake that causes a lot of frustration:
Some gravel contains limestone, which slowly raises your system’s pH.
That might not sound like a big deal, but in aquaponics:
The tricky part is that limestone doesn’t always look different from safe gravel.
That’s why testing (like the simple vinegar test) is so important before you add anything to your system.
Unlike some pre-packaged grow media, gravel usually comes dusty and dirty.
If you skip cleaning:
Washing gravel isn’t complicated, but it does take time and effort. Think of it as a one-time investment that prevents long-term headaches.
Compared to clay pebbles or other lightweight options, gravel is:
This doesn’t make it a bad choice, it just means you’ll want to plan your setup carefully before filling your grow bed.
Honest Take:
Not at all.
Every grow media has trade-offs. Gravel’s downsides are real, but they’re also predictable and manageable if you know what to expect.
In fact, many experienced growers prefer gravel because it’s so stable once everything is set up correctly.
Choosing gravel might seem simple until you realize the wrong choice can quietly cause problems for months.
This is where a lot of beginners slip up. They grab whatever gravel is cheapest or closest… and end up dealing with pH swings, clogged beds, or struggling plants.
Let’s make sure that doesn’t happen to you.
Quick Checklist (Save This Before You Buy)
Before you commit to any gravel, make sure it checks all of these boxes:
If it fails even one of these, it’s worth reconsidering.
The ideal gravel size for aquaponics is 10–20 mm.
Why this matters:
Gravel comes in different shapes depending on how it’s sourced.
Rounded (river gravel):
If you have the option, go with smooth or slightly rounded gravel.
Not all gravel is chemically safe.
Some types, especially those containing limestone, can slowly raise your system’s pH and cause nutrient issues.
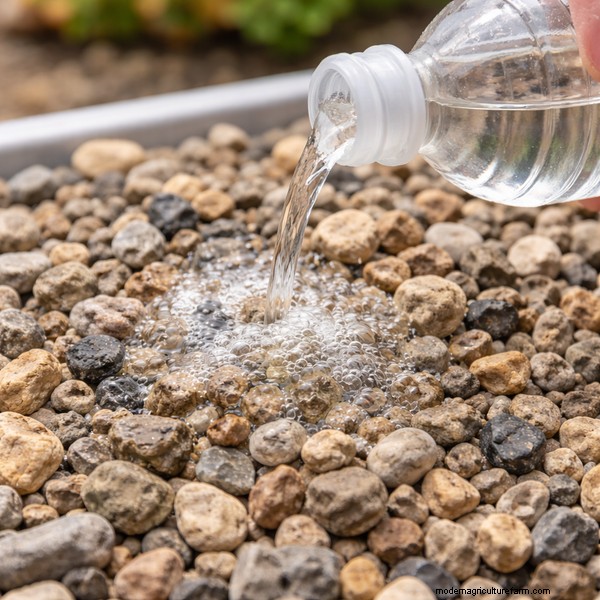
Simple Vinegar Test (Do This Every Time)
👉 If it fizzes or bubbles → avoid it
👉 If nothing happens → it’s likely safe
This quick test can save you from long-term headaches.
Even good gravel can cause problems if it’s dirty.
Look for gravel that is:
If it looks dusty, expect to spend time washing it (we’ll cover exactly how in the next section).
The Bottom Line
Choosing the right gravel isn’t complicated, but it does require a little attention upfront.
Get these four things right:
…and you’ll set your system up for smooth operation from day one.
This is the step many people rush and it’s also where a lot of problems begin.
Even if you picked the perfect gravel, using it straight out of the bag can throw your entire system off. Dust, debris, and hidden contaminants can clog your setup, stress your fish, and slow down plant growth.
The good news? Proper preparation is simple, you just need to do it right once.
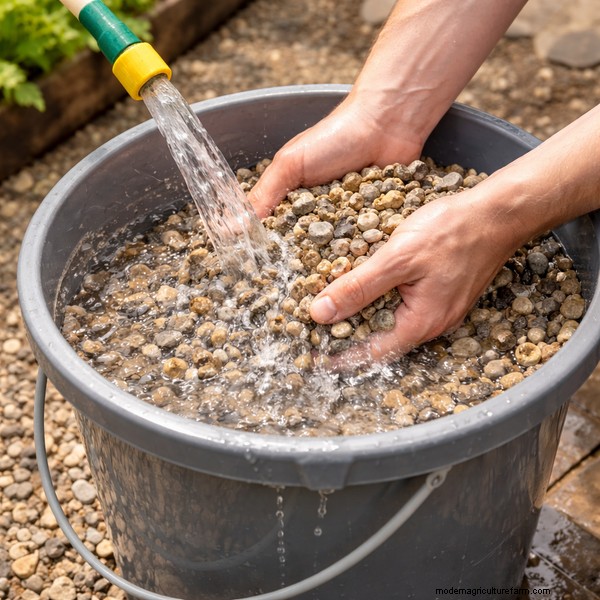
Start by removing all the fine dust and dirt.
How to do it:
Tip: The first few rinses will look very muddy, that’s normal. Keep going until it clears up.
Why this matters:
After rinsing, let the gravel soak in clean water for several hours (or overnight if possible).
Purpose:
This step is often skipped, but it makes a noticeable difference in system clarity early on.
Even if you’ve already done a vinegar test, it’s smart to double-check.
If the pH rises significantly, your gravel may not be as inert as expected.
As you rinse and soak, keep an eye out for:
Removing these early prevents long-term system issues.
Once your gravel is clean and ready:
Take your time here, this is the foundation your plants will rely on.
Now that your gravel is clean and ready, it’s time to actually put it to work.
This is where everything comes together and small setup details here can make a big difference in how your system performs long-term.
For most aquaponics systems, your gravel bed should be:
25–30 cm deep (10–12 inches)
This depth creates three important zones:
Too shallow, and your plants won’t develop properly.
Too deep, and you risk compaction and poor oxygen flow.
When filling your grow bed:
An uneven bed can cause:
A level surface = a more predictable system.
Gravel works best in a media bed system.
Here’s how it works:
This cycle:
Most systems use a bell siphon or timed pump to control this cycle.
Before adding gravel, make sure your plumbing is protected:
Without this, small shifts in gravel can:
Planting in gravel is straightforward:
Gravel makes it easy to:
A common rule of thumb: Keep the water level about 2–5 cm below the top of the gravel
Why?
This small adjustment makes a big difference in system cleanliness.
The Bottom Line
Using gravel effectively isn’t complicated, but it does require attention to detail:
Get these right, and your grow bed becomes a stable, productive environment for both plants and bacteria.
A well-set-up gravel bed can run smoothly for years, but only if you give it a little attention along the way. Here’s how to keep things performing at their best.
Over time, fish waste and uneaten food can build up in your grow bed.
To stay ahead of this:
If left unchecked, buildup can:
Your system should have a consistent flood-and-drain cycle.
Watch for signs of trouble:
If something feels “off,” it usually is. Catching these early prevents bigger issues later.
You don’t need to dig through your entire grow bed, but occasionally:
This helps:
Healthy plants are great, but overgrown roots can start to crowd your system.
Look out for:
If needed:
Sometimes the issue isn’t the gravel, it’s what’s around it.
Regularly check:
A small clog or slowdown can affect your entire grow bed.
Most of the time, you won’t need to remove and wash your gravel again.
But in rare cases (like severe clogging), you may need to:
If your system is designed well, this should be infrequent or unnecessary.
By now, you’ve seen what gravel can do, but it’s only fair to ask:
Is gravel actually the best option for your setup?
The honest answer? It depends on your goals, budget, and how hands-on you want to be.
Let’s break it down clearly so you can choose with confidence.
Side-by-Side Comparison
Cost
Very low
Higher
Moderate
Availability
Very high
Limited in some areas
Moderate
Weight
Heavy
Lightweight
Medium
Bacteria Surface
Good
Good
Excellent
Ease of Handling
Harder
Easy
Rough
Durability
Very high
High
Can break down
Cleanliness
Needs washing
Pre-cleaned
Dusty, rough
Gravel is ideal if you:
It’s especially great for:
Clay pebbles are worth considering if you:
The trade-off? You’ll pay more for that convenience.
Lava rock can be a strong option if you:
Just be prepared for:
There’s no “perfect” grow media, only the one that fits your situation best.
But here’s what many experienced growers will tell you:
If you want something that just works consistently and affordably, gravel is hard to beat.It may not be the most modern option, but it’s one of the most proven.
After everything we’ve covered, you might be wondering:Is gravel really the right choice for your system?
Here’s the honest answer: for many growers, especially beginners, it absolutely is.
Gravel stands the test of time because it delivers where it matters:
It may not be the most “modern” option, but it’s one of the most proven and dependable.
Gravel is a great fit if you:
It’s also ideal for growers who value function over flash, people who want a system that works consistently without constant adjustments.
Gravel may not be the best choice if you:
In those cases, alternatives like clay pebbles might make more sense.
If you’ve made it this far, you already have a strong understanding of how to use gravel effectively.Now it’s time to take action.
Start small. Keep it simple. Focus on getting the basics right.
From there, everything gets easier.
To wrap things up, here are some of the most common questions growers have about using gravel in aquaponics, answered clearly and practically.
Yes, as long as it’s inert and pH-neutral.
The key is avoiding gravel that contains limestone or other materials that can alter your water chemistry. A simple vinegar test can help you confirm it’s safe before use.
Not all gravel is suitable.
Avoid:
Stick with washed, inert gravel in the 10–20 mm range for best results.
The ideal size is:
👉 10–20 mm (½ to ¾ inch)
This size provides:
It’s the most widely recommended range for a reason, it works.
Absolutely.
Unwashed gravel can:
Rinse it thoroughly until the water runs mostly clear. It’s one of the most important preparation steps.
In most cases, you won’t need to fully clean it again after setup.
Instead:
A well-balanced system keeps the gravel functioning naturally.
It can, if you choose the wrong type.
That’s why testing before use is so important.
Not all, but many.
Gravel works best for:
It’s less ideal for:
It depends on your priorities.
If you want simplicity and cost-effectiveness, gravel is often the better choice.