
Welcome to Modern Agriculture!

Hostas are one of the most forgiving perennials in the garden, but they aren’t indestructible. Split one at the wrong time or hack through the root ball without a plan, and you could end up with a pile of wilted leaves and a bare spot where your favorite shade plant used to be.
The good news? Spring is the single best window for dividing hostas, and the technique is simpler than most gardeners expect. With the right timing, the right tools, and a little patience during the first two weeks of aftercare, you can turn one overgrown clump into four or five thriving new plants without losing a single one.
Timing isn’t just a suggestion here. It’s the single biggest factor in whether your divisions survive or spend the entire summer struggling to recover.
Early spring works so well because hostas haven’t started pushing energy into leaf production yet. According to Iowa State University Extension, the ideal window is right as the new “eyes” or pointed shoots poke through the soil surface. At this stage the roots are plump with stored energy, water demand is low, and cool soil temperatures encourage rapid root regeneration.
 DepositPhotos.com
Dividing in summer, by contrast, is a gamble. Hot temperatures, high humidity, and fully expanded leaves create a perfect storm of transplant stress. Fall division is possible, but it gives the plant less time to establish before winter dormancy sets in. Spring gives your divisions the longest possible growing season to settle into their new spots.
If you’re putting together a spring gardening plan, splitting hostas belongs right at the top. For more tasks that deserve your attention this month, check out our list of 20 March Gardening Tasks You’ll Regret Skipping.
Not every hosta needs splitting. A healthy three-year-old clump is doing exactly what it should, and digging it up would only set it back. But there are some clear signals that a hosta is ready (or overdue) for division.
The most obvious sign is a “donut” pattern. Older hostas often die out in the center while the outer edges keep growing. You’ll notice smaller leaves, thinner growth, or even bare soil in the middle of what used to be a full mound. That’s the plant telling you it has exhausted the soil nutrients at its core.
Overcrowding is another indicator. If your hosta clump has expanded to the point where it’s bumping into neighboring plants, edging, or walkways, it’s time. Crowded hostas produce smaller leaves and fewer flower stalks because they’re competing with themselves for light, water, and nutrients.
As a general rule, most hostas benefit from division every three to five years, according to the University of Minnesota Extension. Some fast-spreading varieties may need it sooner.
We'll email it to you so you can read it later!
By saving, you agree to receive occasional emails. Unsubscribe anytime.
You don’t need a garage full of specialty equipment, but a couple of tool choices make a real difference in how cleanly the division goes.
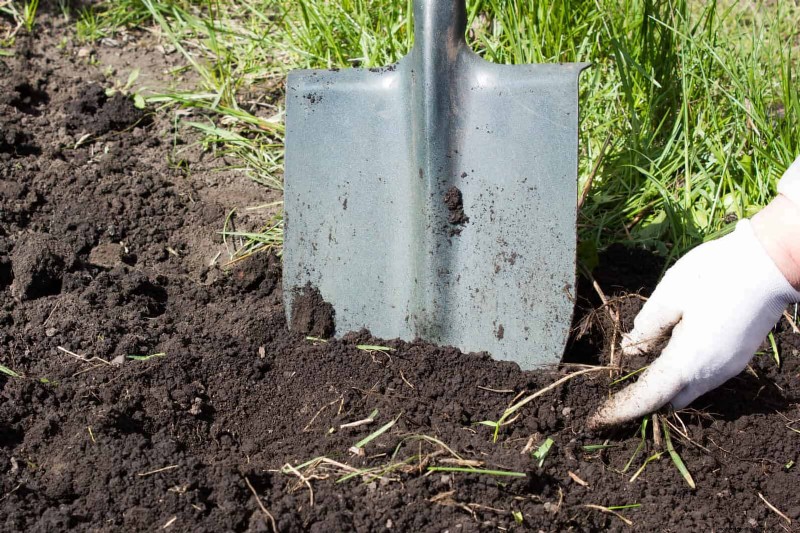
One tool tip that experienced gardeners swear by: use a flat-bottom spade, not a pointed one. A pointed spade concentrates force on a narrow area and can slice through roots and rhizomes you didn’t intend to cut. A flat edge gives you a clean lift underneath the root ball.
Sanitize your cutting tools before you start. A quick wipe with rubbing alcohol prevents the spread of soil-borne diseases between plants.
The day before you plan to divide, water the hosta deeply. Moist soil is easier to work with than dry, compacted soil, and hydrated roots handle the stress of being cut and moved much better than thirsty ones.
 DepositPhotos.com
Start by cutting a circle around the clump with your flat-bottom spade, about two to three inches outside the outermost leaves. Push the blade straight down to a depth of about eight to ten inches. Hosta roots are relatively shallow, typically extending only 12 to 18 inches deep, so you don’t need to dig a massive hole.
Work your way around the entire perimeter, loosening the soil as you go. Then slide the spade underneath the root ball from one side and lever it upward. If the clump is large, work from two opposite sides to rock it free.
Once it releases, lift the entire clump out and set it on a tarp or bare patch of ground. Shake or rinse off excess soil so you can see the root structure clearly. This step is optional but makes the next part much easier, especially on large, tangled clumps.
This is the step that makes people nervous, and for good reason. You’re essentially performing surgery on a living plant. But hostas are tougher than they look, and a confident, clean cut heals far faster than a tentative, jagged tear.
For small to medium clumps, you can often pull the divisions apart by hand. Look for natural separations in the crown where individual fans of leaves have their own root clusters. Grip two sections firmly and pull them apart with a twisting motion. If they resist, use a sharp knife to cut through the connecting tissue.
For large, mature clumps (five or more years old), hand separation usually isn’t practical. Place two garden forks back-to-back in the center of the clump and push them apart to split the root mass. Or use a sharp spade to cut straight through the center. Yes, you’ll cut through some roots. That’s okay. Hostas regenerate roots quickly in spring.
Each division must have at least one growing point (the pointed “eye” or emerging shoot) and a healthy cluster of roots attached. A division without roots will almost certainly die. A division without an eye has no way to produce new leaves.
One important thing to know: if the center of your old clump looks woody, brown, or hollow, discard it. The center of an aging hosta is often the weakest part of the plant. Use only the vigorous outer sections for your new transplants.
Speed matters here. Once a division is out of the ground, its roots start drying out. Aim to get each piece replanted within an hour of division, or keep them soaking in a bucket of water while you prepare the new planting holes.
Dig each hole about twice as wide as the root spread and just deep enough so the crown sits at the same level it was at before. Planting too deep is one of the most common mistakes with hosta divisions. Buried crowns are prone to rot, especially in heavy or clay soils. If you can see a soil line on the stem, match that line to the surrounding ground level.
Mix a handful of compost or aged manure into the backfill soil. Hostas aren’t heavy feeders, but the organic matter improves drainage and gives new roots something to grow into. Firm the soil gently around the roots, then water deeply to settle out air pockets.
Spacing depends on the mature size of the variety. Miniature hostas can go 12 to 18 inches apart. Standard varieties need 24 to 36 inches. Giant varieties like ‘Sum and Substance’ or ‘Empress Wu’ need a full 48 to 60 inches between plants. When in doubt, check the tag or look up the variety’s mature spread and give it the full room. Hostas fill in fast.
The first 14 days after division are the critical window. Your divisions are working overtime to push new roots into unfamiliar soil, and they need consistent support to get through it.
Water every other day for the first two weeks unless rain does the job for you. The soil should stay consistently moist but never waterlogged. Soggy conditions invite crown rot, which is far more dangerous to a fresh division than a day or two of mild dryness.
Apply a two-to-three-inch layer of mulch around (but not touching) each division. Mulch holds moisture, moderates soil temperature, and discourages weeds from competing with the still-establishing root system. Shredded bark, leaf mold, or even a thin layer of grass clippings all work well.
Hold off on fertilizer. Newly divided hostas don’t need it yet, and a strong dose of nitrogen can actually burn tender new roots. Wait until you see active new leaf growth, usually about three to four weeks after planting, before applying a balanced slow-release fertilizer.
Even if you do everything right, some divisions will look rough for a week or two after transplanting. Wilting, yellowing leaves, or a general droopy appearance doesn’t necessarily mean you’ve killed the plant.
Transplant shock is the plant’s way of adjusting to disrupted roots. It temporarily can’t absorb water as efficiently as it could before the move. The leaves show the stress even though the roots may already be recovering underground.
Here’s what to do if your divisions look sad: keep watering on schedule but resist the urge to overwater. Move any divisions that ended up in direct afternoon sun to a shadier spot, or rig up temporary shade with a garden chair, overturned pot, or piece of shade cloth for the first week. Remove any flower scapes that appear so the plant channels all its energy into root recovery instead of blooming.
If a division hasn’t perked up after three weeks, gently tug on it. Resistance means new roots are forming. Give it more time. If it slides out of the ground with no root grip at all, the division may not have had enough viable root tissue to survive.
Sometimes division isn’t the goal at all. You just want to relocate a hosta that’s been in the wrong spot: too much sun, too little space, or too close to a tree that’s grown up since you planted it.
 DepositPhotos.com
The process is nearly identical to dividing, with one key difference: you’re keeping the clump intact. Dig wide, dig deep enough to get under the root ball, and lift the whole thing out as one piece. The bigger the root ball you take with you, the less shock the plant will experience.
Prepare the new hole before you dig up the plant. You want the hosta out of the ground for as little time as possible. Match the planting depth exactly, water thoroughly, mulch, and follow the same two-week aftercare schedule described above.
Hostas are one of the best shade-tolerant perennials to tuck under mature trees. If you’re looking for companion plants, take a look at our guide to 24 Beautiful Plants That Actually Thrive Under Large Trees.
Hosta roots grow outward more than downward. A mature clump’s root system typically extends as far from the center of the plant as the foliage does, but only reaches about 12 to 18 inches deep. This shallow, spreading habit is why hostas respond so well to division: you’re not fighting a deep taproot to get them out of the ground.
All hostas can be divided, but some bounce back faster than others. Fast-growing, vigorous varieties tend to recover from division with barely a hiccup.
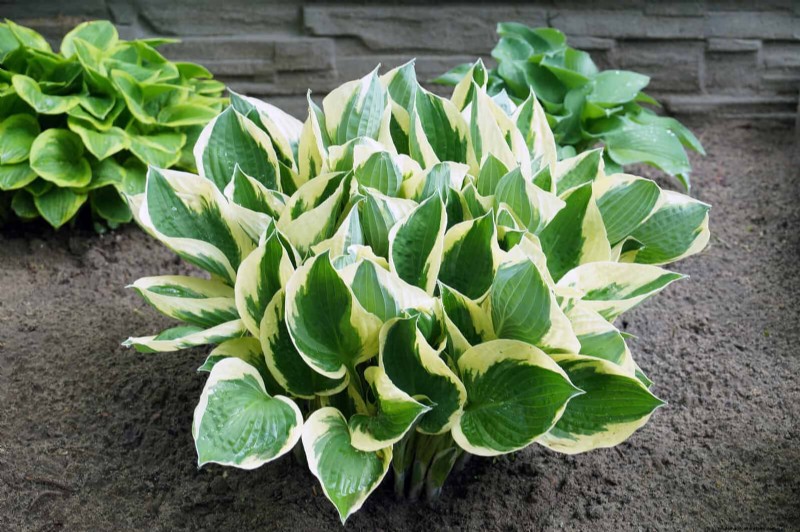
‘Patriot’ is a great example. It’s a medium-sized hosta with dark green leaves edged in crisp white, and it multiplies quickly enough that you could divide it every two to three years without thinking twice. ‘Francee’ and ‘Royal Standard’ are similarly cooperative, producing dense clumps that practically ask to be split.
Giant varieties like ‘Sum and Substance’ and ‘Empress Wu’ can be divided, but they take longer to recover and reach their impressive mature size again. If you’re splitting a giant, keep the divisions on the larger side (six or more eyes) so each one has enough stored energy to rebuild.
Miniature hostas such as ‘Blue Mouse Ears’ are a different story. Their root systems are delicate and their crowns are small, so division requires a lighter touch. Use a sharp knife rather than a spade, and handle the tiny root clusters carefully. They’ll recover, but they need gentler treatment than their full-sized cousins.
If you grow hostas in containers, you’ll eventually face the same overcrowding issue. Our guide on How To Overwinter Hostas In Pots covers how to keep potted hostas healthy through the cold months after division.
Dividing in midsummer is the number one mistake. Even experienced gardeners sometimes decide to split hostas in July because “they’re right there and it would be so easy.” It’s not worth it. The combination of heat stress, high water demand from fully expanded leaves, and the shock of root disturbance makes summer division a recipe for plant loss.
Using dull tools is another common error. A dull spade doesn’t cut through roots cleanly; it crushes and tears them. Ragged root ends are slower to heal and more vulnerable to soil pathogens. Take five minutes to sharpen your spade before you start.
Planting too deep trips up a surprising number of gardeners. It’s tempting to bury the crown a little deeper “for stability,” but this invites rot. The crown should sit at ground level or even slightly above it in clay soils.
Neglecting water in the first two weeks is the final common pitfall. Spring weather can be deceptive. A few warm, breezy days can dry out the top few inches of soil faster than you’d expect, and freshly divided hostas don’t have the root network yet to pull moisture from deeper down.
Splitting hostas in spring is one of the most rewarding tasks in the garden. You’re turning one plant into several, refreshing a tired clump, and filling new garden beds without spending a dime at the nursery. The key is timing (early spring, before leaves unfurl), clean cuts with sharp tools, and consistent watering for those critical first two weeks.
Your hostas are tougher than you think. Trust the process, keep the soil moist, and by midsummer those divisions will look like they’ve been growing in their new spots for years.


