
Welcome to Modern Agriculture!

DIY grow lights are easier than you think! No need to spend a lot of money when cheap grow lights get the job done, and look beautiful at the same time.
Starting seeds at home can be tricky, especially in northern climates with short winter days (and cold windowsills). Even with our attached greenhouse here in Vermont, we still don’t get quite enough light for healthy seedlings each spring. Beyond that, the temperatures never quite consistent enough for healthy seedlings, too hot during the daytime and too cold at night.
Gardener’s Supply sells beautiful grow light shelf setups, but at $900 for a three-shelf unit, I knew I could make my own for a lot less. After a little research, I was able to set up my own DIY grow lights on adjustable shelving for under $300, and I’ve been using it for years now.
We use ours year-round, growing microgreens during the offseason and starting literally hundreds of seeds each spring.
Sure, $300 sounds like a lot for a seed starting setup, but with our large garden this beauty easily paid for itself in the first year, and I hope to be using it for the next decade.
A seed packet usually costs around $2 to $4, often for 100+ seeds, but the nursery charges around $4 per seedling…it doesn’t take long to make your money back starting your own seeds.
I’m writing this in January, which is when much of the country is getting their seeds started. It’s too early to start seeds in our cold climate, since our last frost is usually sometime in early June.
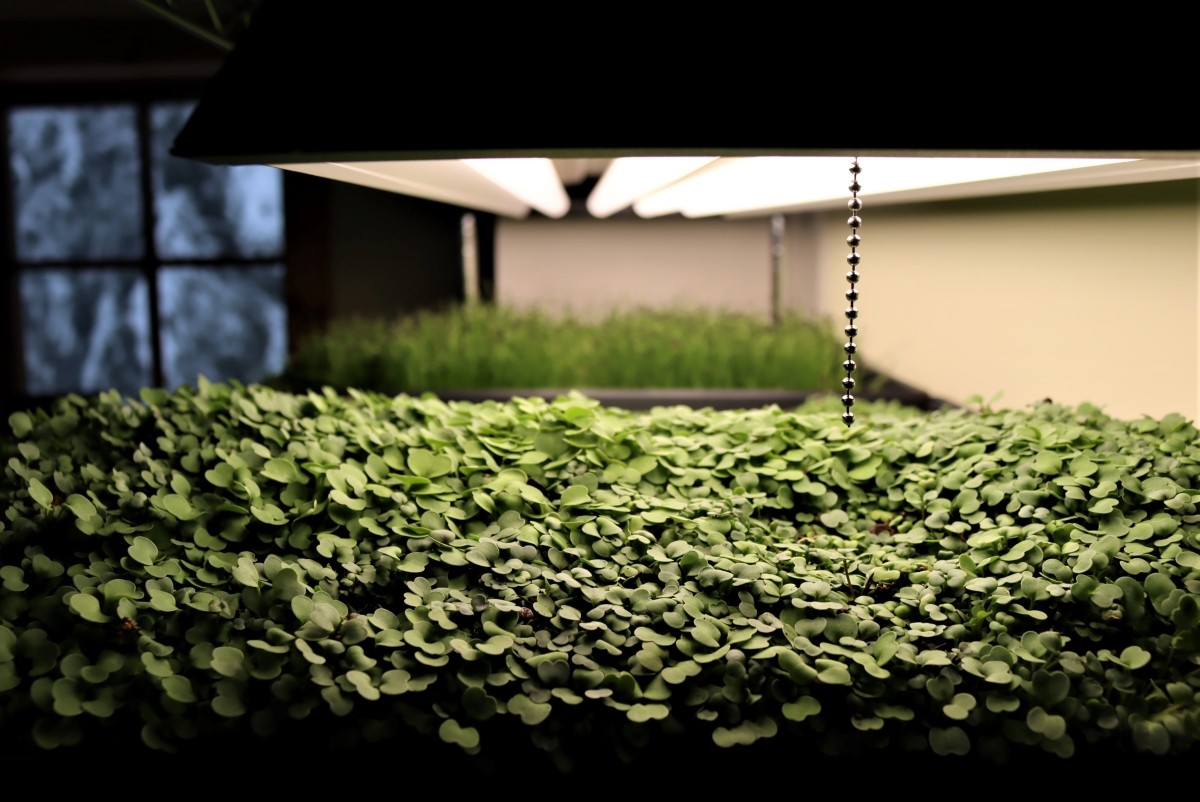
Still, my DIY grow light rack is still hard at work growing food for my family, in the form of microgreens. We grow at least a dozen varieties every winter, and mixed together they make wonderful fresh salads even when it’s -20 degrees outside.
Here’s what we used to build our own homemade grow light setup for seed starting (and microgreens):
Beyond the basics, there are a few “nice to have” seed starting accessories that can ensure your plants get off to a good start.
I know that sounds like a lot, but really, it’s not that complicated and all of it can be ordered for home delivery right to your doorstep for somewhere between $250 and $300, depending on how many shelves/lights you’re planning to include.
(Update: That’s what I paid, just 2 years ago (2018)…prices have gone up due to all the chaos of 2020, and things are a bit more now. It’s still about 1/3 to 1/2 the price of buying a premade unit.)
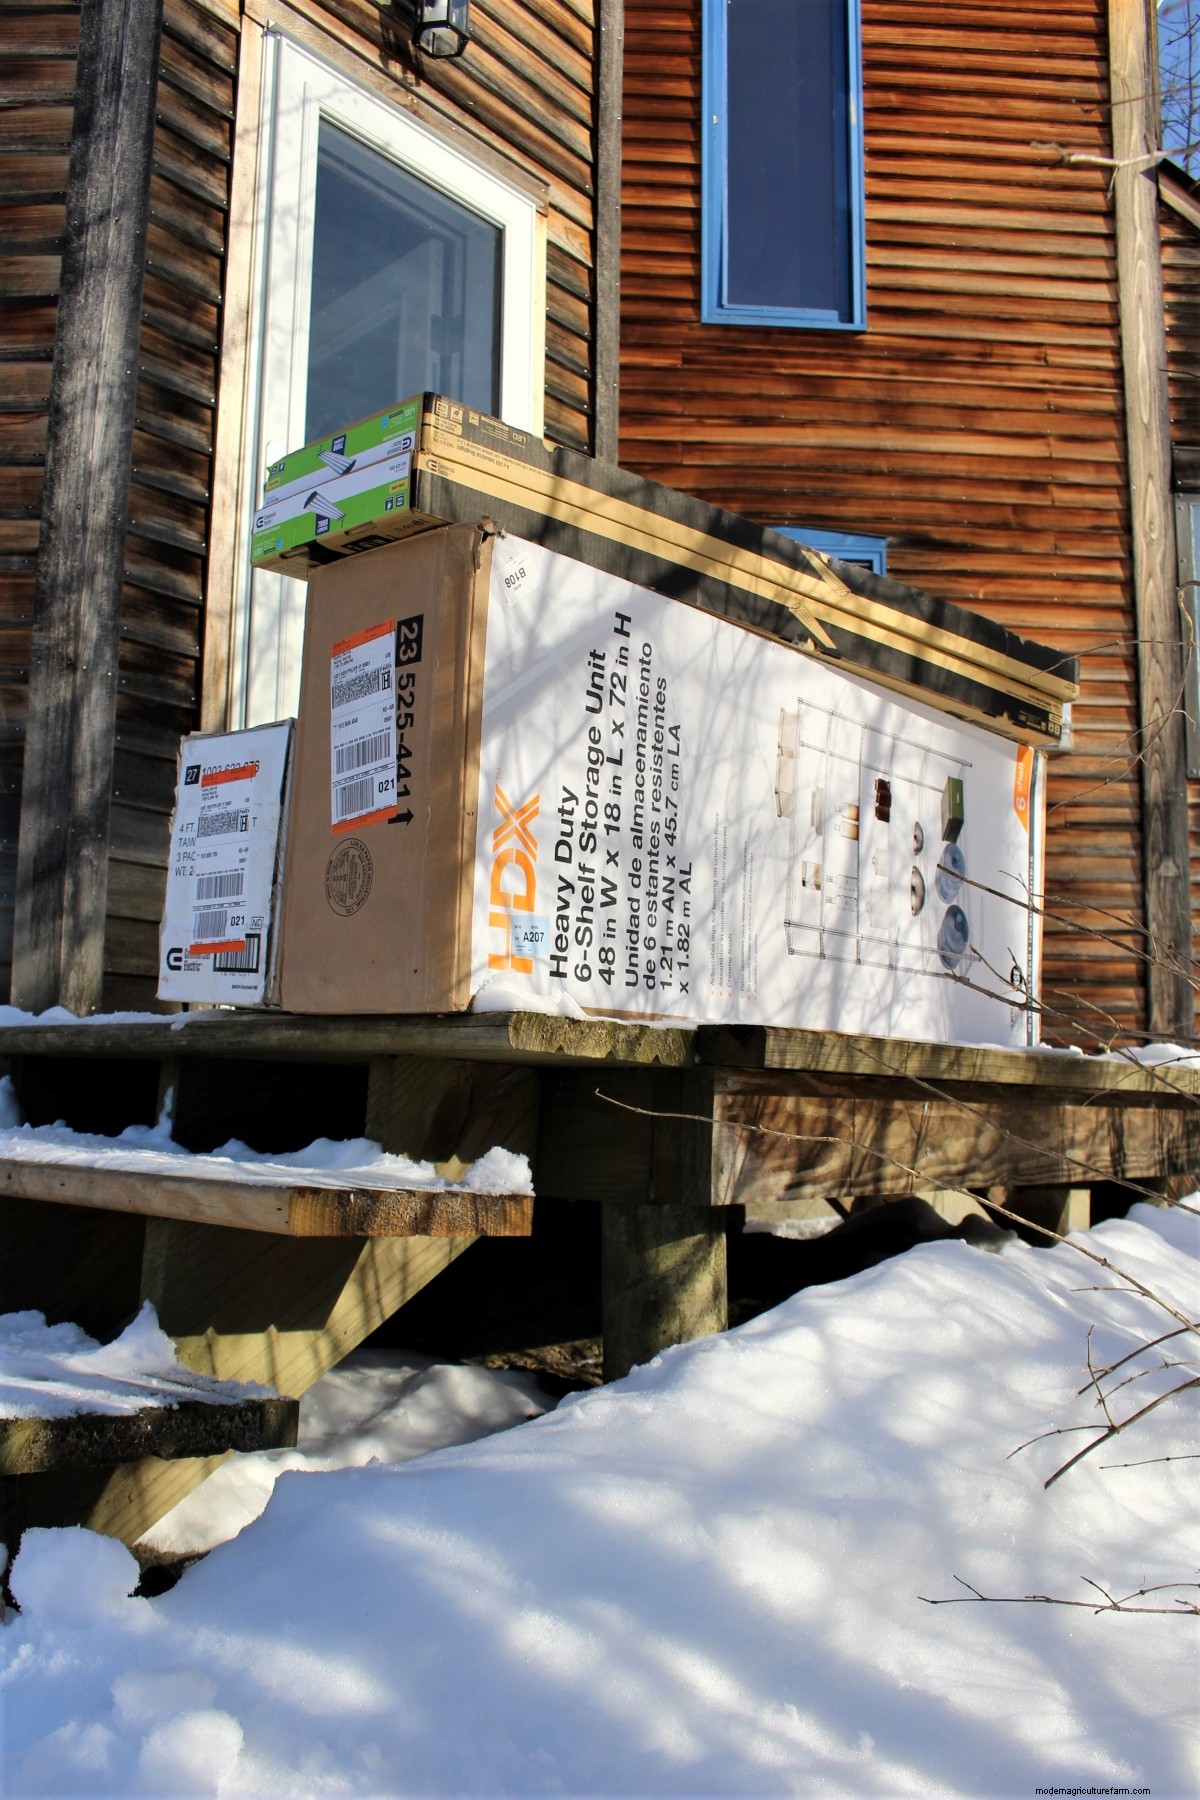
All the equipment for our DIY grow light setup landing on my porch a few years back.
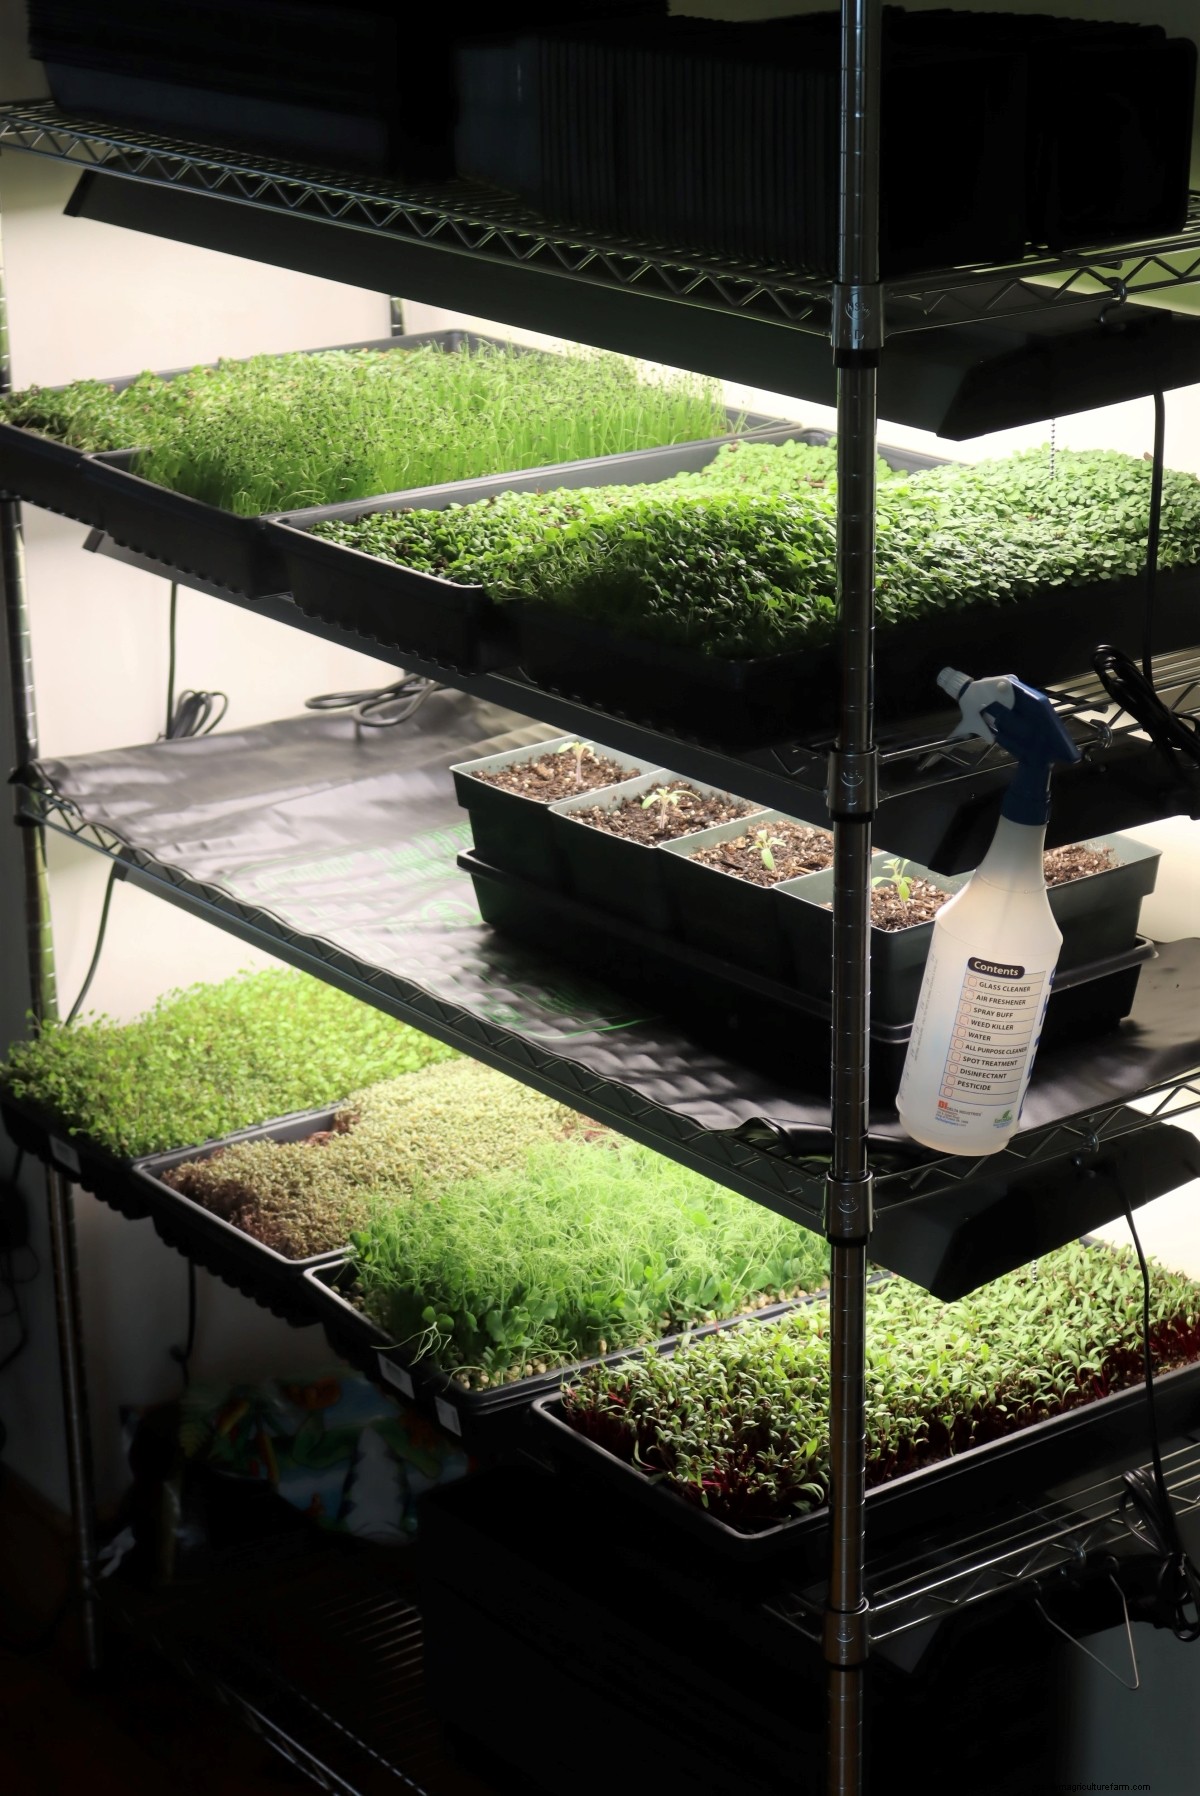
The adjustable metal shelving we use comes with 6 shelves, but you can’t actually fit that many with enough height for plants and grow lights. We’re using 4 shelves and 4 grow lights, and the last shelf is set about a foot from the top to hold seeds, and supplies. At the very top, we’ve set the 6th shelf for more overhead storage of light things like pots and trays.
What I’d suggest, and how we’re planning on reconfiguring it soon, is just putting on 5 shelves equally spaced, with the 1st about an inch of the bottom, and the 5th all the way at the top for storage. This leaves you with 4 full-sized zones for growing which will accommodate plants as they get really tall (like tomato seedlings), and then an extra shelf that you won’t need.
(Our extra shelf is going to the basement to be added onto our other shelving units, which could always use more given that they’re holding shorter mason jars from our home-canned goods.)
Once you’ve set the shelving, hang the LED shop lights from “S” hooks below each shelf. With this setup, you should have a total of 4 shop lights, one for each shelf. Though you’ve fixed the shelf heights, you can drop the lights lower and closer to the plants if needed by adding more S hooks.
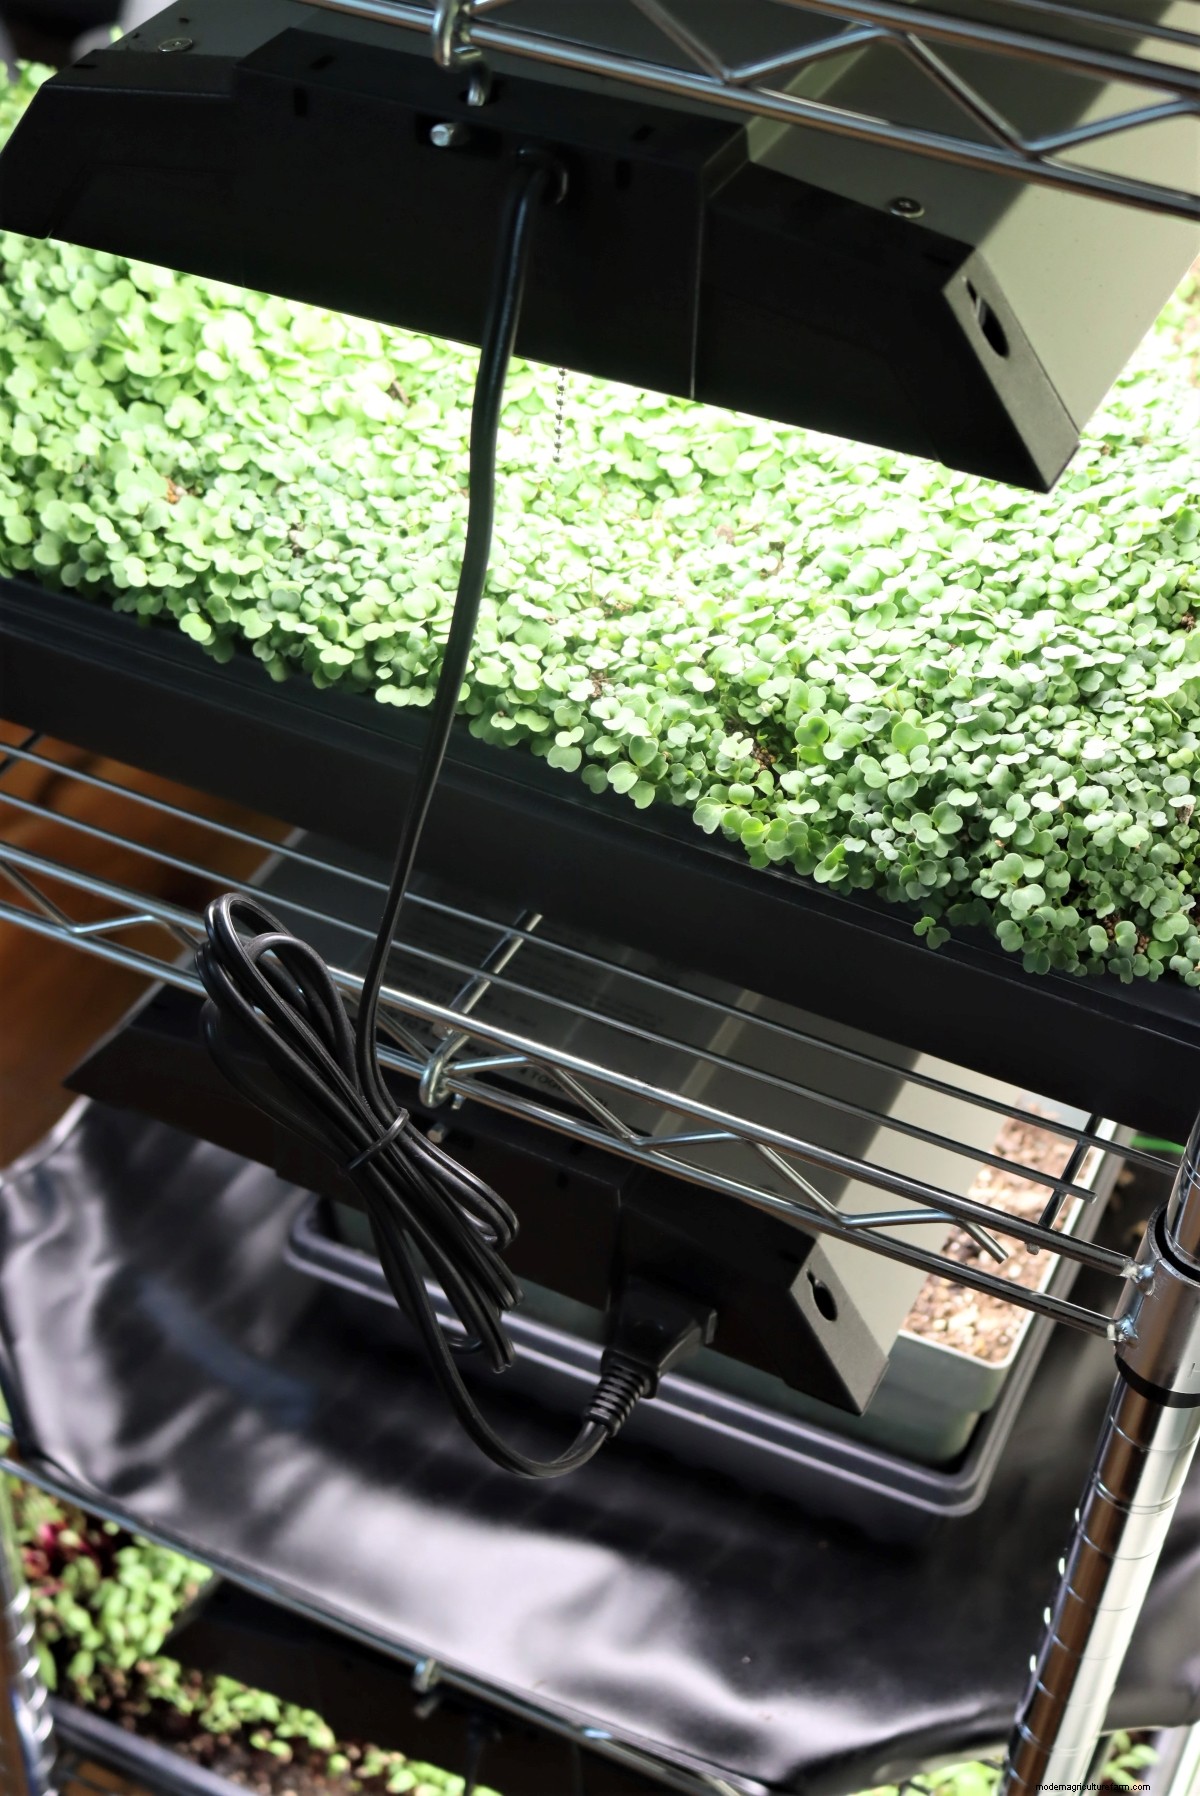
Four lights in theory means four things to plug in, but since these are meant to hang in a workshop, they’re equipped so that they can be chained together.
That means they each plug into each other, and only the last one needs to plug into the wall (or surge protector outlet). Either way, there’s plenty of cord to accommodate this, whether you decide to chain them together (shown below) or just plug them all in individually.
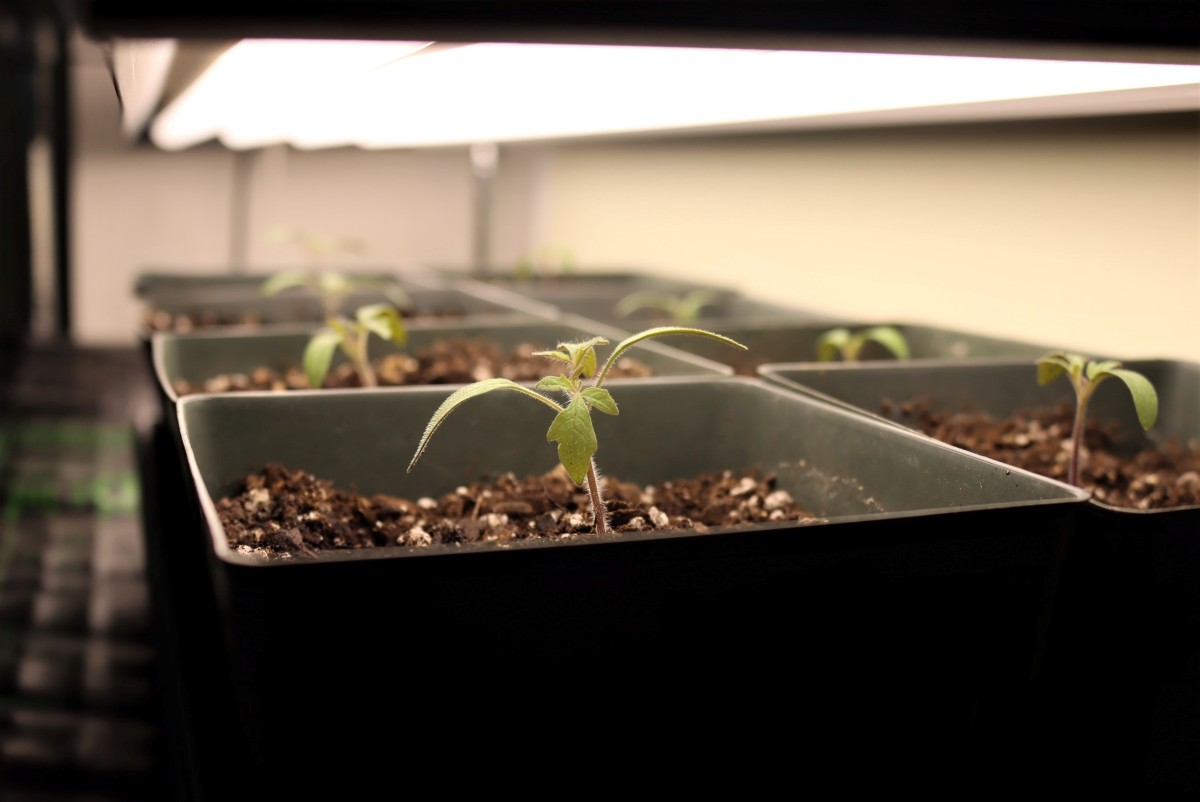
At this point, you’ve got shelving equipped with grow lights, and that’s all you really need to get your seeds started. Put the drip trays on the shelves, and load them up with your seedling pots.
The adjustable metal shelving is 18 inches deep and 48 inches wide, and I’ve found that you can fit 4 standard seedling trays if you slide them in the narrow way. You can also put them in the long way, so all the plants have more light exposure, but then you get two trays to a shelf instead of 4.
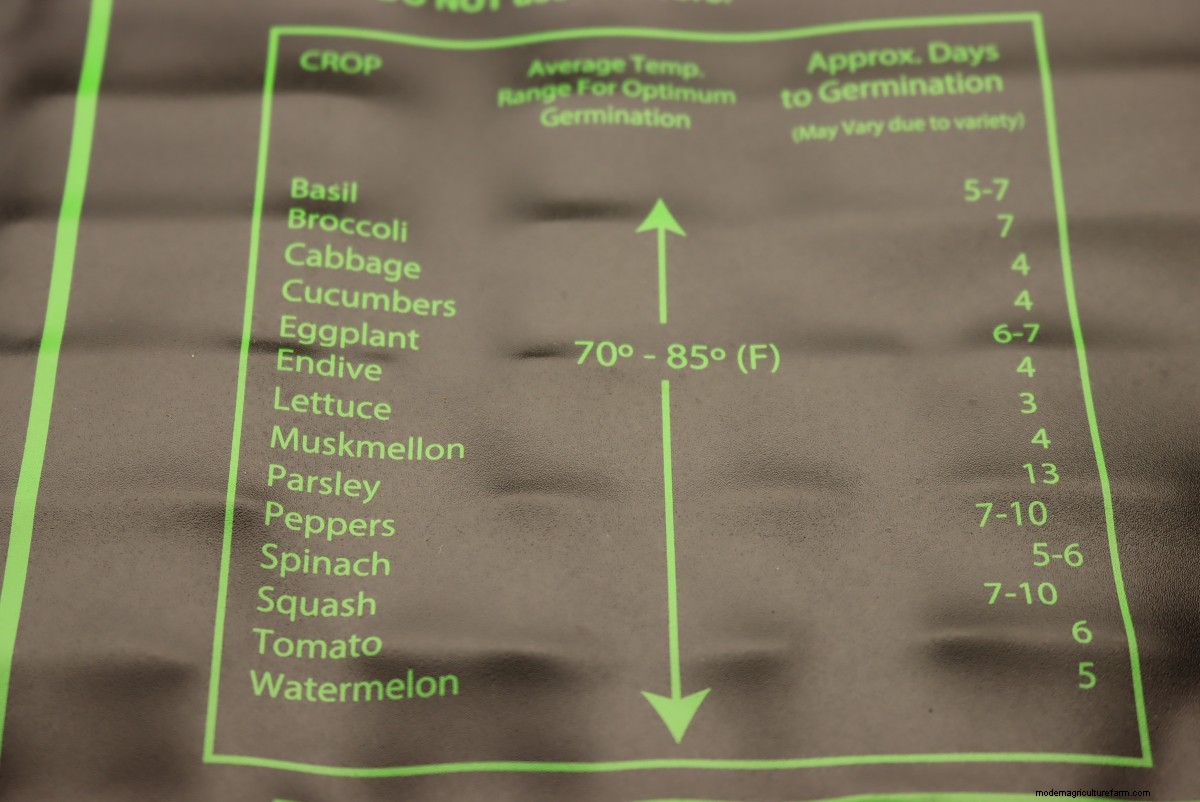
Heat mats are optional, but they can really help with germination for heat-loving plants like tomatoes, peppers, eggplant, and basil.
They provide a gentle heat under the plants that warms the soil, which often needs to be warmer than room temperature for germination. This is especially true in the winter months in cold locations, where room temperature can dip pretty low at night depending on how your house is heated.
Ours came with a handy temperature guide printed on it, that shows usual heat requirements and days to germination for many garden crops.
The heat mat itself doesn’t have a thermostat, and you’ll need to plug it into a thermostat that turns it on and off to keep the right temperature.
The thermostat has a little temperature probe that you stick into the soil on your seedling trays, so that it’s actually measuring the soil temperature and keeping them warmed appropriately.
Make sure that the temp probe stays in the soil, if not, you’ll just be measuring the room temperature and the heat mats will stay on all the time (overheating your seedlings).
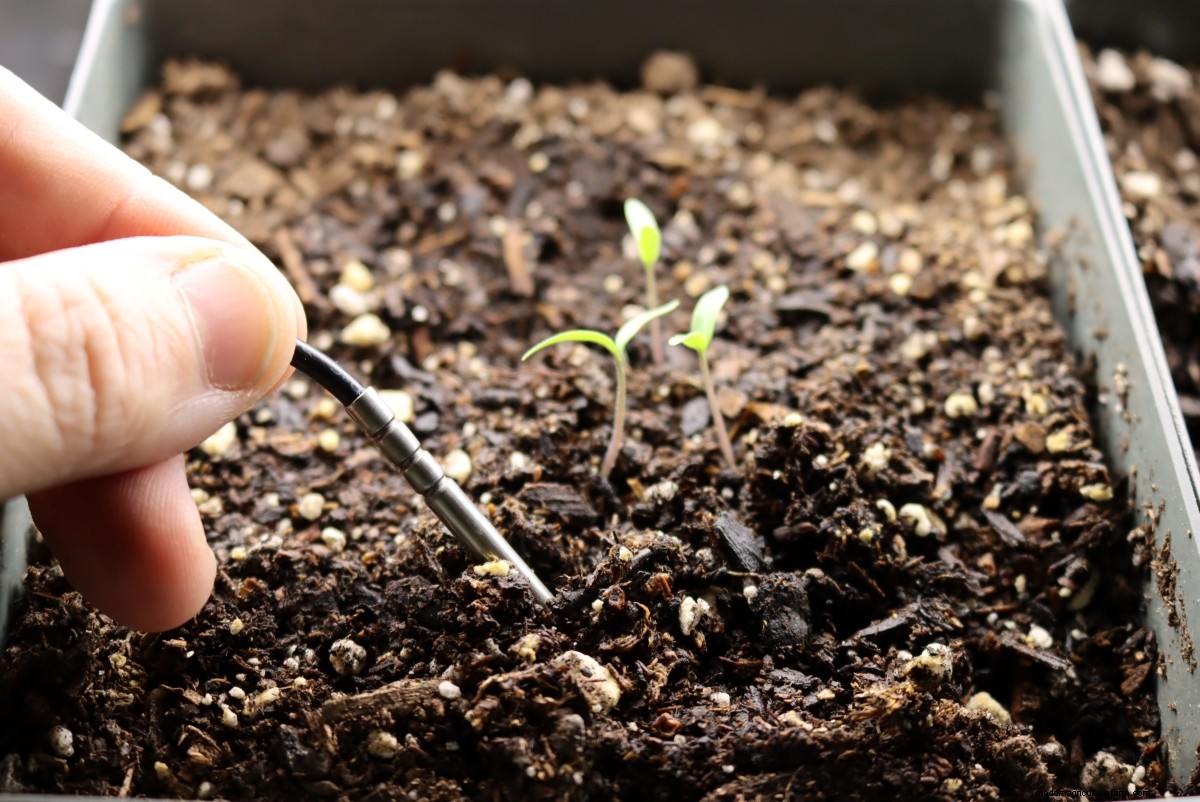
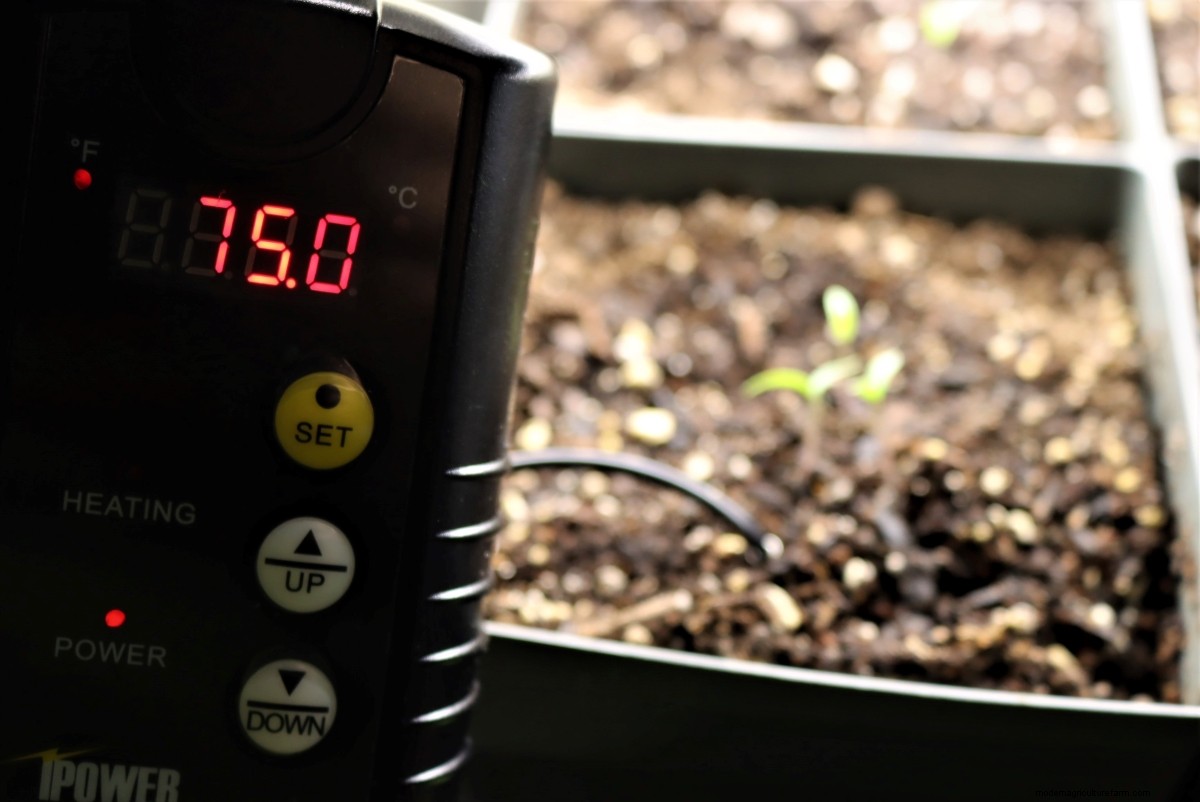
Once the probe is in the soil, it’ll show the temperature, and if set appropriately, it’ll turn on and off to maintain the proper temperature.
The soil temperature for these tomato seedlings is currently 75 degrees F, which is nice and warm even though the surrounding room is a chilly 62 degrees on this January day.
At this point, your seedlings have light from the shop lights you’ve hung under each shelf, and if your house is cold during germination time, hopefully, you’ve chosen to add seedling heat mats that should self regulate.
We choose to turn the lights on in the morning and off at night by hand, but they make auto light timers you can get that will automate that step too.
The last things you’ll need to worry about are water, and air circulation. I do really suggest setting up a fan on low near the plants, not pointed directly at them, just in their general area to keep air moving. Stagnant air is a main source of disease for seedlings, especially fungal diseases.
Early on, the seedlings should be watered from the top with a spray bottle, as they just need moisture near the surface to grow. Having the whole pot soggy wet will only lead to moss/disease issues. Once they germinate, you can give them bottom water by filling the drip trays to keep the soil damp throughout (but not soggy).
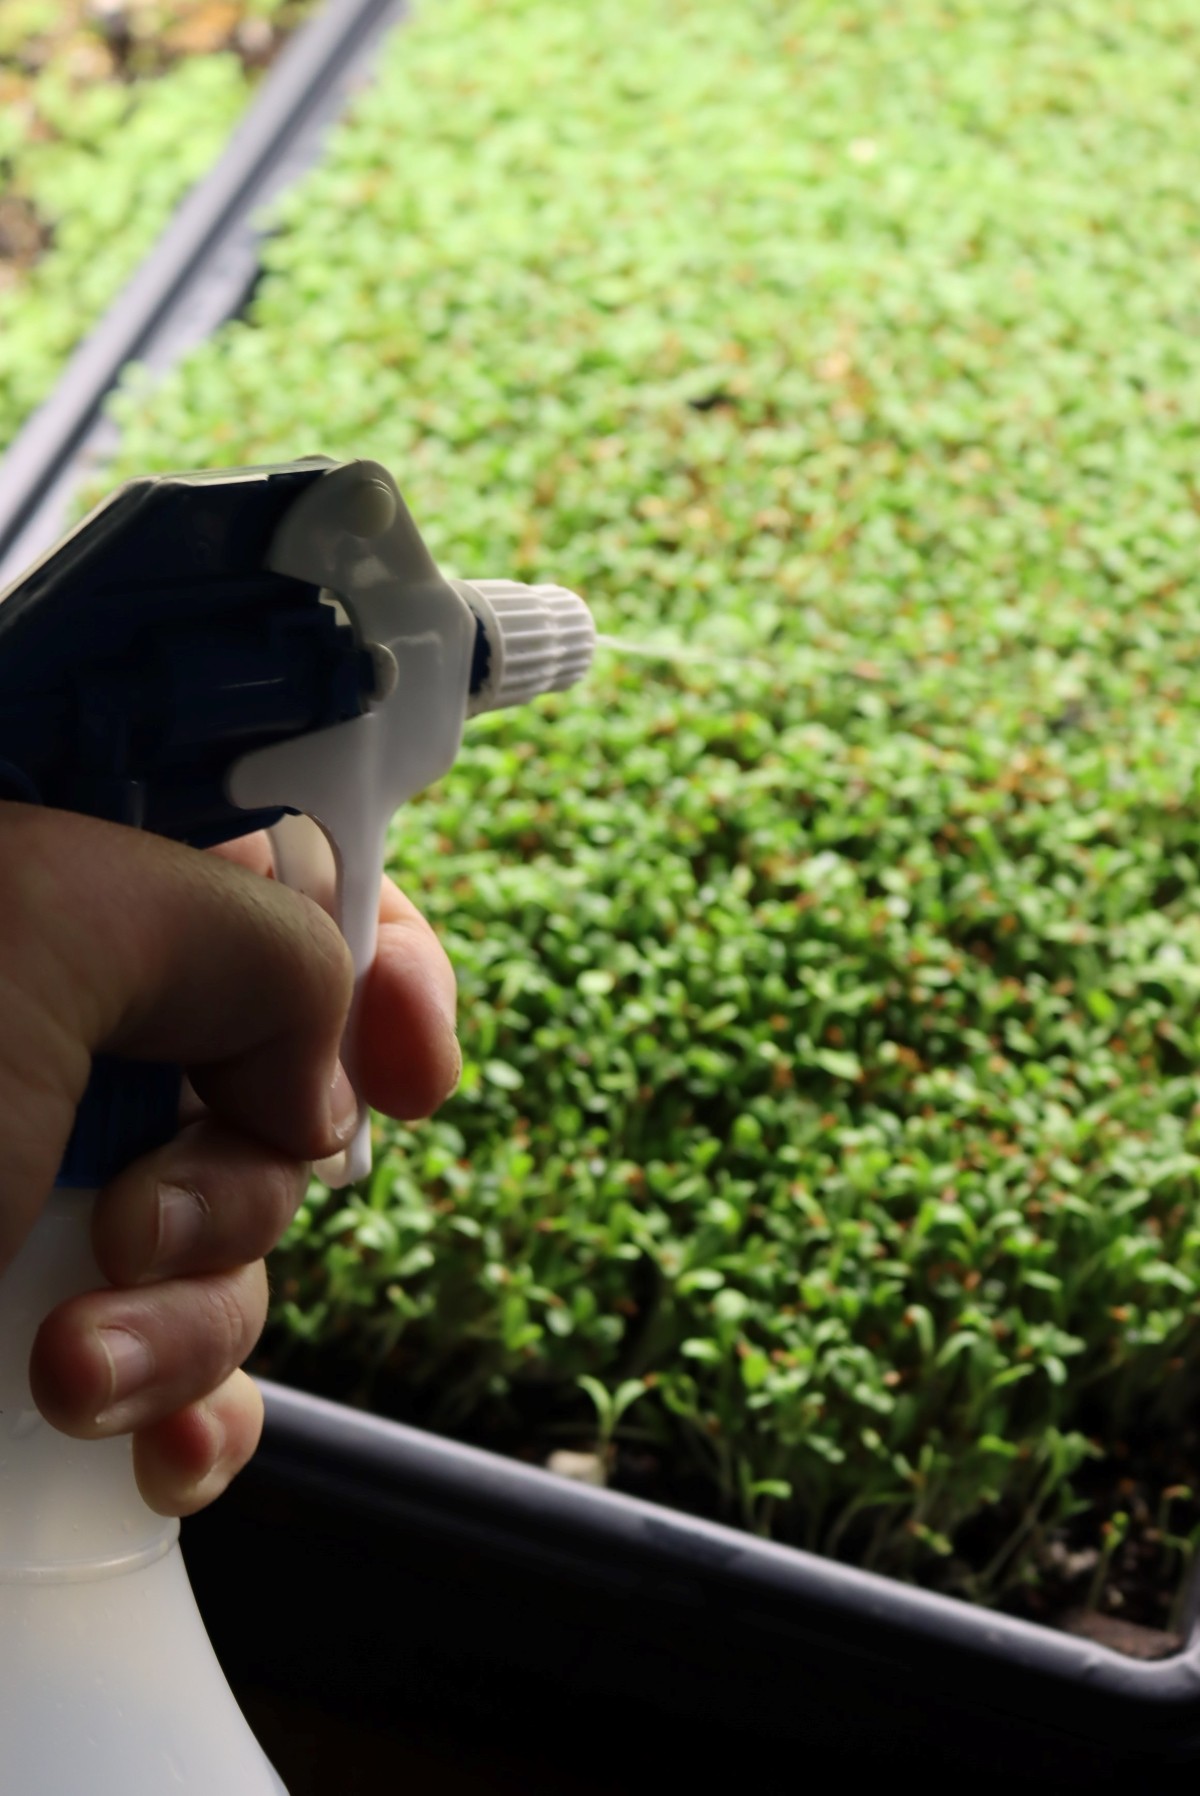
Watering microgreens with a spray bottle.
With this setup, I suggest 4 shelves and 4 lights. Each shelf can hold 4 standard seedling drip trays (10×20), and each of those will hold either eight 5” pots (as we use) or eight small 6 celled “pony packs.”
With our setup and larger 5” pots, we can start up to 128 plants at a time. That’s plenty for our garden, even with 30+ tomato plants, a few dozen peppers, etc.
We like giving the plants a bit more room in the larger pots, but if you opt for 6 packs you could start 6 times that many…which is a truly absurd number of starts. At that point, you could supply the neighborhood (or start a farmstand).
In reality, we always keep at least a few trays of microgreens going year-round, and usually 8 to 12 trays in the winter. During seed starting time, we’ll usually devote 3 of the 4 shelves to seedlings, and still, keep our family in fresh homegrown greens with the 4th shelf of microgreens.
So if you’d like to put in a setup like this, here’s your shopping list:
Optional Equipment (Recommended, but not strictly necessary)
When I put in my setup in 2018, I spent right around $250 to $300. Prices have gone up a bit with material shortages and inflation 2020, so I’d guess the total should be around $300 to $400 now for everything.
That’s still less than half what it’d cost for a ready-made unit, and if you grow a big garden you’ll make that back on the cost of buying nursery seedling starts in the first year.
Likely, if you’ve started seeds in the past all you really need is the metal rack (about $90) and the shop lights (price varies, but $30 to $60 each).
What do you think? Are you ready to get growing?
Need a few specific seed starting guides to get you growing?


