Welcome to Modern Agriculture!

I was surprised to learn that most container plant deaths stem from issues hiding below the soil surface, not from lack of sunlight or irregular watering. After researching drainage problems in potted plants, I find it fascinating how many common practices actively harm root systems. Water needs somewhere to go, and when it can’t escape, plants drown slowly from the bottom up.
Good news! I’ve discovered that fixing these drainage disasters is surprisingly simple. Most solutions require no special tools or expertise. Let’s explore what goes wrong and how to set your containers up for success.
Essential Supplies for Better Drainage
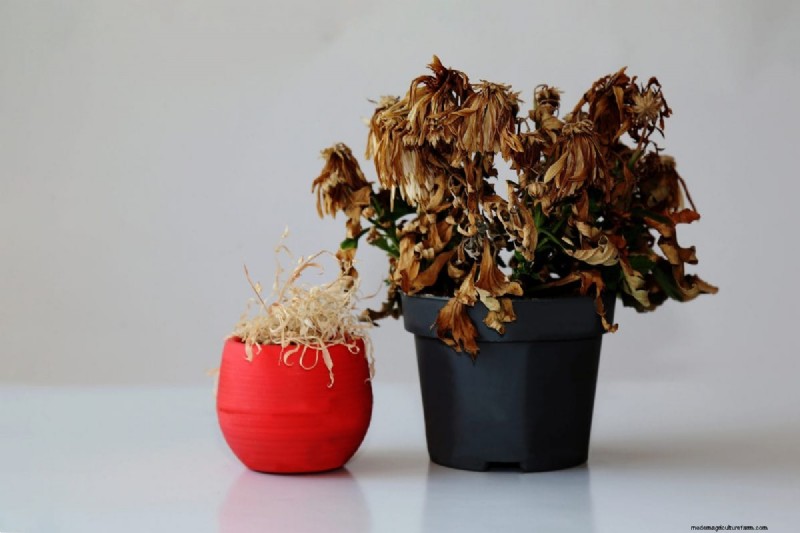
That gorgeous decorative pot sitting in your living room might be slowly killing your plant. I’ve seen this mistake more times than I can count. Without drainage holes, water accumulates at the bottom with nowhere to escape, creating a swampy environment that suffocates roots and invites fungal growth.
The solution here is refreshingly simple. Either drill holes in your decorative containers or use them as cache pots with properly draining nursery pots tucked inside. For plastic pots, a standard drill bit works perfectly. Ceramic or terracotta requires a masonry bit and patience (drill slowly to avoid cracking).
If drilling isn’t an option, the cache pot method works beautifully. Just remember to remove the nursery pot when watering, let it drain completely, then return it to its decorative home. Your plant gets proper drainage, and your decor stays intact.
We'll email it to you so you can read it later!
By saving, you agree to receive occasional emails. Unsubscribe anytime.
Roots need oxygen just as much as they need water. I was fascinated to discover that standing water literally pushes all the air out of soil pockets. When roots sit submerged for extended periods, they can’t breathe and begin to rot. The plant above might look fine initially while catastrophic damage occurs underground.
Check your containers after watering. Water should flow freely through drainage holes within seconds. If water pools on the surface for more than a minute, something’s wrong. Either your soil mix is too dense or drainage is blocked somewhere below.
A useful rule I follow: never let plants sit in standing water for more than 30 minutes. If you use saucers indoors, empty them promptly after watering. This small habit prevents enormous problems down the road.
This myth refuses to die. I still encounter gardeners placing large rocks at the bottom of pots, believing it improves drainage. In reality, this practice often makes drainage worse. Large rocks create what’s called a perched water table, where water gets trapped at the boundary between soil and rocks instead of flowing out the bottom.
Skip the rocks entirely. Use quality potting mix throughout the entire container. If you’re worried about soil washing out through drainage holes, place a small piece of mesh or a coffee filter over the holes instead. Water passes through easily while soil stays put.
I find the physics here fascinating. Water doesn’t flow smoothly from fine particles (soil) into large voids (rock spaces). Instead, it accumulates at the interface until saturation forces it through. This creates a perpetually soggy layer right where your deepest roots live.
When water encounters the boundary between fine soil particles and large rocks, it tends to accumulate rather than continue draining. This invisible soggy layer becomes a breeding ground for root rot pathogens. Over time, this leads to slow plant decline and eventual death.
For heavy pots where weight matters, I’ve discovered better solutions. Mix lightweight materials like perlite or pine bark chunks directly into your potting mix. These materials improve drainage throughout the entire pot while keeping overall weight manageable. You get better drainage without creating problem zones.
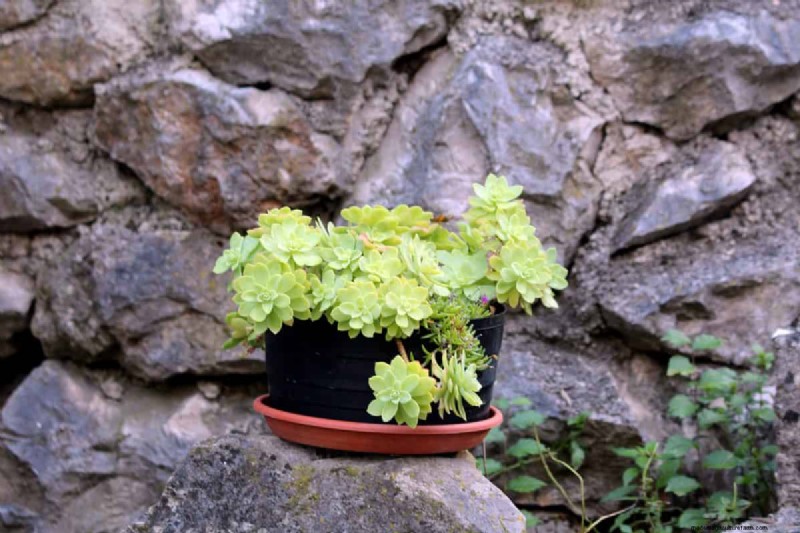
Saucers protect indoor surfaces from water damage, which makes perfect sense. But outdoors? They transform into mini swimming pools during rainy seasons. Rain fills these saucers, forcing roots to sit in standing water long after storms pass. This prolonged moisture exposure invites root diseases and attracts pests.
Elevate outdoor containers on pot feet, bricks, or decorative stands instead. This allows free drainage even during heavy downpours. For patios or decks where you need surface protection, use saucers but commit to emptying them promptly after rain or watering.
I’ve seen gardeners lose entire container collections to this issue during particularly wet seasons. The plants looked healthy until they suddenly collapsed. Root systems had been slowly rotting in those water-filled saucers.
Standing water in saucers creates ideal mosquito breeding conditions. Female mosquitoes lay eggs in as little as a tablespoon of water. I was surprised to learn they can complete their entire life cycle in just seven days under the right conditions.
Beyond mosquitoes, slugs, fungus gnats, and other garden pests gravitate toward these consistent moisture sources. If you notice small flying insects hovering around your container plants, check your drainage situation first. Removing standing water often solves pest problems without requiring chemicals or pesticides.
Regular inspection of drainage areas should be part of your plant care routine. A quick glance under pots once or twice a week catches problems before they spiral out of control.
Garden soil might seem like a money-saving option for containers. I understand the appeal. But it quickly creates drainage nightmares that cost far more in lost plants than you save on soil. Garden soil compacts easily in pots, turning into a dense mass that prevents water movement and restricts root growth.
The natural drainage properties that work beautifully in your garden fail miserably in the confined space of a pot. Garden soil contains clay particles that squeeze together under repeated watering, eliminating the air spaces roots need.
Invest in quality potting mix formulated specifically for containers. These mixes contain materials like peat moss, coconut coir, perlite, and vermiculite that maintain their structure over time. They provide crucial air spaces for proper drainage even after months of watering cycles. The additional cost pays off with healthier plants and fewer headaches.
Read more: Does Potting Soil Have Fertilizer In It?
As garden soil in containers settles, it becomes increasingly dense with each watering cycle. Water starts flowing through channels rather than spreading evenly through the soil. Some roots sit dry while others remain waterlogged. Root growth becomes severely restricted in this compacted environment.
I’ve pulled seemingly healthy plants from pots only to discover their root systems barely extended beyond the original root ball. The surrounding garden soil had compacted so tightly that roots couldn’t penetrate it.
Refresh potting mix annually for perennial container plants. Remove the top few inches and add fresh mix. For long-term containers, consider complete repotting every 2-3 years with fresh media. This restores proper drainage properties and prevents progressive compaction issues.
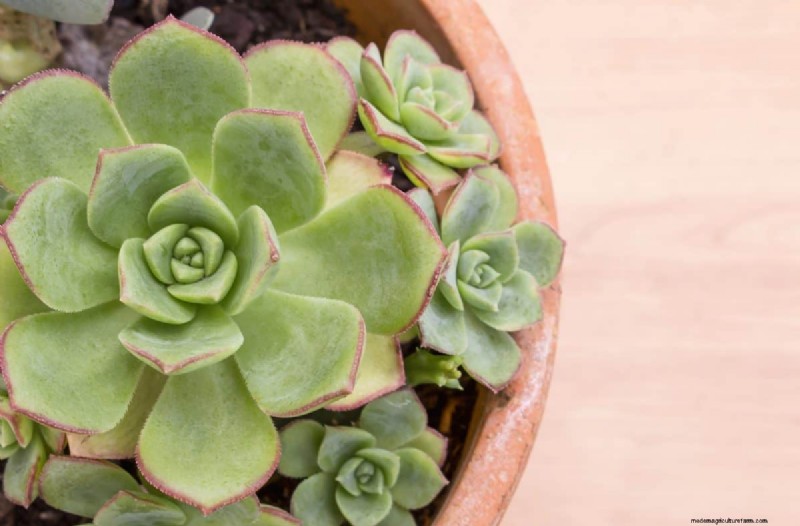
Some plants have virtually zero tolerance for wet feet. Succulents and cacti top this list. Their natural habitats feature extremely quick-draining, gritty soil that never stays wet for long. Regular potting mix, even high-quality well-draining versions, can retain too much moisture for these specialized plants.
Create a specialized drainage layer for moisture-sensitive plants using coarse materials like pumice, chicken grit, or pea gravel mixed into the lower third of the potting mix. This creates a quick-exit zone for excess water while maintaining proper soil structure above.
I’ve experimented with various ratios and find that mixing these materials throughout the entire pot works even better than creating distinct layers. The coarse particles interrupt the fine soil structure, creating drainage pathways from top to bottom.
Echeveria and similar succulents store water in their fleshy leaves and stems, an adaptation that allows them to thrive in arid conditions. When their roots sit in moist soil, they continue absorbing water they don’t need. Eventually this causes cell rupture and rot that spreads throughout the plant.
Succulent-specific potting mixes typically contain 50-70% mineral content like pumice, perlite, or crushed granite. These materials create large air pockets that allow roots to dry quickly after watering. The mix looks more like gravel with some soil mixed in than traditional potting soil.
For best results, water thoroughly but infrequently. Allow soil to dry completely between waterings. I stick my finger deep into the pot to check moisture levels below the surface. If I feel any moisture at all, I wait another few days.
Read more: How to Avoid the Danger of Poorly Drained Succulent Pots
Quick Questions About Container Drainage
Can I use decorative pots without drainage holes?
Yes, but use them as cache pots. Keep your plant in a draining nursery pot inside the decorative container, and remove it for watering.
How often should I check drainage holes?
Check weekly during growing season. Look for clogs, mineral buildup, or roots growing through holes. Clean as needed to maintain free water flow.
What’s the best material for covering drainage holes?
Use coarse mesh, landscape fabric, or broken terracotta pieces. Avoid fine screens that clog with mineral deposits over time.
A thick layer of mulch works wonders in garden beds. But containers operate differently. While mulch helps conserve moisture in pots, too much creates a moisture-retaining blanket that prevents soil from drying properly between waterings.
Containers already have limited evaporation compared to garden beds. They’re essentially isolated environments surrounded by air on all sides. Adding excessive mulch on top further reduces the already limited evaporation, throwing off the wet-dry cycle plants need.
Limit mulch to a thin layer of about ½ inch in containers. Just enough to reduce surface evaporation without affecting drainage. Consider using inorganic mulches like small decorative stones for containers. They provide aesthetic benefits without holding excess moisture against the soil surface.
Organic mulches like shredded bark or compost absorb water themselves, creating a sponge-like layer that slows evaporation dramatically. In the confined space of a container, this disrupts the natural wetting and drying cycle plants evolved to expect. The soil surface stays constantly moist, which invites fungal issues and crown rot.
If you notice the soil surface in your containers never seems to dry out, reduce or remove mulch layers. Allow some natural air circulation at the soil surface, especially for plants prone to crown rot or fungal problems. This small adjustment often improves overall container drainage dynamics.
I’ve found that plants with fuzzy leaves or thick succulent foliage particularly dislike mulch in containers. These plants evolved to handle dry conditions, and constant surface moisture causes more problems than it solves.
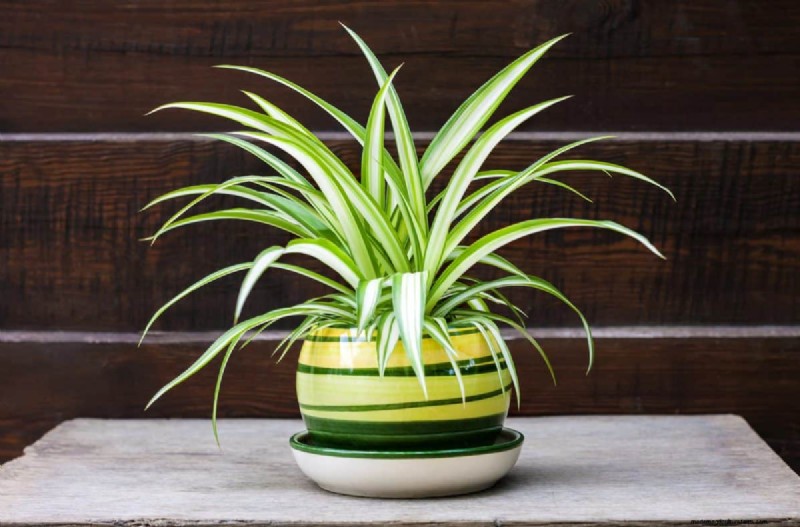
Plants’ water needs change dramatically across seasons, but many gardeners maintain identical drainage setups year-round. Summer heat increases evaporation and plant water consumption substantially. Winter brings slower growth and drastically reduced water needs. Rainfall patterns also shift seasonally in most regions.
During rainy seasons or winter months, move containers to more sheltered locations or under eaves to control water input. This prevents oversaturation during naturally wet periods. Conversely, during hot, dry stretches, you might need more frequent watering but excellent drainage becomes even more critical to prevent salt buildup from repeated waterings.
I’ve learned to treat my container garden almost like two different collections depending on season. The same plants that need daily watering in July might need water only once every two weeks in January.
In Mediterranean climates, winter brings abundant rain while summer stays dry, requiring completely different drainage strategies across seasons. Desert regions face extreme evaporation in summer and cooler, sometimes surprisingly wet winters. Even temperate zones experience significant seasonal shifts in rainfall and humidity.
Adjust your container positioning and watering schedule seasonally. Plants that thrive in partial shade during brutal summer heat might benefit from full sun exposure during milder winter months. Similarly, drainage needs shift as temperatures and rainfall patterns change.
I track watering frequency for my key plants throughout the year. The patterns that emerge help me anticipate seasonal needs and adjust drainage setups before problems develop.
Even containers with proper drainage holes face problems when placed directly on solid surfaces like concrete patios or wooden decks. The flat contact point creates a seal that blocks water flow, especially as tiny soil particles wash down and clog the exit path.
This invisible problem slowly kills plants from the bottom up. I was fascinated to discover how easily this seal forms. The weight of the pot, combined with the vacuum created by draining water, essentially suctions the pot to the surface below.
Raise all containers slightly using pot feet, decorative stands, or even repurposed materials like wine corks placed under the pot edge. This creates space for water to escape freely and allows airflow beneath the container. Air circulation promotes faster drying after watering or rain events.
Over time, mineral deposits, algae growth, and soil particles accumulate at the contact point between pot and surface. This creates an invisible seal that blocks drainage. Plants begin showing overwatering symptoms despite having proper drainage holes because water can’t actually exit the container.
The symptoms develop gradually, making this problem particularly insidious. By the time you notice wilting leaves or yellowing foliage, significant root damage has already occurred.
Periodically lift and check beneath containers for signs of drainage problems. Look for staining, algae growth, or soil deposits. Clean contact surfaces regularly and replace pot feet or risers if they show deterioration. This simple maintenance prevents gradual drainage failure that occurs completely out of sight.
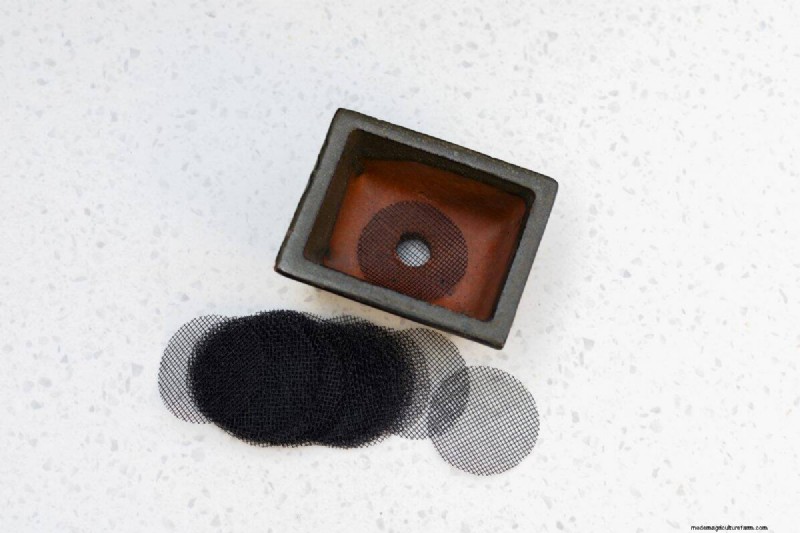
Fine mesh screens placed over drainage holes seem brilliant for preventing soil loss. But they create new problems over time that I didn’t anticipate when I first started using them. Minerals from water and fertilizers gradually build up on these screens, creating a crusty layer that blocks water flow. The finer the mesh, the faster it clogs.
Choose coarser screening materials like landscape fabric or broken pieces of terracotta for covering drainage holes. These allow water passage while blocking soil loss, with less surface area to collect mineral deposits.
For existing containers with clogged screens, remove them completely and clean thoroughly. Replace with coarser material or skip screening altogether if soil loss isn’t a significant issue. Sometimes the cure causes more problems than the disease.
Hard water containing high mineral content accelerates clogging of drainage holes and screens dramatically. The calcium and magnesium in hard water leave deposits with each watering, gradually building up until drainage slows or stops completely. I learned this the hard way in areas with particularly hard water.
If your tap water is hard, consider periodically flushing containers with distilled water or collected rainwater. This dissolves mineral buildup before it becomes problematic. Alternatively, acidifying your water slightly with a few drops of vinegar per gallon helps prevent mineral accumulation in drainage areas.
The vinegar trick works because mild acidity dissolves calcium deposits before they harden. Use sparingly though. Too much acidity harms plants and disrupts soil pH.
Many plants suffer when planted too deeply in containers, with soil covering parts of the stem that evolved to remain above ground. This common mistake leads to stem rot and disrupts the plant’s natural ability to regulate moisture uptake. The excess soil also reduces the container’s overall drainage capacity.
Position plants so their root crown (where stems meet roots) sits at or slightly above the soil surface. For transplants, carefully remove excess soil to find the original soil line. Plant at that same depth. This preserves the plant’s natural moisture regulation systems and maintains proper drainage throughout the container.
I’ve rescued many plants simply by excavating excess soil from around their stems. The improvement in plant health often occurs within weeks.
The root crown evolved to remain in the transition zone between air and soil. When buried, this sensitive area stays constantly moist, leading to tissue breakdown. This creates an entry point for pathogens that can quickly kill the entire plant.
Additionally, excess soil above the root ball compresses over time, affecting water movement throughout the container. Water flows around the root ball rather than through it, leaving roots alternately too wet and too dry.
After planting, gently brush away soil that contacts stems above the root crown. For established plants buried too deeply, carefully remove excess soil around the base without disturbing major roots. Most plants recover quickly once their root crowns breathe freely again and normal moisture levels resume.
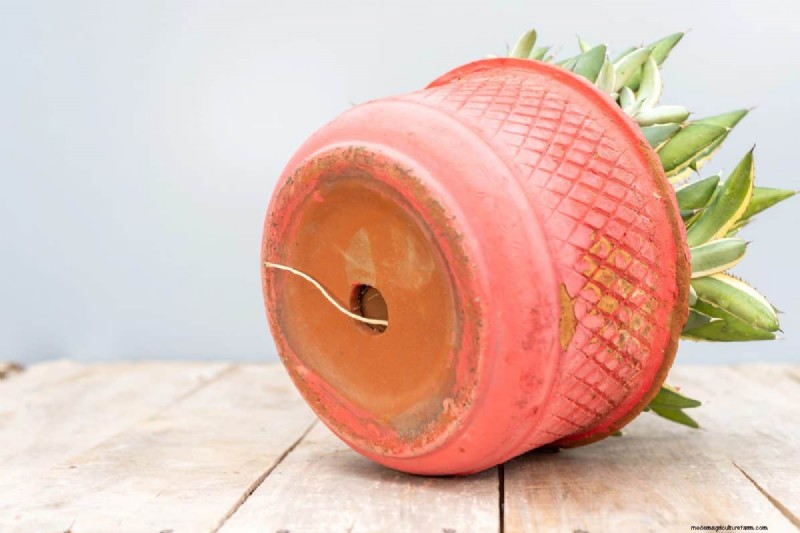
When roots escape through drainage holes, they initially seem to help by accessing additional water. However, these escaped roots eventually create serious problems by blocking drainage and becoming damaged when you move the pot. Once roots grow into the ground beneath a container, water flow becomes severely compromised.
Regularly check the bottom of containers and prune any escaping roots before they become established. For pots sitting directly on soil, reposition them slightly every few weeks to prevent roots from anchoring into the ground below. Consider placing containers on gravel beds or stands to discourage root escape entirely.
I’ve had to sacrifice entire root systems when moving pots whose roots had grown extensively through drainage holes and into the ground. The plants never quite recovered from that trauma.
As plants become root-bound, the dense root mass displaces soil and creates water channeling issues. Water flows quickly through channels without properly saturating the root ball. Parts of the soil stay bone dry while others remain soggy. This uneven moisture distribution stresses plants severely and reduces drainage efficiency.
Repot root-bound plants into slightly larger containers with fresh potting mix. If keeping the same container size, root prune by trimming away about one-third of the root mass. Focus on circling roots at the bottom and sides. This rejuvenates the plant and restores proper drainage throughout the container.
Root pruning sounds scary but most plants tolerate it well. I was nervous the first time I tried it, but the results convinced me. Plants often respond with vigorous new growth once freed from their tangled root prisons.
Slipping nursery pots into decorative containers makes display easy. But this setup creates a hidden reservoir between the two pots. After watering, excess water collects in this space, keeping the bottom of the root ball constantly wet. Plants develop “wet feet” despite appearing properly potted from above.
Always remove nursery pots before watering, or devise a system to empty the decorative pot afterward. Alternatively, add a layer of gravel to the bottom of decorative pots so the nursery pot sits above any collected water. Checking for and emptying this hidden water after each watering prevents gradual root damage.
I now make it a habit to tip decorative pots and pour out any collected water every time I water. It takes five extra seconds and saves countless plants.
The space between nested containers creates a humid microclimate that affects the entire root system. Even when the upper portion of soil feels dry, the bottom roots remain in a high-humidity environment that promotes root rot and fungal growth. This invisible problem explains why some plants decline despite seemingly correct care.
If using double-pot systems, create drainage space by placing small risers like bottle caps between the pots. This maintains an air gap and prevents water accumulation. Another solution involves drilling matching drainage holes in both containers so water exits completely rather than pooling between layers.
I’ve started preferring single-pot setups with proper drainage over nested systems. They’re simpler to manage and eliminate hidden water reservoir problems entirely.
PRO TIP
Test drainage before planting by filling your container with water and timing how long it takes to drain completely. Water should exit within 2-3 minutes for most plants. If drainage takes longer, address the issue before adding plants and soil.
Proper drainage forms the foundation of successful container gardening. I find it fascinating how many of these mistakes have remarkably simple solutions. Most require no special equipment or expertise, just awareness and minor adjustments to existing practices.
By making small changes to your containers, you’ll create a healthier environment where plant roots access the perfect balance of water and oxygen. Different plants have different drainage needs, which makes observation crucial. Succulents require extremely quick drainage. Tropical plants might tolerate slightly more moisture. Ferns often prefer consistent moisture but never waterlogged conditions.
Observe your plants closely throughout the seasons. Watch how quickly soil dries. Notice which plants seem perpetually thirsty despite regular watering (often a sign of poor drainage preventing proper root function). Adjust your drainage systems seasonally as rainfall patterns and temperatures shift.
Don’t be afraid to experiment with different drainage solutions until you find what works for your specific plants, containers, and climate. Your compost pile has opinions, and so do your container plants. Listen to what they’re telling you through their growth patterns, leaf color, and overall vigor. Healthy drainage shows up in strong root systems and thriving plants that grow steadily rather than struggling along.